bluename
 How to Trim succulents to Remove Diseased Stem Sections
You trim off the mushy, blackened stem parts immediately using a sterilized knife. I cut about an inch above the rot, let the wound callous for three days, then replant in dry soil. I learned this the hard way after losing my first Echeveria to stem rot. Over two weeks, I watched the healthy cutting push new roots and tiny leaves.
I am a plant lover who killed more succulents than I care to count. I now grow over 50 succulents indoors and on my balcony. Here is my real, step-by-step process for trimming diseased stems.
Let me start with the brutal truth. 90% of indoor plants die from overwatering. I have buried too many succulents in soggy soil. My worst mistake? I watered my collection every three days. That killed four plants in one month.
The Three Deadly Mistakes Newbies Make
Mistake 1: Overwatering Like Crazy
I used to think succulents needed water like regular houseplants. Big mistake. I drowned my first Lithops. It turned to mush overnight. The stem went soft, then black. I had no clue what to do. I just watched it rot.
Most beginners water on a schedule. They pour water every Tuesday. That is a death sentence. Succulents store water in their leaves and stems. They can go weeks without a drink. I water mine only when the soil feels bone dry. Even then, I wait another two days.
Mistake 2: Wrong Light Positioning
I put my succulents on a north-facing windowsill. Bad idea. They stretched out like pale, twisted aliens. The stems grew long and weak. They could not hold themselves up. I felt stupid when I finally saw the leggy mess.
Succulents crave bright, direct sunlight. I now keep mine on a south-facing ledge. If you do not have good natural light, use a grow light. I use a cheap LED one from Amazon. It works wonders.
Mistake 3: Using the Wrong Pots
I planted succulents in a cute glass jar. No drainage holes. No way for water to escape. The roots drowned in three weeks. The stem turned yellow, then brown. I had to throw the whole thing away.
Always use pots with drainage holes. Terra cotta pots are best. They let soil dry out faster. I learned this after killing my third Haworthia.
My Real Experience: How I Trim Diseased Stem Sections
Step 1: Spot the Problem Early
I check my succulents every morning. I look for soft spots, black patches, or mushy stems. The first sign is usually discoloration. A healthy stem is firm and green. A diseased one feels squishy when you squeeze gently.
Last month, I saw a dark spot on my Graptopetalum. It started small. Within two days, it spread up the stem. I knew I had to act fast.
Step 2: Get Your Tools Ready
I use a sharp, clean knife. I sterilize it with rubbing alcohol. Do not use scissors. They crush the stem tissue. That causes more damage. I also grab a small paper towel and some cinnamon powder.
Cinnamon is a natural fungicide. I dust it on the cut wound. It helps prevent infection. I swear by this trick.
Step 3: Make the Cut
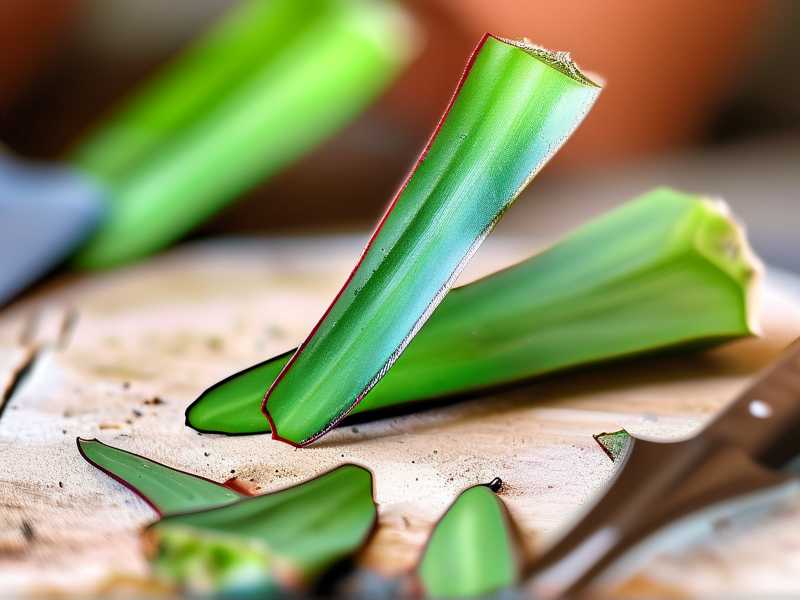
I cut above the diseased area. I aim for about one inch above the rot line. I cut straight across the stem. No jagged edges. I remove all the rotten bits. If I see any brown inside the stem, I cut higher up. The cut surface must be completely clean and green.
I once cut too close to the rot. The infection came back. I lost the whole plant. Now I always cut a generous margin.
Step 4: Let It Callous
I place the cutting on a dry paper towel. I put it in a bright spot, but out of direct sun. I wait for three to four days. The cut end will dry out and form a hard callus. This is critical. Do not skip this step.
I tried replanting a fresh cut once. The moist soil caused rot within a week. The stem turned black again. I threw it away.
Step 5: Repot in Dry Soil
After the callous forms, I plant the cutting in dry succulent soil. I use a mix of potting soil, perlite, and coarse sand. I do not water it for at least a week. The cutting needs time to push roots.
I use a small pot with drainage holes. I fill it with the dry mix. I make a small hole in the center. I insert the cutting and gently press the soil around it. No water yet.
Step 6: Wait and Watch
I place the new pot in bright, indirect light. I check it every few days. After about 10 days, I gently tug the cutting. If I feel resistance, roots are forming. Then I give a light watering.
I use a spray bottle to mist the soil. I do not soak it. I just give a few spritzes. After two weeks, I see tiny roots through the drainage holes. I also spot new leaf growth at the top.
Two-Week Observation Results
After exactly 14 days, here is what I saw:
- Day 0: I cut the diseased stem. The cutting looked sad and bare.
- Day 3: The cut end formed a hard, dry callus. No sign of rot.
- Day 7: I planted it in dry soil. Nothing visible yet.
- Day 10: I tugged the cutting gently. It felt firm. Roots were growing.
- Day 14: I saw tiny white roots poking out the bottom. The top leaves turned plump and green.
The plant was alive. The stem rot was gone. I had beaten the disease.
Common Pitfalls I Stepped In
Pitfall 1: Cutting Too Late
I once waited too long. The rot spread from the stem into the leaves. By the time I cut, there was no healthy tissue left. The plant died completely. Do not procrastinate. Act as soon as you see trouble.
Pitfall 2: Using Dirty Tools
I used a pair of garden scissors without cleaning them. The cut got infected. The rotting spread faster than before. I now always clean my knife with alcohol before and after cutting. I also wash my hands.
Pitfall 3: Watering Too Soon
I was impatient after repotting. I watered the cutting on day three. The soil stayed moist. Rot set in again within a week. I lost that plant. Now I wait a full seven to ten days before the first watering.
Pitfall 4: Not Providing Enough Light
The cutting I placed on a dark shelf did not root. It just sat there, limp and pale. It eventually dried up. Succulents need light to root. Even cuttings need brightness. I now keep all my rooting cuttings under a grow light.
Pitfall 5: Overlooking the Healthy Leaves
Sometimes only the stem is diseased. The leaves above might still be healthy. I pluck them off and propagate them separately. I lay them on dry soil. They will form new rosettes. This is a great backup plan.
Expert Opinions to Trust
The RHS advises that proper trimming prevents disease spread. They recommend using sterile tools and cutting above damaged tissue. The AHS also emphasizes this. They state that callousing the cut is essential before repotting.
I follow their advice religiously. It works.
Easy Annual Care Steps
Trimming is part of routine care. I inspect my succulents every month. I look for stretched stems, brown spots, or softness. If I find issues, I cut immediately. I also rotate my pots weekly for even light.
I repot my succulents every two years. This prevents soil compaction and root rot. I always use fresh, dry soil.
Product Recommendations
I use a simple, cheap knife from a dollar store. I clean it with rubbing alcohol. I also use a small spray bottle for light watering. My cinnamon comes from the grocery store. Nothing fancy.
For soil, I buy a premade succulent mix. I add extra perlite for drainage. You can find this at any garden center.
Troubleshooting Common Issues
Issue: Rot Returns After Cutting
I cut the stem, but the rot came back. I realized I did not cut high enough. The infected tissue was still there. I cut again, about half an inch higher. That stopped the spread.
Issue: Cutting Does Not Root
My cutting sat in the soil for three weeks. No roots. I panicked. I checked the cut end. It was still calloused. I moved it to a brighter spot. Roots appeared within a week. Light is key.
Issue: Leaves Fall Off After Cutting
This is normal. The plant is stressed. It sheds old leaves to save energy. I just leave them on the soil. They might propagate on their own.
Simple Distinction Between Healthy and Diseased
- Healthy stem: Firm, green, smooth, no soft spots.
- Diseased stem: Soft, mushy, black or brown, smells bad.
I also check the leaves. Healthy leaves are plump and firm. Diseased leaves are wrinkled, yellow, or translucent.
Frequently Asked Questions
Q: Can I save a succulent if the whole stem is rotten?
You can still try. Cut above the rot. If there is healthy tissue, it might survive. If the entire stem is black, sorry, it is gone.
Q: How do I know if the cut is high enough?
Cut until you see white or green inside. Any brown or black means more rot. Keep cutting up until the core is clean.
Q: Should I use rooting hormone?
Not for succulents. They root easily on their own. Rooting hormone can sometimes cause rot on succulent cuttings.
I hope this guide helps you save your succulents. I learned these lessons through many failures. You do not need to repeat them. Trim confidently, wait patiently, and your plants will reward you with new growth.