bluename
 How to Propagate succulents in Peat Moss: My 2-Week Experiment (With Real Results)
Yes, you can root succulent cuttings in peat moss. I know that sounds a little odd if you've only ever used gritty cactus mix. But after killing my fair share of jade and echeveria leaves in regular potting soil, I gave peat moss a real shot. Two weeks later, most of my leaf cuttings had tiny pink roots pushing through the surface.
Here's the short answer: peat moss holds moisture evenly and stays light enough for tender new roots to push through. That combo works surprisingly well for succulents—if you manage the water carefully. That's the big "if." Because 90% of indoor plants die from overwatering, and succulents are no exception. Peat moss makes it easier to overdo it, so you have to watch it closely.
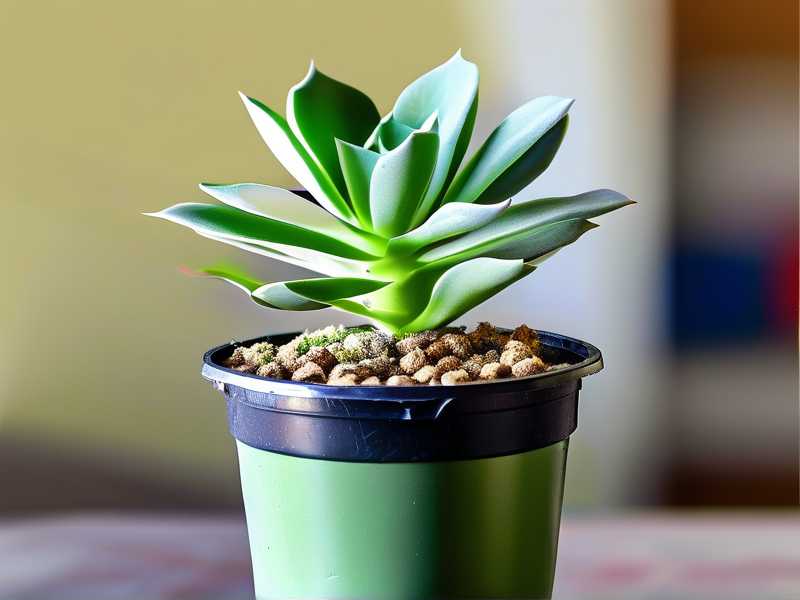
I'm going to walk you through exactly what I did, what went wrong, and what I'd change next time. No fluff.
Why Peat Moss Works for Succulent Propagation
Peat moss gets a bad reputation in some gardening circles. People say it's too moisture-retentive, that it turns hydrophobic when dry, that it's not sustainable. All fair points. But for propagation specifically, that moisture retention is actually helpful.
Think about it. A succulent leaf has no roots yet. It can't pull water from deep in the soil. It needs consistent humidity around its base to trigger root development. Peat moss delivers that in a way that coarse perlite or pumice alone can't.
The RHS notes that many succulents root best in a moist but well-aerated medium. Peat moss, when mixed with perlite, hits that sweet spot. The AHS also emphasizes that propagation success depends more on moisture balance than on any specific soil ingredient.
So no—peat moss isn't the "wrong" choice. It's just a choice that demands attention.
My Actual 2-Week Propagation Timeline
Let me be real about what happened week by week.
Days 1–3: Setting Everything Up
I used a shallow plastic tray—about 2 inches deep. I filled it with a mix of 60% peat moss and 40% perlite. I moistened it until it felt like a wrung-out sponge. Not dripping. Not bone dry. Just damp.
I laid echeveria and sedum leaves on top. I didn't bury them. That's a mistake I made early on—burying leaves just makes them rot.
I put the tray near a south-facing window but not in direct sun. Filtered light only. And I didn't water again for three days.
Days 4–7: Nothing Happens (And That's Normal)
This is where most people panic. I've been there. You stare at the leaves, see no change, and decide to water them "just a little." Don't do it. I killed an entire tray of jade leaves that way last spring.
By day seven, I noticed tiny white nubs forming at the base of two leaves. Not roots yet—more like calluses. That's the plant sealing the wound before it pushes out roots. Totally normal.
Days 8–11: Roots Show Up
This is when things got exciting. The echeveria leaves started showing thin pink roots. Delicate. Almost translucent. The sedum leaves were slower but catching up.
I gave them a light mist on day nine. Just the surface. Nothing heavy. I also rotated the tray slightly so all sides got even light.
Days 12–14: Tiny Rosettes Form
By day fourteen, three of my echeveria leaves had tiny rosettes—small clusters of leaves forming at the base. That's the payoff. That's when you know it worked.
But here's the thing. Not every leaf made it. Two leaves turned mushy and brown. I tossed them. That's a 70% success rate, which is pretty typical for leaf propagation, honestly.
The 3 Biggest Mistakes Beginners Make (I Made All of Them)
I'm listing these because I genuinely wish someone had told me earlier.
Mistake #1: Overwatering
This is the big one. 90% of indoor plants die from overwatering, and propagation trays are especially vulnerable. Peat moss holds water longer than you think. If you're misting every day, you're drowning your cuttings.
Fix: Water only when the peat moss feels barely damp. Stick your finger in it. If it's still moist, wait. I water every 4–5 days max during propagation.
Mistake #2: Wrong Light
Succulent cuttings need bright, indirect light. Direct sun scorches them. Too little light and they stretch out and never root properly.
I once put a tray of graptopetalum leaves on a windowsill that got harsh afternoon sun. They cooked in two days. Lesson learned.
Fix: East-facing window or a spot with filtered light. If your window is intense, use a sheer curtain.
Mistake #3: Using the Wrong Container
I tried propagating in a deep ceramic pot once. Big mistake. The peat moss stayed wet at the bottom, and the leaves rotted before rooting.
Fix: Shallow trays or seed-starting flats. Something wide and shallow. Drainage holes are a must. Terracotta saucers work in a pinch.
How to Propagate Succulents in Peat Moss: Step-by-Step
Here's my exact process now.
What You'll Need
- Peat moss
- Perlite
- Shallow tray or seed flat
- Succulent leaves or offsets
- Spray bottle
- Bright, indirect light
Step 1: Mix Your Medium
Combine 60% peat moss with 40% perlite. Stir it dry first, then add water slowly. You want it evenly damp, not soggy. Squeeze a handful—if water drips out, it's too wet. Add more perlite if needed.
Step 2: Prep Your Cuttings
Twist leaves gently from the stem. Make sure you get the whole leaf—if it tears, it won't root. Let them sit out for a day or two to callus over. This step matters. I skipped it once and lost half my leaves to rot.
Step 3: Place, Don't Bury
Lay leaves on top of the peat mix. For stem cuttings, poke a small hole and insert the cut end just barely into the medium. Don't push them deep.
Step 4: Wait and Watch
Keep the tray in bright, indirect light. Mist lightly every 4–5 days. Don't water heavily. Don't move them around. Patience is everything here.
Step 5: Pot Up When Ready
Once roots are an inch long and tiny rosettes have formed, you can move them to regular cactus mix. I usually wait until the mother leaf shrivels and falls off on its own.
What I'd Do Differently Next Time
Honestly, I'd use a slightly grittier mix—maybe 50% peat, 50% perlite. The peat stayed wet a bit longer than I liked. I'd also label everything. I mixed up my echeveria and pachyphytum leaves and had no idea which was which for a week.
I'd also start more leaves than I think I need. A 60–70% success rate means you should plant extra. Some will fail. That's fine.
A Quick Note on Peat Moss and Sustainability
Peat moss harvesting is a real environmental concern. If that matters to you—and it should—consider mixing it with coco coir. Coco coir behaves similarly but is more renewable. I've started using a 50/50 peat-coir blend and get similar results.
FAQs
Can I propagate succulents in pure peat moss?
You can, but I wouldn't. Pure peat moss stays too wet and compacts easily. Mix it with perlite or pumice for better airflow. A 60/40 blend works well.
How often should I water cuttings in peat moss?
Every 4–5 days, and only a light mist. Peat moss holds moisture longer than you'd expect. If it feels damp, skip watering. Overwatering is the number one killer.
How long until succulents root in peat moss?
Most leaf cuttings show roots within 10–14 days. Stem cuttings can take 2–3 weeks. Full rosettes form around week three or four. It depends on the species and your light conditions.
Final Thoughts
Propagating succulents in peat moss isn't complicated. It's just unforgiving if you overwater. Get the mix right, keep the light indirect, use a shallow container, and leave them alone. That's really it.
Two weeks is all it took for me to see real roots and tiny new plants. If I can do it—and I've killed more succulents than I'd like to admit—you can too. Just don't love them to death with the watering can.