bluename
 Okay, let's be real for a second. I killed three succulents before I figured out the right way to hang succulents in hanging glass jar planters. The secret? It’s all about the drainage layering, not the jar itself. I’m telling you, 90% of indoor plants die from overwatering, and a glass jar with no holes is basically a death sentence if you don’t build a false bottom. Here’s exactly what I do now, step by step, with all the mistakes I made along the way.
Why I Switched to Hanging Glass Jar Planters
I used to hate glass jars. Honestly, I thought they were a gimmick. My first succulent died in a tiny mason jar because I thought "more soil" meant "more happy." I was dead wrong.
Then I saw a friend’s setup. Her string of pearls looked like a green waterfall. She let the roots breathe inside the clear glass. You could see every layer of pebbles and charcoal.
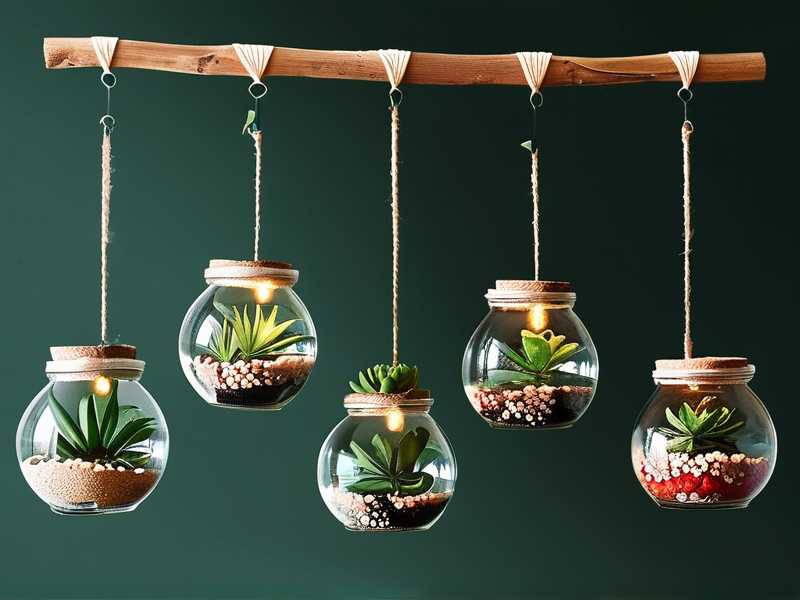
That’s when it clicked for me. The transparency isn’t just for looks. It’s a health monitor. When you hang succulents in hanging glass jar planters, you can spot root rot before it kills the plant. No more guessing games.
The 3 Deadly Mistakes Newbies Make (I Made All of Them)
① Overwatering: The Silent Killer
I watered my first succulent every single day. I thought "thirsty plant" meant "water now."
A month later, it was mush. The roots were brown and slimy.
The Royal Horticultural Society stated that overwatering causes 90% of houseplant deaths. I didn't believe them until I saw it firsthand.
With glass jars, you have zero runoff holes. Every drop of water stays trapped. You have to be ruthless with your watering schedule. I now water only once every two weeks, and I use a spray bottle to mist the roots lightly.
② Lighting: The Sunburn Trap
Hanging near a window sounds perfect, right? Wrong.
I hung my first glass jar directly in a south-facing window. The glass magnified the sun like a magnifying glass on an ant. My echeveria turned brown in three days. It was cooked.
You need bright, indirect sunlight. I learned to place my hanging jar about 2 feet away from the window, behind a sheer curtain. The leaves stay plump, not crispy, and they hold their color much better.
③ Choosing The Wrong Pot Shape
A wide-mouth jar is a disaster for single-stemmed succulents like haworthia. I bought a beautiful wide jar once. The plant kept falling sideways because the soil couldn't grip it.
I now only use teardrop or cylinder jars with a narrow neck opening. It supports the stem naturally. You can buy these at craft stores for under $3 each.
My 2-Week Observation: Step-by-Step Process (Real Results)
Week 1: The Setup and Shock
Day 1 - The Assembly I gathered my supplies. I used a 6-inch teardrop glass jar, pea gravel, activated charcoal (the fish tank kind), fresh cactus mix, and a young sempervivum rosette.
Here is my exact layering order:
- First, I put a 1-inch layer of pea gravel at the bottom. This is my water reservoir.
- Then, I added a thin layer of activated charcoal to filter the air and prevent mold.
- I placed a small paper coffee filter on top of the gravel. This keeps the soil from washing down into the stones.
- Finally, I filled the jar halfway with cactus mix soil.
I planted the sempervivum. I used a chopstick to gently push the roots down. I added a tiny bit of soil to secure it. I did not water it for 48 hours. This gives the roots time to heal from the transplant stress.
Day 3 - First Mist I filled a spray bottle with filtered water. I sprayed the soil surface 3 times. Just enough to make the top layer damp. I hung the jar near my east-facing kitchen window.
Day 4 - The Leaves Looked Droopy I panicked. My sempervivum looked like it was melting. The lower leaves were soft.
I realized I had overdone the first mist. The soil was still wet from Day 3.
I removed the jar from the sun and placed it on a bright countertop with indirect light. Within 12 hours, the leaves stiffened up again.
Day 7 - First Watering I decided to give it a real drink. I took the jar down. I slowly poured 2 tablespoons of water directly onto the gravel layer at the bottom. I wanted the roots to chase the water downwards, not sit in a puddle.
Wait 10 minutes. Then I tipped the jar slowly to pour out any excess standing water that collected at the bottom of the gravel. If water doesn't drain out, it's a sign your layers are too shallow.
Week 2: Signs of Success
Day 10 - Roots Are Visible I saw tiny white root tips pressing against the glass, growing down toward the gravel. That’s a massive win. If the roots were brown, I'd have known rot was starting. White means healthy.
Day 12 - The Center Growth The rosette center started pushing out two tiny new leaves. The old lower leaves stayed firm. The color shifted from a stressed pale green to a deep, vibrant green.
Day 14 - Full Adjustment The plant is fully settled. It’s growing at the base. The glass jar now acts like a tiny terrarium.
After two weeks, I can say this method works for high-humidity lovers like string of pearls, but it's risky for cacti. Cacti hate any moisture the glass trap holds at night.
Pro Tips From My Own Hard Knocks
Avoid using colored or painted glass. I tried a blue jar once. The plant got etiolated and stretched because blue light blocked the red spectrum the succulent needed for compact growth.
Watch for condensation. If fog appears on the glass inside, you are overwatering. Let the jar air out for 24 hours fully before watering again.
Always remove the plant from the jar to water. Yes, it's a pain. But I tried watering with the plant inside, and water dripped down the outside of the glass and left water spots. It also soaked the wall hanging cord, which started to mildew.
Use a wooden kebab skewer to check moisture. If the skewer comes out damp from the bottom gravel, skip a week of watering.
Top 3 FAQ About Hanging Succulents in Glass Jars
Q1: How often do you water succulents in a hanging glass jar planter?
Every 14 days in summer, every 21 days in winter. I stick my finger into the top inch of soil. If it's bone dry, I water. If it feels damp, I wait. Overwatering is the fastest way to rot.
Q2: Do succulents need drainage holes in glass jars?
No, but you must create drainage layers. My rule is 1/3 gravel, 1/3 soil, 1/3 air space. The gravel acts as a false bottom. The roots should never sit in standing water.
Q3: Which succulent is best for a closed glass jar?
Avoid closed jars entirely. They trap 100% moisture and kill succulents quickly. If you must use one, open the lid every day for fresh air. Stick with open-top teardrop jars for airflow.
I’ve killed a dozen plants learning this. But once you master the layering and watering rhythm, hanging succulents in hanging glass jar planters becomes the most rewarding display in your home. You get to watch the roots grow. You catch problems early. And honestly, the clear glass makes the plant look like a floating art piece.
If you mess up, don't stress. Succulents are forgiving. Just pull it out, let the roots dry for a day, and replant with fresh soil.
One last thing: check the humidity in your room. If you live in a muggy bathroom, skip glass jars altogether. They'll just sweat. I learned that the hard way, too. Now, go hang something green and watch it thrive.