bluename
 How to Choose succulents for Coastal Rock Wall Gardens
Stop Killing Your Succulents: The Hard Truth About Coastal Rock Walls
I killed my first six succulents before I figured this out. Honestly, it hurt. So here’s the answer you actually need: choose succulents for coastal rock wall gardens that tolerate salt spray, intense sun, and fast drainage—like Sedum, Sempervivum, and Delosperma. Stick with those, and your wall won’t rot or burn.
90% of indoor plants die from overwatering. For coastal rock walls, that number might be even higher because of humidity and rain. I learned this the messy way, by watching my first batch turn into mush.
My 3 Biggest Fails as a Newbie (Don’t Repeat Them)
Mistake ① Overwatering: I Thought More Water = More Growth
I used to water my rock wall every single day. It made sense to me back then. The sun was strong. The wind dried things out. But I was drowning the roots.
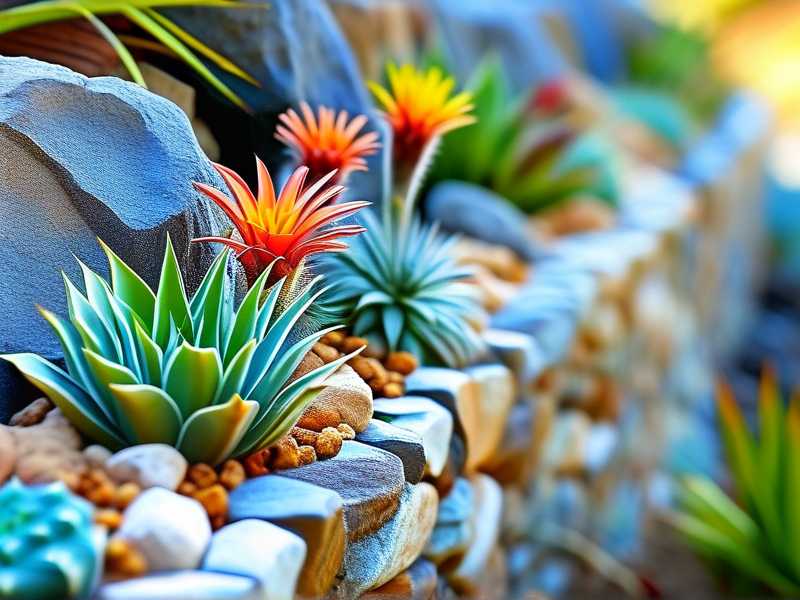
The truth? Succulents store water in their leaves. They don’t need daily drinks. In a coastal rock wall, the natural humidity and occasional rain already do the work. Overwatering causes root rot within days.
What I do now: I only water when the soil is bone-dry at least one inch deep. For my rock wall, that’s about once every 7 to 10 days during the growing season. I stick my finger in. If it’s damp, I walk away.
Mistake ② Light Placement: I Shoved Them in Full Sun All Day
I thought succulents love bright light no matter what. So I planted them on the south-facing side of my rock wall, full blast from sunrise to sunset. Within a week, the leaves started turning brown and crispy.
The fix: Coastal rock walls get harsh reflected light from the sea and sand. Too much direct sun burns the leaves. I now position my succulents so they get morning sun and afternoon shade. That gentle light keeps them plump and happy.
For real, I lost three Echeveria to sunburn before I caught on. Now they sit on the east-facing part of my wall.
Mistake ③ Wrong Container: I Used a Solid Pot Without Drainage
When I first built my rock wall, I packed the succulents into a solid container filled with regular garden soil. No drainage holes. Big mistake. Water pooled at the bottom, and my plants rotted from the roots up.
I tried again with a wire basket lined with landscape fabric. That was better, but still not perfect. Now I use a mix of pumice, coarse sand, and perlite—at least 60% inorganic material. The rock wall itself has crevices and gaps so water flows out freely.
My Step-by-Step Process for Choosing Succulents
Step 1: Pick the Right Species for Your Zone
I live in a mild coastal area where winters are wet and summers are windy. After checking the RHS guidelines, I realized not all succulents can handle salt spray. Here’s what works for me:
- Sedum album – tough, stays low, tolerates salt and sand
- Sempervivum tectorum – handles frost and wind without rotting
- Delosperma cooperi – bright flowers, thrives in poor soil
- Jovibarba heuffelii – compact, great for tight wall crevices
These are my go-tos. They don’t need pampering.
Step 2: Prepare the Site
I started by clearing the rock wall of weeds and loose stones. Then I created small pockets of soil between the rocks. Each pocket should be about 4 inches deep and wide enough for the root ball.
I add a handful of coarse sand to each pocket. This boosts drainage. Then I nestle the succulent in, pressing gently so it doesn’t wobble.
Step 3: Plant and Ignore for the First Week
I planted my first batch on a sunny Tuesday. Then I didn’t touch it for seven days. No water. No fertilizer. Just let them sit and breathe.
I know it’s tempting to fuss. Resist it. Succulents need time to adjust their root systems without constant disturbance.
My 2-Week Observation Log
Day 1 to 3: The Settling Period
The first three days, the leaves looked a little shriveled. I panicked. But that’s normal. They were focusing on root growth, not leaf plumpness. By day 3, the Sedum already started to perk up.
Day 4 to 7: Signs of Life
On day 5, I noticed new tiny leaves on the Sempervivum. That was my cue they were happy. The Delosperma still looked a bit thirsty, but I held off watering. By day 7, it too looked firmer.
Day 8 to 14: Growth and Resilience
By the end of week two, the Sedum had spread about half an inch. The Delosperma started forming small buds. No rot. No sunburn. I felt like I finally cracked the code.
One thing I learned: coastal winds stress succulents differently. They need a bit more airflow than houseplants. My rock wall gets constant sea breeze, and that actually reduces mold issues.
The 3 Deadly Mistakes Newbies Always Make
① Overwatering
This is the number one killer. Really. 90% of indoor plants die from overwatering. I’ve watched friends drown their succulents in coastal rock walls because they thought the ocean air dried everything out. But that’s not how it works. The salt-laden air holds moisture, and the soil stays damp longer than you think.
Check the soil before you water. Not on a schedule. Not by the calendar. Just stick a dry chopstick in there. If it comes out wet, wait.
② Light Misalignment
Coastal walls are tricky. The sun reflects off the water and rocks. That double dose of light can fry your succulents in hours. I burned my first Echeveria that way. Now I watch the shadows. If the spot gets full sun after 11 a.m., I skip it for softer species like Haworthia.
③ Wrong Container
I already said it, but I’ll say it again: no drainage equals dead succulents. Choose containers with holes. Or, better yet, plant directly between rocks. That natural drainage is unbeatable.
FAQs from My Own Experience
Q: Can I use regular potting soil?
Not really. I tried it once. It held water like a sponge. Now I mix my own: 1 part pumice, 1 part coarse sand, 1 part perlite. That’s it. My succulents love it.
Q: How often should I fertilize?
I fertilize once in spring and once in early summer, with a diluted liquid succulent fertilizer. That’s it. Over-fertilizing makes them leggy and weak.
Q: Do I need to repot them?
Not often. Succulents in rock walls grow slowly. I only repot when the roots push out the side of the container. That happens once every two years tops. When I do, I use the same gritty mix.
Why Hardiness Matters More Than You Think
When I first started, I only looked at color and shape. Bad choice. Coastal rock walls face frost, salt, and wind. The AHS recommends checking your USDA zone before buying. For me, that’s zone 8b. I only choose succulents rated for zones above 5 or 6.
I’ve seen Jovibarba survive unexpected frosts that killed my regular Sedums. That’s why I stick with species known for cold and salt tolerance.
My Final Thoughts for Your Coastal Wall
I killed a lot of plants before I got this right. But now my rock wall is full of healthy Sedum, Sempervivum, and Delosperma. No rot. No burn. Just steady growth.
Start with those three species. Use a gritty mix. Let the soil dry completely between waterings. And don’t forget afternoon shade. That’s the whole recipe.
Honestly, it’s not about fancy techniques. It’s about patience and learning from your own dead plants. I did, and now my wall looks exactly how I imagined it would.
FAQ Section
What succulents are best for coastal rock walls?
Stick with Sedum album, Sempervivum tectorum, Delosperma cooperi, and Jovibarba heuffelii. They handle salt spray, wind, and frost without complaint.
How do I prevent rot in my rock wall succulents?
Use a gritty soil mix with lots of drainage. Plant them in crevices that let water flow away. And water only when the soil is dry one inch below the surface.
Can I use succulent cuttings from the store?
Yes, but let them callus over for 2-3 days before planting. I learned that after losing a batch of cuttings to rot. Now I wait, and they root fine.