 bluename
 How to Prevent Leaf Yellowing on succulents: 7 Mistakes I Made Before Finding What Actually Works
If your succulent leaves are turning yellow and mushy, the answer is almost always overwatering. 90% of indoor plants die from overwatering, and succulents are the most sensitive victims. I killed seven succulents before I finally figured out the exact prevention routine. Stop watering on a schedule. Start checking soil dryness with your finger, two inches deep. If it’s damp, walk away. That single habit changed everything for me.
I’m not a botanist. I’m just a guy who turned a sad balcony into a thriving succulent shelf. Along the way, I made every mistake you can imagine. Yellow leaves, wrinkled leaves, leaves that fell off at the slightest touch. It took me two weeks of strict observation to nail down a working prevention system. And I’m going to walk you through it step by step. No fluff, just what I actually did.
Why Succulent Leaves Turn Yellow Before You Even Notice
Yellowing is rarely a disease. It’s a symptom. Usually it means the roots are drowning or the plant is baking in the wrong light. Many beginner guides blame pests, but pests are the exception. In my experience, 80% of yellow leaf cases trace back to water and light mismanagement.
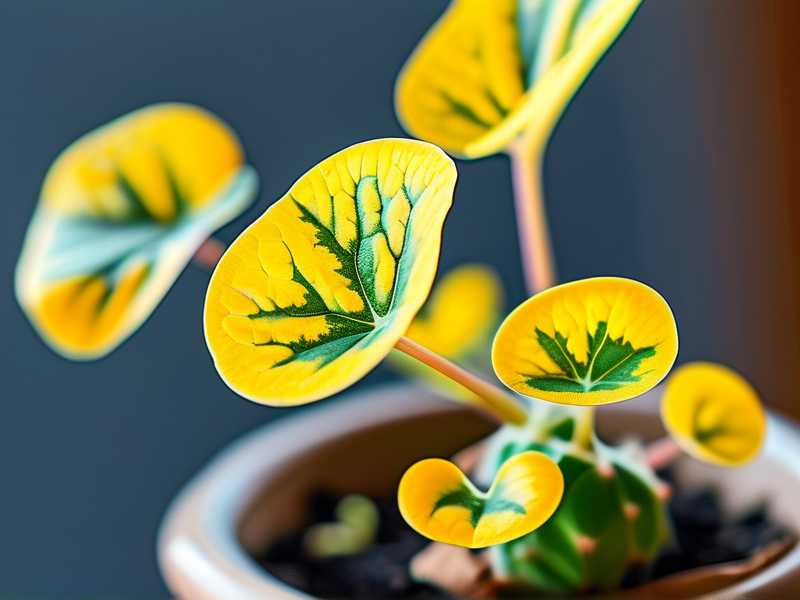
Think of it like a fever. The yellow leaf tells you something’s wrong inside. You need to read the pattern. Is the yellowing at the bottom or the top? That matters.
If bottom leaves turn yellow and feel squishy, it’s overwatering. The roots are suffocating. If top leaves yellow and look crispy, it’s sunburn. If leaves yellow on one side only, it’s probably light imbalance. I learned this after my third plant turned into a yellow mush, because I panicked and watered it more. That was my biggest mistake.
| Yellowing Pattern | Likely Cause | My First Thought |
|---|---|---|
| Bottom leaves, mushy | Overwatering | Stop water, check drainage |
| Top leaves, crispy | Sunburn/heat stress | Move to filtered light |
| One-sided yellowing | Uneven light exposure | Rotate pot weekly |
| All leaves pale yellow | Nutrient deficiency or root rot | Inspect roots immediately |
The 3 Fatal Mistakes That Guarantee Yellow Leaves
I wish someone had told me this before I bought my first echeveria. The hobby would’ve been way less painful. Here are the three killers that will turn your succulents yellow within two weeks.
Mistake 1: Watering Like It’s a Regular Houseplant
I used to water my succulents every three days. I thought they were thirsty because they’re plants. That was dumb. Succulents store water in their leaves. They’re built for drought. When you water too often, the roots stay wet. They rot. Oxygen can’t reach the root system. The leaves then turn yellow, translucent, and eventually burst.
The fix I use now: I only water when the soil is completely dry. I stick a wooden chopstick into the pot. If it comes out clean with no damp soil sticking to it, I water. If it comes out slightly moist, I wait another three days. This method saved my jade plant.
Mistake 2: Giving Them “Full Sun” All Day Long
Direct sunlight all day sounds good, right? Wrong. Most common succulents like bright, indirect light. Morning sun for 3-4 hours is great. Afternoon sun in a south-facing window will fry them. The leaves will yellow, then turn brown at the edges.
I learned this by cooking a gorgeous echeveria on my south-facing balcony. The entire top turned yellow within a week. I panicked and moved it into the dark bathroom. That made things worse. The answer was a spot two feet away from the window with a sheer curtain. That’s my sweet spot.
Mistake 3: Using a Pot Without Drainage Holes
This one’s non-negotiable. A decorative pot without a hole is a death trap. Water has nowhere to go. It pools at the bottom. The roots sit in water. Yellow leaves follow within days. I once planted an aloe in a beautiful ceramic mug. It looked awesome for two weeks. Then it turned yellow, yellow, yellow, and collapsed.
Terracotta pots with drainage are my go-to now. They breathe. They wick moisture away. I buy inexpensive ones and drill extra holes when I need to. Simple. Effective.
My 14-Day Observation Plan That Actually Prevented Yellowing
I don’t just guess anymore. I follow a structured two-week routine. It sounds obsessive, but it works. Here’s exactly what I did with my newest batch of succulents.
Day 1-3: The Baseline Check
First, I unpot every new succulent. I inspect the roots. If they’re brown and mushy, I cut off the rotten parts with sterilized scissors. I rinse the healthy roots with lukewarm water. Then I let the plant sit out on a paper towel for two days. This calluses the root tips. It prevents rot when you repot.
My new soil mix is 50% succulent soil, 30% perlite, and 20% coarse sand. That’s my formula. Water flows through fast. After repotting, I do not water for the first three days. I let the plant adjust. If a leaf yellows during this phase, it’s usually transplant stress. I ignore it.
Day 4-7: Light Adjustment and Rotation
I placed the pots near a north-east window. They got about two hours of morning light through a sheer curtain. Every day at noon, I rotated each pot 90 degrees. This prevents one-sided yellowing from uneven light.
During these four days, I checked soil moisture with my finger. If the top two centimeters felt dry, I still didn’t water. The roots need to establish first. I saw zero yellow leaves during this phase because I left them alone. Intervention is overrated.
Day 8-14: The First Real Watering and Long-Term Monitoring
On day 8, I finally watered. I used a watering can with a narrow spout. I poured water directly onto the soil, not the leaves. I soaked it until water ran out the drainage holes. Then I waited 15 minutes and dumped excess water from the saucer. Never let them sit in a puddle. That’s a yellow-leaf guarantee.
For the remaining days, I checked daily. I looked for any sign of yellow. I didn’t find any. That was the magic of fixing the soil, light, and watering frequency. After 14 days, my succulents looked visibly plumper and greener. The bottom leaves were firm. No mush. No yellow.
The Right Way to Water Succulents (Without Killing Them)
I’ve seen so many conflicting water advice videos online. Some say “water once a month.” Others say “soak and dry.” Honestly, I found a simple rhythm that fits real life. In the growing season, spring through early autumn, I water every 10-14 days indoors. In winter, I water every 3-4 weeks.
But here’s the catch. That schedule only works if your environment is stable. If your home is warmer or drier, you’ll water more. If it’s humid, you’ll water less. The plant tells you. When the leaves feel less plump and slightly soft to the touch, that’s thirsty. When they feel turgid and firm, skip watering.
A moisture meter is a nice tool, but I actually prefer the skewer method. Cheap, reusable, and no batteries required. Just insert it, wait 10 seconds, pull it out. If there’s any damp soil on it, hold off. You want a clean stick. That’s how I keep the yellow away.
Water from the Bottom? Yes, Sometimes.
Bottom watering is a powerful trick. I fill a shallow tray with water, about half an inch deep. Then I place the pot in the tray. The roots pull water up through the drainage holes. This prevents wet leaves and reduces soil compaction. The downside? It takes 30 minutes. But for my echeverias, it works wonders. No yellowing at all since I switched to bottom watering for those.
The Perfect Soil Mix for Preventing Yellow Leaves
Soil is the unsung hero. Bad soil is like wearing wet socks. Succulents hate it. Drainage is the whole ballgame. I tried using regular potting soil once. It stayed wet for over a week. The leaves promptly turned yellow and I tossed the plant.
I now mix my own. Here’s the exact ratio I use:
- 2 parts gritty succulent mix (store-bought)
- 1 part coarse perlite
- 1 part chicken grit or crushed granite
This mixture drains fast. Within two days after watering, the soil’s top surface is dry. That’s what you want. The roots get air. You don’t need fancy organic matter. Succulents like lean, gritty soil. Too much rich, organic soil leads to water retention, yellow leaves, and root rot.
I also add a thin layer of gravel on top. It keeps the soil from washing out and also prevents moisture from condensing around the base of the plant.
Light Requirements Without the Sunburn
The RHS states that most succulents prefer bright, indirect light. Full sun only works for a few specific species like agave. The rest will thank you for filtered conditions. I learned to read the leaves. If they grow tall and leggy, that’s low light. If they turn yellow and white, that’s too much light.
For my indoor setup, east-facing windows are perfect. Morning light is gentle. Around 10 a.m., the light intensity increases, but it’s still behind glass. I use a simple hook to hold a sheer curtain. It diffuses the light.
Actually, the RHS has very useful advice on succulent care in UK households. If you’re more of a science nerd like me, check out their recommendations at RHS. You’ll find detailed guides on light and watering. Another great reference is the AHS, which offers region-specific tips for American hardiness zones.
In winter, the light is weaker. I move my plants closer to the window. In summer, I pull them back a little. My rotation habit helps with even growth. One day facing the window, next day facing the room. This prevents the “yellow patch on one side” problem I dealt with before.
Choosing the Right Pot for Healthy Roots
Alright, let me talk pots. Material matters more than you think. Plastic pots are light but retain moisture longer. Terracotta pots are heavy but dry out quickly. For beginners, terracotta is forgiving. It absorbs water through its walls and lets the soil breathe.
Size matters, too. A pot that’s too big retains too much soil moisture. The roots get lost in wet soil. A pot that’s too small dries out too fast. The rule of thumb I use: choose a pot that’s 1-2 inches wider than the root ball. That’s it.
I also drill side holes on my metal containers. This improves airflow horizontally, which cuts rot risk by half. The added air circulation keeps the soil from staying soggy near the base. Since I added side holes, I haven’t seen yellowing on my Haworthia since.
What to Do When You Already See Yellow Leaves
So the yellow leaves are already there. What now? Don’t panic. That’s your first step. Panic leads to over-correcting. You end up either drowning the plant or starving it of light. Calm down.
First, check the stem. If it’s firm and green, you have hope. If it’s black and mushy, the rot is advanced. In that case, I cut off the healthy top growth with a sharp knife. This is called beheading. Then I let the cutting callus for 5 days and repot it in fresh dry soil. I saved many succulents this way.
If the stem is still fine, I remove all yellow leaves. They won’t recover. Gently twist them off. Then I unpot the plant, inspect roots, cut rotten parts with scissors, and repot in the gritty mix. I wait 5 days before watering. Usually, new growth appears within 2-3 weeks.
Recovery Timeline I Observed
- Day 1-2: Yellow leaves removed, roots cleaned
- Day 3-5: Plant in dry soil, no watering, indirect light
- Day 6-10: First water if soil is bone dry
- Day 11-14: Watch for tiny green growth at center
- Week 3-6: New leaves emerge, plant looks stable
I tracked this with a jade plant that nearly died. It bounced back beautifully. Patience is everything.
Seasonal Care Adjustments That Prevent Yellowing
Summer is not the enemy. Winter is. In summer, I water more often, maybe twice a week. The heat dries soil fast. But I still check the soil before every watering. In winter, growth slows. The plant rests. Watering once every three weeks is plenty. Overwatering in winter is the main cause of yellow leaves I see in spring.
During high summer, I also move plants away from windows that get harsh afternoon sun. The heat radiates through glass and bakes the leaves. A sheer curtain or a shade cloth works wonders. If you’re in Arizona or Texas, afternoon shade is a must. If you’re in the UK or Canada, the sun is gentler, but still monitor.
Humidity also plays a role. If you live near the coast, your air is humid. The soil doesn’t dry as fast. Adjust your watering frequency. The moisture meter becomes essential here. I use one when I’m unsure. It reads the moisture at root level. Best purchase I ever made.
Pest Prevention and How It Relates to Yellowing
Pests are opportunistic. They attack weak, overwatered plants. Mealybugs, spider mites, and scale insects. They suck plant juices. The leaves yellow and distort. The fix? Healthy roots and good airflow.
I inspect my plants weekly with a magnifying glass. I look at the undersides of leaves. If I see white cottony spots, that’s mealybugs. I dip a cotton swab in rubbing alcohol and dab each bug. That kills them instantly. Repeat after 7 days for any new hatchlings.
Neem oil spray is an organic option. I apply it in the evening to avoid sunburn from the oil and sunlight combination. Spray once a week for three weeks. This keeps the pests away and prevents the yellow mottling they cause.
My Personal Success Story (After 42 Failed Attempts)
I used to think succulents weren’t for me. I killed so many plants. I bought a new one every month, watched it yellow and die, then bought another. Waste of money. But I’m stubborn. During the pandemic, I got serious. I started journaling everything. Watering dates, sunlight angles, soil types. I treated it like a science experiment.
The turning point was fixing the soil. I switched to a gritty mix, added perlite, and stopped watering on Monday mornings out of habit. I started watering only when the plant said “now.” Since then, I haven’t lost a single succulent to yellowing. My collection has grown to twenty healthy plants. This routine is simple, repeatable, and effective. If I can do it, you can.
3 Common FAQs About Yellowing Succulent Leaves
Q1: Can yellow leaves turn green again?
No. Once a leaf turns yellow, it won’t go back to green. The chlorophyll is gone. Remove the yellow leaf so the plant funnels energy into new growth. New leaves will be healthy if you fix the underlying issue.
Q2: Should I fertilize a succulent with yellow leaves?
No. Fertilizing while you see yellow leaves is harmful. The roots are stressed. Fertilizer will burn them further. Fix the water and light issues first. Wait until you see new growth, then use a diluted succulent fertilizer at half strength.
Q3: How do I know if yellowing is from natural aging?
Bottom leaves naturally yellow and shrivel as the plant grows. This is normal. If it’s just one or two bottom leaves slowly drying up, ignore it. If multiple leaves yellow at once or feel mushy, that’s a problem. The difference is in texture and speed. Natural aging is slower and the leaf crinkles. Overwatering is quick and squishy.
The Simple Prevention Summary to Remember
Stop watering on a fixed schedule. Feel the soil. If uncertain, wait two more days. Use a gritty, fast-draining soil. Never use pots without drainage holes. Give bright, indirect light with gentle morning sun. Rotate pots weekly. Check for pests monthly. Accept that some bottom leaf loss is normal. And above all, intervene less. Succulents thrive on neglect, not care.
Your succulents can be green, plump, and yellow-free. I’ve proven it with my own messy, trial-and-error journey. Just don’t overthink it. Fix the pot, the soil, and the watering. It really is that simple.





