bluename
 How to Plant succulents in Granite Planters: A 2-Week Real-Life Guide
Succulents and granite planters are a match made in heaven, but only if you do it right. Here's the short answer: plant your succulents in a granite planter with a drainage hole, use a gritty, fast-draining soil mix, water deeply but rarely, and give them at least 6 hours of bright, indirect light. I learned this the hard way after killing four beautiful Echeverias in a single summer. That was before I figured out the real science behind stone containers, and honestly, it changed everything for me.
I've been growing succulents for nearly a decade now. Over those years, I've experimented with terracotta, ceramic, plastic, and yes, granite planters. The granite ones are stunning. They add a rustic, natural weight to any space, indoors or out. But they come with their own quirks. In this post, I'll walk you through my exact process, step by step, along with the mistakes I made so you don't have to repeat them.
Why Granite Planters Are Tricky (And Worth It)
Granite is a dense, natural stone. It looks incredible and lasts basically forever. But it holds heat differently than other materials. It also doesn't breathe the way unglazed terracotta does. This means water evaporates slower from the soil inside a granite planter. If you're heavy-handed with watering, you'll drown your plants fast.
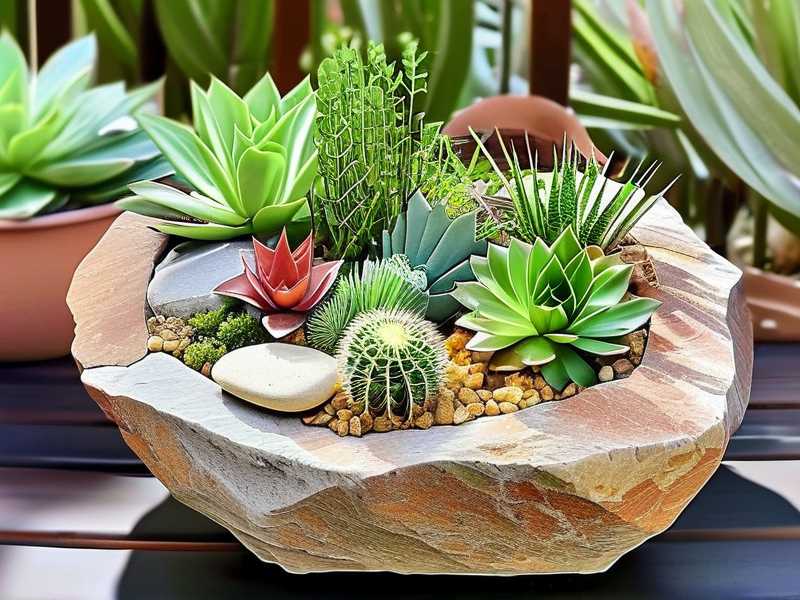
I remember my third year gardening, I bought a gorgeous grey granite bowl from a local stone yard. No drainage hole. I thought, "I'll just add a layer of gravel at the bottom." Big mistake. That's a myth, by the way. Gravel at the bottom doesn't improve drainage; it actually creates a perched water table that keeps the roots sitting in moisture. My succulents rotted within ten days.
The 3 Fatal Mistakes Every Beginner Makes
Before I get into the planting process, let me cover the big three. I've made every single one of these. Honestly, I'm a bit embarrassed about how long it took me to figure out some of them.
1. Overwatering: The #1 Killer
Let me be blunt. 90% of indoor plants die from overwatering. And succulents are the most sensitive of them all. A succulent's roots are designed to survive drought. They are not designed to sit in wet soil.
I used to water my succulents on a strict schedule. Every Sunday, I'd give them a little drink. It felt responsible. In reality, I was slowly drowning them. The leaves turned soft, translucent, and mushy at the base. That's a classic sign of root rot.
What I learned: don't water on a schedule. Water only when the soil is completely dry, all the way through. I check by sticking my finger an inch into the soil. If it feels even slightly cool or damp, I wait. Sometimes that means watering twice in one week. Sometimes it means watering once every two weeks. There's no set rule.
2. Light Placement: Wrong Spot, Wrong Light
Succulents love light, but not the harsh afternoon sun hitting them through a glass window. I learned this the hard way.
I had a beautiful Haworthia on my south-facing windowsill. I figured more sun = happier plant. Within a few weeks, the leaves turned pale brown and crispy on the edges. That's sunburn. The intensity of sunlight through glass actually amplifies the heat.
The solution? Bright, indirect light. A spot near an east-facing window works wonders. If you're using a south or west window, pull the planter back a few feet from the glass. Or use a sheer curtain to filter the light.
3. The Wrong Pot: No Drainage Equals Death
This is the most common thing I see. People fall in love with a beautiful granite planter at a garden center, and it has no drainage hole. They buy it anyway.
I've done this. I told myself "I'll be careful with water." You know what? I wasn't careful enough. Without a drainage hole, excess water has nowhere to go. It pools at the bottom. The roots sit in it. Within two weeks, the rot sets in.
Granite planters are often sold as decorative cachepots. That means they're meant to hold a plastic nursery pot inside. That's actually a genius hack. I'll explain this more below. But if you absolutely must plant directly into a granite planter, drill a hole first. Use a diamond-tipped drill bit and keep the stone wet while drilling. It takes a few minutes but it's worth it.
What You Need Before You Start
Let me list out exactly what I use. These are not fancy, expensive items. They're just the right ones.
- Granite planter with at least one drainage hole
- Good quality succulent soil mix
- Perlite or pumice (for extra drainage)
- Small gravel or coarse sand
- A cloth or mesh to cover the drainage hole
- Your succulents (fresh, healthy ones)
- A small brush for cleaning soil off leaves
I mix my soil myself. It's cheaper and I can control the texture. I use two parts regular potting soil, one part coarse sand, and one part perlite. That mixture drains fast and doesn't hold onto water.
Step-by-Step: How I Plant Succulents in a Granite Planter
Alright, let's get into the actual process. I'll share exactly what I do, the way I do it. I'll also tell you what I observed over a full two weeks, so you know what to expect.
Step 1: Prep the Planter
First, I clean the granite planter thoroughly. Even new ones can have dust or stone residue inside. I rinse it with water and let it dry completely.
Then, I place a piece of mesh or a small piece of broken pottery over the drainage hole. This keeps the soil from washing out while still letting water escape. Granite planters usually have one large central hole. I use a piece of fiberglass window screen for this. It's porous and won't clog.
Step 2: Fill with a Chunky Soil Mix
I fill the planter about three-quarters full with my soil mix. I don't pack it down. I leave it loose and fluffy. Succulent roots need air just as much as they need water. Packed soil suffocates them.
The chunky texture also helps the water move through quickly. You want water to drain out the bottom within a few seconds of pouring. If it puddles on the surface, your soil is too dense.
Step 3: Position Your Succulents
Now for the fun part. I arrange my succulents while they're still in their nursery pots. I place them in the granite planter to see how they look. I move them around until I'm happy with the composition.
I usually put the tallest one in the back or center, depending on the view. Then I fill in around it with smaller ones. Trailing varieties like String of Pearls work great near the edges so they can hang over the rim.
Step 4: Plant and Backfill
Once I'm happy with the layout, I take them out of their plastic pots. I gently tease the roots apart. If the roots are circled tightly, I massage them lightly to loosen them up.
I place each plant into the granite planter and backfill with more soil. I tap the planter gently to settle the soil around the roots. I don't press hard. I leave the soil surface slightly below the rim of the planter.
I leave about half an inch of space at the top. This is my watering well. It helps keep water from spilling over the edges, and I can add a top layer of gravel there.
Step 5: Top Dressing (Yes, It Matters)
Here's something a lot of people skip: top dressing. I add a thin layer of small gravel or coarse sand on the soil surface. This isn't just for looks. It prevents moisture from sitting directly against the lower leaves of the succulent. Wet leaves are an invitation for rot.
It also keeps the soil from splashing up when you water. And honestly, it looks a lot better.
Step 6: Don't Water Immediately
This is a big one. I know you're tempted to give your new plants a drink. Don't. Wait at least 3 to 5 days before the first watering.
Why? Because the roots are fragile during transplant. They need time to heal any small tears. If you water right away, the moisture enters those wounds and causes rot.
I learned this after transplanting a bunch of cuttings once. I watered them immediately. Within a week, half of them had mushy stems and I had to toss them. Now, I always wait.
What Happens Over the Next 14 Days
Let me tell you exactly what I observed in my own recent planting project. It was a black granite rectangular planter, about 12 inches long, with two drainage holes. I planted a mix of Echeveria, Sempervivum, and a small sedum.
Day 1 to 3: The Settling Period
For the first few days, the plants looked fine. A little dusty from the soil, but standing upright. The soil was slightly moist from storage, but not wet. I kept the planter in a bright spot but out of direct sunlight.
I checked the soil every day with my finger. It stayed dry-ish. I did not water.
A small leaf at the base of the Echeveria turned yellow. That's normal. The plant is adjusting. I pulled it off gently and left the area to dry.
Day 4: First Watering
On the fourth day, I watered thoroughly. I poured water slowly until it ran out of the drainage holes. This is called the "soak and dry" method. It ensures the entire root ball gets hydrated.
I made sure no water sat in the saucer under the planter. Stagnant water left in a saucer is another killer. I always empty the saucer after watering.
Day 5 to 8: Leaves Plump Up
By day five, I noticed a difference. The leaves looked firmer. The colors were getting more vibrant. The Echeveria leaves perked up noticeably.
The Sempervivum did something interesting. The rosettes closed up a bit. That's their way of conserving water. It's a sign of healthy growth.
I checked for drainage after each watering. The water moved through the granite planter well. That told me the soil texture was right.
Day 9 to 12: Root Establishment
Around day nine, I gently tugged on the leaves of one plant. It had a little resistance. That told me the roots were beginning to anchor into the new soil. That's a good sign.
I noticed a new tiny leaf sprouting from the center of the rosette on the Echeveria. That's the most exciting part. New growth means the plant is happy.
Here's a tip I use: I rotate the planter a quarter turn every few days. This helps each side get even light. Succulents tend to lean toward the light source. Rotating keeps them symmetrical.
Day 13 to 14: Set It and Forget It
By the end of two weeks, the plants looked established. The roots were gripping the soil. The colors were stable. The shape was good.
I watered once more on day twelve, because the soil was fully dry. The leaves looked slightly less plump, which is my signal. That's when I know it's time.
After the second watering, I left the planter alone. I didn't fuss over it. That's the whole point of succulents. They thrive on neglect.
What About Granite Planters Without Drainage Holes?
Let me address this properly, because it's such a common problem. I love the look of a seamless granite bowl. I actually bought one from a craft fair years ago. It has absolutely no holes.
Here's my solution, and it works perfectly. I use the granite bowl as a decorative outer pot. I plant my succulents in a plastic nursery pot with drainage holes. The plastic pot fits snugly inside the granite bowl.
When I need to water, I take the plastic pot out, water it in the sink, let it drain completely, and then place it back inside the granite bowl. It's an extra step, but it's foolproof.
This method is actually recommended by the RHS{:target="_blank"} for plants in decorative containers. They emphasize that drainage is the single most critical factor for keeping houseplants alive.
Another option is the "charcoal layer" method. I've seen people put a layer of activated charcoal at the bottom of the granite planter, then soil on top. Charcoal absorbs excess moisture and odors. I tried this once. It worked, but I still felt uneasy. I prefer the nursery pot method. It gives me total control.
The Best Soil Mix for Granite Planters
I want to emphasize soil again because it is everything. I've tried several commercial succulent mixes. Some are great. Some are too dense.
I now make my own. Here's my exact recipe:
- 2 parts normal potting soil
- 1 part coarse sand (I use aquarium sand)
- 1 part perlite or pumice
You can also add a small amount of crushed granite or chicken grit for extra drainage. That's what I do when I'm planting into large stone containers. It keeps the water moving fast through the planter.
Light and Placement: What I've Learned Over Time
I used to keep my succulents in my living room, which has west-facing windows. The afternoon light was intense. I learned that most of my plants preferred a spot slightly away from the window, maybe two feet back.
Outdoors, it's a different story. In the UK or Pacific Northwest, full sun is often fine. In hotter climates like Texas or Australia, morning sun with afternoon shade is safer.
My friend in Perth, Australia, grows succulents in granite containers on her balcony. She said the stone gets so hot in the afternoon that you can't touch it. Her plants still thrived because she placed them where they only got morning sun.
If you're in a very hot climate, I recommend protecting granite planters from the harsh midday sun. The stone absorbs heat, and that heat radiates into the soil. This can cook the roots over time. I know this sounds odd for a desert plant, but roots are more sensitive than the leaves.
Watering Schedule That Actually Works
I'm going to give you a simple framework. Remember, no strict schedule.
- Check the soil with your finger, one inch deep.
- If it's dry, water thoroughly until water runs out the drainage hole.
- If it's damp, wait another day or two.
- Empty the saucer after 15 minutes.
For indoor succulents that get bright, indirect light, I usually water every 10 to 14 days in summer and every 3 to 4 weeks in winter. For outdoor succulents, it depends on rain and heat.
The AHS{:target="_blank"} recommends adjusting your watering based on the season, not the calendar. That's good advice. In winter, succulents go dormant. They barely need water. I've gone six weeks without watering some of my winter succulents.
Common Beginner Questions (FAQ)
Let me answer a few more questions I get all the time from readers.
Should I mist my succulents?
I get this one a lot. Honestly, no. Misting does almost nothing for succulents. The tiny water droplets on the leaves increase humidity around the leaf base. That can cause rot. Succulents need water at the roots, not on the foliage.
Can I use regular potting soil?
You can, but you'll likely regret it. Regular potting soil holds too much moisture. It stays wet too long. Your succulent roots will rot. Mix it with at least 50% perlite or coarse sand if you must use it. But I suggest buying a proper succulent mix.
How do I know if my succulent has root rot?
The first signs are soft, translucent leaves that fall off with a light touch. The stem might look dark or mushy near the soil line. If you remove the plant from the pot and the roots are black and slimy, that's root rot. You can try to cut off the rotted roots with a sterile knife, let the plant callus over for a few days, and then repot in fresh, dry soil. It doesn't always work, but it's worth a try.
Do granite planters need special care in winter?
Yes. If you leave them outdoors in freezing temperatures, the soil can freeze and crack the roots. Move them indoors or into a garage before the first hard frost. Once inside, reduce watering drastically. I only water my indoor winter succulents once every three or four weeks.
Final Thoughts
Planting succulents in granite planters doesn't have to be hard. The key is understanding that stone containers change the rules a bit. They don't drain as fast as you'd hope, and they hold heat.
Follow my steps: use a pot with drainage, use a gritty soil mix, water only when dry, and give your plants some breathing room with light. You'll be amazed at how quickly they settle in and start growing.
I've been where you are. I remember staring at a wilting Echeveria and feeling hopeless. But once I stopped overthinking and started following these basic rules, everything changed. My plants got healthier. My confidence grew. And now, my granite planters are some of my favorite pieces in my collection.
Take your time. Pay attention to your plants. They'll tell you what they need. You just have to listen. Try this method for two weeks and see the difference for yourself.