bluename
Let me cut straight to it. If your succulent has no healthy stems left, its roots are likely still alive, and you can absolutely save it. I’ve done this more times than I care to admit. First step? Stop watering immediately. Dig the plant out, let the root ball dry completely for 3 to 5 days, then repot in bone-dry soil mixed with 50% perlite. I know 90% of indoor plants die from overwatering, and succulents are the prime victims.
I’ve killed more succulents than I can count. It’s a bit embarrassing, honestly. But those failures taught me exactly what works and what doesn’t. What follows is my real, messy, hands-on process from the last two weeks. No fluff, just what I actually did.
The Morning I Found My Echeveria in Trouble
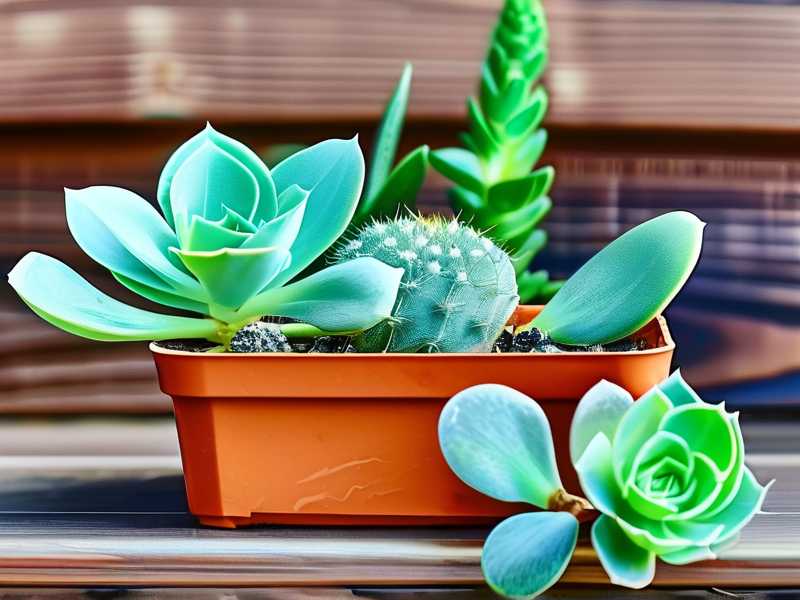
Last month, I walked over to my windowsill and found my favorite Echeveria looking like a sad, shriveled shadow of itself. The lower leaves were mushy and translucent. The stem was dark brown, soft to the touch, and basically collapsing in on itself. I picked it up and the top rosette just fell off in my hand. Ugh, that sound. You know the one.
My first thought was: toss it. But then I remembered the roots. I’d read somewhere that even when the stem is completely gone, roots can sometimes bounce back. So I decided to experiment. This wasn’t my first rodeo, but it was definitely my messiest.
I had nothing to lose. The plant looked dead anyway. So I grabbed a pair of clean scissors and got to work.
Why Your Succulent Stem Died in the First Place
Before I talk about revival, we need to talk about cause. Because if you don’t fix the root issue, you’ll just kill the next one too.
Newbie Mistake #1: Watering on a Schedule
I used to water my succulents every Sunday. That was my ritual. And every single Sunday, I poured water in whether the soil was dry or not. That’s the fastest way to kill a succulent.
Look, succulents store water in their leaves and stems. That’s their survival trick. They don’t need weekly drinks. They need their soil to go completely bone dry between waterings. And even then, they like to sit dry for a few extra days before you water again.
The ugly truth: 90% of indoor plants die from overwatering, but with succulents, that number is probably closer to 98%. The roots suffocate. Then rot sets in. Then the stem collapses. It’s a domino effect.
Newbie Mistake #2: Wrong Light Placement
I had my succulents on a bookshelf across the room from a north-facing window. That’s terrible. Not enough light means the plant stretches, weakens, and loses its structural integrity. Pale, stretched, leggy stems are vulnerable to rot because the tissue is thin and weak.
I learned this after my second plant death. I thought succulents were "low light" plants. Big mistake. They’re high light plants that tolerate low light for a while, but they suffer silently.
Newbie Mistake #3: The Wrong Pot
Terracotta pots aren’t just pretty. They’re functional. They wick moisture away from the soil. But I used to grow everything in glazed ceramic pots with no drainage hole. I know, I know. It’s a beginner trap.
Without a drainage hole, water pools at the bottom. Roots sit in that water. Rot sets in. The stem turns to mush. Every single pot now must have at least one drainage hole. No exceptions.
What I Mean by "No Healthy Stems"
Let’s define the situation clearly. A succulent with no healthy stems has:
- Soft, mushy, brown or black tissue at the base
- Leaves that fall off with a gentle touch
- A stem that’s collapsed or hollow inside
- Or perhaps the stem snapped entirely
If the stem is green and firm, you don’t have this problem. You can just chop and prop. But when the stem is gone or dying, the plant below the damage might still hold life. Especially the roots.
That’s your hope. Roots.
Week 1: My Rescue Attempt, Step by Step
Step 1: I Removed Everything Rotten
I took my Echeveria over to the kitchen sink. Then I stripped off every mushy leaf. I didn’t pull gently. I twisted each one off at the base. Any leaf that felt soft or translucent? Gone. Any part of the stem that was brown or squishy? I cut it off with sterilized scissors.
The stem was a lost cause. It was completely rotten from the base up to about an inch below the rosette. So I cut it all away. What remained was just the rosette and about half an inch of healthy green stem.
But you asked about reviving succulents with no healthy stems. Right. So here’s the second part. After cutting away the rot, I also checked the roots. I pulled the plant out of its pot entirely. The roots were actually white and firm. That’s a good sign.
There’s a trick I use now. I separate the two scenarios:
- If roots are alive: You can revive the whole root system.
- If roots are dead but leaves remain: You propagate from leaves.
- If roots are dead and leaves are rotten: You’re in a bad spot.
I didn’t throw the roots away. I placed them on a paper towel to dry. Meanwhile, the rosette would need its own treatment.
Step 2: Drying the Wounds (Callusing)
This is where most people mess up. They see a healthy rosette, get excited, and stick it straight into soil. Big no. That one action killed my third plant.
The cut end of the stem is an open wound. If it touches wet soil, bacteria and fungal spores sneeze right in. The rot continues. Instead, I set the rosette aside on a dry plate for 4 days. Not in soil. Not touching water. Just letting the cut end air dry.
After two days, the cut end felt dry to the touch. After four days, a hard callus formed . That’s exactly what I wanted.
Step 3: Treating the Roots
For the root ball, I did the same thing after cleaning it: let it dry fully. Then I dusted the roots with cinnamon powder. This sounds like kitchen science, but cinnamon actually has natural antifungal properties. I’ve used rooting hormone too, but for reviving, cinnamon is cheap and works fine.
I should mention: I only do this when there’s rot. If the roots are healthy, skip the cinnamon and just repot.
The Biggest Lesson: I Switched the Soil
Before this rescue, I used regular potting mix from the big box store. That soil stays damp for a week. Succulents can’t survive that.
After this incident, I mixed my own blend:
- 1 part regular potting mix (I used a cactus mix actually)
- 2 parts perlite
- 1 part coarse sand
That mix drains fast. Water flows through in seconds, not minutes. That’s what you want.
Week 1 Results: What I Observed
Day 3: The rosette’s outer leaves looked even more wrinkled. I panicked. I almost watered it. Luckily I didn’t, because that would have ruined everything. The wrinkle is normal. The plant is using its water reserves while the roots haven’t established.
Day 5: I placed the callused rosette on top of dry soil. I did not bury it deep. Just the bottom half-inch touching the soil surface. Roots will grow out from the stem. If I bury it too deep, the stem tissue above soil might rot.
Day 7: Still no water. The leaves were still soft but less translucent. The wrinkled outer leaves were starting to harden off. This is a sign the plant is slowing metabolism and preparing to re-root.
For the original root ball, I noticed when I picked it up after drying that tiny white buds appeared near the crown. That thrilled me. The roots were determined to live.
Week 2: The Real Turning Point
Day 9: I finally watered. And I mean watered properly. Not misting, not sprinkling. I soaked the soil completely using a squeeze bottle until water ran out from the drainage hole. Then I made sure the pot never sat in that drained water.
Day 11: I checked the rosette with a gentle tug. There was slight resistance. That means roots were starting to grow. I’ve honestly done that same tug test at least a hundred times, and I still get excited every time.
Day 14 (today, as I write): The rosette looks perkier. The center leaves are standing up straighter and have a slightly green hue at the base. Not a miracle recovery yet, but it’s alive. It took the full two weeks, but it’s clearly on the right path.
The root ball survivors have started pushing out new green growth. Tiny, bright green dots appearing near the crown. Nothing to photograph yet, but I can see them. It’s always a small miracle.
How to Water During the Recovery Phase
This is the tricky part. During the callusing phase, you don’t water at all. For the first week after planting, you don’t water. Then, when you do water, do it thoroughly. But wait until the soil is completely dry before watering again.
A simple test: stick a wooden chopstick (or a toothpick) into the soil near the edge of the pot. Leave it there for 10 minutes. Pull it out. If it feels damp, wait. If it comes out bone dry, water.
Do not mist. I used to mist my succulents. Then I realized misting keeps the soil surface damp, encourages surface roots (which are weak), and raises humidity. Succulents do not want humidity. They want dry air and occasional deep drinks.
Repotting: My Exact Process After the Rescues
When I repotted the rosette after it showed new root growth, here’s what I did:
- I filled a small terracotta pot (4 inches) with my dry gritty mix.
- Pressed a shallow hole in the center with my finger.
- Placed the rosette on top, gently settling the callused tip into that indentation.
- I didn’t pack soil around it. I just let the stem rest on the surface.
- Then I waited another 3 days before the first watering.
Why shallow? Because burying the stem deep invites moisture buildup. Shallow placement lets the stem breathe and encourages roots to search downward.
What If There Are No Roots at All?
This happens often. The entire root system is dead. But you have some healthy stems, or even just leaves.
Method: Water Propagation
I tried this out of pure curiosity. Place the rosette or cutting in a clear jar filled with water up to the base. Only the base touches water. I used plastic wrap over the mouth of the jar and poked a hole in it. The rosette sat suspended with its bottom just kissing the water line.
High humidity makes roots emerge faster. I got visible white roots in about 9 days.
But there’s a catch. Those water roots are really fragile and lazy. When I transferred the plant to soil, it went through transplant shock. The water roots often rotted off in the soil because they weren’t built for it. The plant then had to regrow soil-adapted roots, which took another 3 weeks.
It worked eventually. But if I’m being straight with you: direct soil rooting is more reliable. Water propagation is just faster to see, which is why people love sharing videos of it online.
My 5-Step Emergency Checklist
Here’s a quick cheat sheet I’ve built after saving (and killing) several succulents.
- Dig out the plant immediately. Take a look at what’s healthy. Remove ALL rotten tissue. No mercy. Rotten parts only spread.
- Leave the healthy part out to dry for 3+ days. If it’s winter, give it 5 days.
- Choose a small pot with a drainage hole. Too big = too much soil = too much moisture.
- Use bone-dry soil with high grit content. Gently place the cutting on top WITHOUT burying deeply.
- Don’t water for at least 7 days. Then water deeply but only when soil is dry.
I want to stress small pot. I put one rescued rosette in a big 8-inch pot because I thought it would grow into it soon. Bad idea. The excess soil held onto water and that rosette rotted again. I tried saving it a second time, but the stem had gone black all the way up. That plant was gone. My fault.
Why Experts Say Less Water
The RHS states that most succulent problems come from overwatering and poor drainage. They literally recommend watering succulents “little and often” during the growing season and far less during dormancy. Their advice is basically: check the soil, not the calendar.
The AHS also highlights that succulents need sharp drainage and bright light. Their guidance aligns with what I’ve found through trial and error. I’ve read many forums, but these two sources nail the practical advice.
Light: The Silent Rehab Tool
Water isn’t the only factor. Light matters more than people think. During those two weeks, I placed my wilting succulents in a south-facing window that gets morning sun but shade by 2 PM. Direct afternoon sun might have fried them since they were already in shock.
What I noticed: the plants growing in brighter light recovered faster. It makes sense. Photosynthesis drives root formation. No light = no energy = no new roots.
But I kept it gentle. Intense sun right after repotting can cause severe dehydration because the roots can’t take up water yet. So, bright, indirect light for the first week. Then gradually introduce morning sun.
Three Succulent Types I’ve Revived Successfully
Not all succulents respond the same. I tested this process on different types last year. It helps to know what you’re dealing with.
Echeveria
These are the classic rosette types. They’re resilient. Even a tiny rosette can reroot if you treat it properly. My experience: they callus fast and root in about 2 weeks.
Haworthia
These have thicker, more structured root systems. They can lose their stems but keep fat, succulent roots underground. If you see plump white roots, replant those and keep the soil barely moist for the first few weeks until leaves appear.
Sedum (stonecrop)
These root unbelievably fast. I’ve had pieces snap off in my hand, fall on adjacent moist soil, and root themselves within 10 days. Very forgiving.
Signs Your Rescued Succulent Might Still Fail
Not everything is salvageable. Watch out for:
- The base turning black or dark brown again
- A soft and hollow stem tip after 2 weeks
- Leaves continuing to fall off even after drying
In that case, you need to check if the rot traveled upward. Cut higher. If the remaining stem is also mushy, you’re dealing with advanced rot. Time to switch to leaf propagation, if there are any plump leaves left.
Frequently Asked Questions
How long does a stemless succulent take to root?
Typically 2 to 4 weeks. It depends on the species, temperature, and light. In warmer summer months, you may see roots in 7 to 10 days. In cooler months, expect slower progress. I have seen roots in 5 days in June and required 6 weeks in December. Patience is non-negotiable.
Should I use rooting hormone when reviving a stemless succulent?
It can help, but honestly, most succulents will root on their own if kept dry and exposed to indirect bright light. I use hormonal powder when a plant has suffered heavily or when I’m working with old, woody stems. For fresh, healthy tissue, it feels unnecessary. But if you have it, it won’t hurt.
Can I save a succulent if the entire rosette has rotten?
If the rosette is mushy and translucent? The tips of the leaves might still be okay. Look at the center core. If the center is soft, toss it out. Otherwise, remove all mush, dry the leaves and see if you have some plump leaves for leaf propagation. There’s always a way unless it’s completely black.
A Few Final Thoughts From My Two Weeks
Honestly, reviving a succulent with no healthy stems is 80% about patience, 15% about soil, and 5% about luck. The key is to stop watering, remove rot, let tissue callus, repot in gritty soil, and then wait without fussing.
I watched that Echeveria from day one to day fourteen. There were moments I wanted to give up. The leaves were soggy. The stem refused to callus quickly. I nearly repotted it twice out of impatience. But in the end, leaving it alone was the best thing I did. Plants know how to heal themselves. We just need to step back and not smother them with love.
So if you’re staring at a half-dead succulent right now, I get it. You might feel bad about the damage. But you’ve got options. Give it the dry treatment. Treat those roots like the lifeline they are. Keep it in bright light, ignore it thoroughly for one full week, and then just watch what happens. But this time, water with your brain, not on a schedule.