bluename
How to Grow succulents in Mesh Planters (Without Killing Them)
If you want to grow succulents in mesh planters, the short answer is: use a coarse, fast-draining soil mix, water thoroughly but less often, and never let the pot sit in a saucer of standing water. Mesh changes the game because the airflow dries the root ball faster. I’ve been growing these plants for over a decade, and I’ve killed my fair share before I figured this out. 90% of indoor plants die from overwatering, and in a mesh planter, that mistake speeds up the rot faster than in a solid pot. I’m sharing the exact two-week process I used, the brutal mistakes I made, and the fixes that finally worked.
You might think mesh planters are just trendy hanging baskets. But I see them used for indoor shelves, outdoor railings, and even as decorative cloches. The holes mean water escapes sideways, not just downwards. And that changes everything you know about watering habits.
The 3 Deadly Mistakes That Kill Succulents in Mesh
I lost three pots of Echeveria before I realized the problem wasn’t the plant. It was me. And it’s almost always these three things.
Mistake #1: Watering Too Often
I used to water my indoor succulents every other day. I thought they were thirsty. Big mistake. In normal ceramic pots, the soil stays wet for almost a week. In mesh planters, the soil dries out in two days, but I still watered on my old schedule. The result? The roots at the bottom stayed moist because the mesh held soil tightly, and there was no air gap. That caused the base to rot.
I stopped watering on schedule. I started checking the soil with my finger, pushing two inches deep. If it feels damp, skip the watering. In a mesh planter, I water once every five to seven days in summer, and every three weeks in winter. That single shift saved my plants.
Mistake #2: Getting the Light Wrong
I placed my first mesh planter on a north-facing shelf because it looked nice. Succulents stretched out, looking like pale green aliens reaching for the window. They didn’t die, but they became weak and gangly. Then I moved them to direct south sunlight outside. The leaves scorched within 48 hours. Both extremes hurt.
The fix? Morning sun for about four hours, then bright, indirect light for the rest of the day. I put my mesh planters on an east-facing windowsill. If you only have a south window, pull the planter back about a foot from the glass, or use a sheer curtain to filter the harshest midday rays. People often forget that mesh doesn’t block UV rays like a ceramic wall does, so the root zone heats up faster.
Mistake #3: Using the Wrong Pot (or Wrong Soil)
I thought any pot would work. I filled a mesh planter with regular potting soil, because that’s what I had on hand. Within two weeks, the soil compressed and turned into a dense, soggy sponge. The mesh couldn’t dry it out fast enough, and the roots suffocated.
I switched to a gritty mix with one part perlite, one part coarse sand, and two parts succulent potting mix. Then I added small bark chips for drainage. This mix does not hold water. That was the game changer. The mesh planter acts as a sieve, so you need a chunky soil texture that doesn’t escape through the gaps. I also lined the bottom of the planter with a single layer of coconut fiber mat. It keeps the soil inside while still letting the air move through.
My 2-Week Observation Log: The Real Testing Process
Let me walk you through the exact two weeks when I finally got it right. I had a wire mesh planter, about 30 cm in diameter with small hexagonal holes. I used it for a mix of Sedum, Echeveria, and a small Haworthia.
Day 1: Set up and first watering
I placed the fiber mat at the bottom, cut to size. Then I filled the planter with my gritty mix. I didn’t pack it down. I left it loose. I placed the succulents in, arranged them loosely, and then topped the soil with fine gravel. That gravel stops the soil from washing out when you water.
I watered thoroughly from the top until water ran out of the mesh. I waited for two minutes. Then I watered again. This ensured the mix was fully saturated. But I let all the excess water drain fully.
Day 3: Checking the moisture level
I felt the soil surface. It felt slightly damp but not wet. I poked my finger two inches down, it was barely moist. The mesh planter was doing its job. The airflow through the sides dried the soil evenly. In my old plastic pots, I would still be dealing with wet soil at this point.
Day 5: First sign of stress
I noticed one Echeveria leaf starting to yellow at the bottom. I was worried I had overwatered. But I waited. In fact, that leaf was just old and being recycled by the plant. I removed it gently. The plant itself was firm and solid. I didn’t water.
Day 7: A little growth
I saw a tiny red tip on the new growth of the Haworthia. That was a sign of enough light and good drainage. The roots in the mesh planter were sitting dry for the past two days. That is exactly what succulents want. They hate wet feet.
Day 9: Another watering threshold
I checked the weight of the planter. It felt light. I picked it up, and it seemed almost half the weight it was on Day 1. That’s my cue to water. I repeated the same thorough watering again. The water drained out of the mesh within 10 seconds. This time, I put the planter on a small stand with feet to leave the bottom open to airflow.
Day 11: Observing the root zone
A few tiny roots were visible poking out of the mesh holes where the soil met the side. This was a good sign. Succulents breathe through their roots, and the mesh allowed air pruning. Roots that touch dry air naturally stop growing longer and instead branch out inside the pot. This creates a stronger, denser root system.
Day 14: Final look
All the succulents were plump and firm. The colors were vibrant, not pale or stretching. The soil had dried out again. I had watered only twice in two weeks. That’s the rhythm. With a normal pot, I would water three to four times in that same span. The mesh planter gave me a better margin for error, because the risk of water logging was gone.
How Drainage in Mesh Planters Works (and How to Make It Better)
The holes in a mesh planter don’t just remove excess water, they speed up evaporation. Water moves through the soil sideways and escapes through the mesh holes. I learned that this reduces the wet zone significantly. But you still need to create a gradient in the soil.
Add coarse materials to the bottom, like broken terracotta shards or gravel. This forms a thin drainage layer that prevents saturated soil from touching the bottom of the mesh. But watch out, if the mesh holes are small, your soil might wash out. That’s why I use the fiber mat lining. It holds everything in place while still letting air through. If you don’t have that, you can use a coffee filter, but it may break down after a couple months. I recommend coconut fiber mats because they last much longer.
Also, don’t push the soil against the mesh side. Leave a tiny gap of about half a centimeter between the soil and the inner edge. This actually creates a little air pocket, allowing dry air to circulate around the root ball as well. I tried this with a small bamboo stick, keeping the soil loose.
Taking Care of the Light Needs
Succulents in mesh planters often get more sun than you think, because the planter doesn't create shade. I used to hang mine on a west-facing porch. The afternoon sun came in hot at 3 pm. That scorched the soil directly inside the mesh, raising the temperature to almost 40°C at the root base.
Instead, I use a shade cloth if they are outside. Simple white shade cloth with 30% density reduces the heat while keeping the light bright. Indoor, I rotate the planter a quarter turn every week. This ensures every side gets even light. Otherwise, you will see both sides leaning toward the sun.
If you’re growing them under a grow light, set the light about 12 inches above the top of the planter. With mesh, the plant is smaller, the root structure is healthy, they don’t stretch as much. I’ve used cheap full-spectrum LEDs for two months now, and the results match my south window plants.
When to Water? My Simple Rule
Let me give you a simple rule that solved my watering nightmares. I water succulents in mesh planters only when I find the top soil completely dry and the pot is light. I lift the planter up, and if it feels hollow and very light, I water. If it still weighs a bit, I wait another day.
I don’t use a moisture meter. I rely on the weight method. I also gently squeeze the mesh on the side. If the soil crumbles inside and doesn't stick together, I know it’s dry enough. This works every time.
One thing I want you to avoid: misting. I used to spray my succulent leaves with water every morning. I didn’t know that this traps water in the leaf crevices, causing rot. Mesh planter also remains moist longer after misting because there isn’t good natural airflow to dry the droplets. So no misting on the leaves. Just water the base soil.
Choosing the Right Succulents for Mesh
I discovered that some succulents are simply better suited to mesh planters. I tried growing a delicate Haworthia in full mesh outdoors, and it failed because it can’t handle the heat and rapid drying. It prefers a more stable moisture level.
Stick to tough and forgiving varieties. These worked well for me:
- Sedum – These are small and look beautifully trailing when they spill over the mesh edges.
- Sempervivum (hens and chicks) – They love sharp drainage.
- Echeveria – Perfect for mesh planters, just give them morning sun.
- Crassula – They tolerate a bit more water and do great indoors in mesh.
I avoid fleshy, thick-rooted succulents like larger Agave or type of Lithops because they need extremely dry periods and sometimes the mesh lets them dry too fast, but actually that can be good. But they are more sensitive to soil pH and temperature swings. It’s really easier to start with sedum or Echeveria.
Why the Soil Mixture Is My Biggest Victory
I think the biggest win I had was my soil recipe. I refined it over several months and tried multiple variations. I share this exact recipe that I used in my two-week test:
1 part small-size pumice (about 3-6mm) 1 part coarse river sand 2 parts commercial succulent mix
I sift out any tiny particles from the succulent mix to avoid the fine dust. This mixture doesn't degrade or collapse. After a full month of regular waterings, the mixture remains chunky and airy. The soil doesn’t wash out from the mesh side because they are heavier chunks.
If you use organic matter like coconut coir, keep it below 20%. I used to have a 50 percent organic mix that rotted the roots when the planter wasn’t draining. And along with that initial mistake, I learned that the soil must dry quickly, always.
The Right and Wrong Way to Repot Into a Mesh Planter
I can’t stress this enough. I repotted my plants straight from a nursery plastic pot into a mesh planter without cleaning the old soil. That was a bad idea. Old soil and old root ball become anoxic inside the new planter.
Here is what I do now. First, gently take the succulent out from its old container, shake the soil off the roots, and let it dry for 24 hours. Cut away any brown, squishy or dead roots. Then place the plant into the mesh planter empty. Add your new soil mix around the roots, tap the planter to settle, and don’t water for the next 2–3 days. This allows broken roots to callus over. If you water immediately after repotting, the water enters the cut roots, leading to rot.
I lost two plants because I watered right after repotting. Never repeat that mistake. Wait two full days in a shaded spot, and only then move it into normal light and give first watering.
Adapting Mesh Planters to Different Seasons
Mesh planters change the plant’s hydration patterns because outside air humidity and indoor heating affect the drying times. During the summer, I found a mesh planter dries up every five days. But during winter, when the central heating is on in my house, the surrounding air is again dry, and the pot dries just as quickly. But there is low light, so the plants don’t use water that fast. This may seem contradictory.
I learned to not water at all in the coldest months except when the leaves start to wrinkle slightly. That’s the sign. I only watered twice in the whole month of January. This worked better than forcing a routine.
Outside in the open rain, mesh planters can easily get saturated, if left outside for a long rain. I move my planters under the eaves or a porch roof when there’s heavy rain. With mesh, water can re-enter quickly through the sides, and the pot stays moist for days rather than hours. The bottom line is to keep top on the drainage, but also to shelter your mesh from constant downpours. In the spring and fall, I place them under a clear patio roof that lets light through but shields them from heavy streaming wet.
Fertilizing the Right Way
People often forget succulent fertilizers. I feed them twice a year. I use a balanced liquid fertilizer, diluted to half the strength recommended on the bottle. I apply this in early spring and again in mid-summer. With mesh planters, I mix into the water and then water lightly. I don’t use any fertilizer on newly repotted plants for at least a month.
Using a slow-release fertilizer with mesh, is tricky. The pellets may fall out from the holes if the mesh is coarse. I use only liquid fertilizers, because you control exactly what the plant gets, without waiting.
Don’t fertilize in the fall or winter. The plant will not use it and the salts remain in the soil. Since the soil dries quickly, salts may concentrate around the roots over time. So every spring, I flush the soil with a lot of pure water and let the extra drain. This leaches out salts.
Handling Common Pests in Mesh Planters
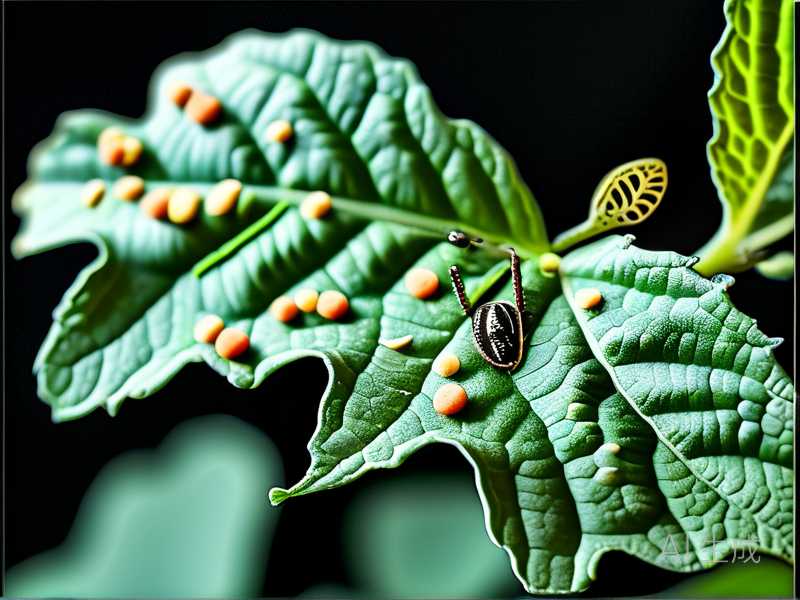
Mesh planters can be a double-edged sword when it comes to bugs. They allow very good airflow and often prevent fungus gnats, which like moist soil. However, mesh also allows landing where flying pests like whiteflies or aphids can enter from below.
I found mealybugs on the root part of my succulent hide under the fiber mat, because it sits between the soil and the mesh. I inspect my plants every time I water. Simply check the root crown and under leaves. If I found some, I use a cotton swab dipped in 70% isopropyl alcohol and dab directly on the bugs. Then I wait and repeat after four days. Spraying neem oil can also help, but it should be used sparingly because it can block leaf pores and burn spots in direct sun.
Do not use chemical granules with mesh because they may leach out too quickly and possibly harm beneficial insects. I stick to natural, manual contact removal.
FAQ
1. How often should I water succulents in mesh planters?
You should water only when the soil feels dry 2 inches deep. This is roughly every 5–7 days in summer and every 2–3 weeks in winter. Mesh accelerates drying, so the schedule depends on your humidity, not on a fixed calendar. Lift your pot. If it is light, water thoroughly.
2. Can I keep mesh planters outside in the rain?
Yes, but not in heavy rain. A drizzle is fine, but prolonged rain could saturate the soil and decrease airflow. Place them under a roof overhang during stormy weather. Also, check after rain that water drains quickly from the sides. If the soil leaks from the holes, line the planter with a coconut fiber mat before adding soil.
3. Do I need to line the inside of a mesh planter?
Not necessarily, but you should if your mesh holes are larger than 1 cm. A fiber mat prevents soil loss while still allowing air movement. I also use it to stop the potting mix from falling out when watering. For extra stability, top dress with gravel to keep the soil in place.
I have been through all the phases, overwatering, root rot, no bloom, burned leaves. But once I understood the air flow and the soil balance, my mesh planters became the healthiest of all my plants. The two-week trial changed my habit forever. The more they stay dry, the better they do. And now that I’ve found that sweet spot, I tell any friend to not fear mesh. They are just beautiful if you know the rules.
If you have been struggling with waterlogging, try the steps above and just do it. Trust the dryness. Your succulents will reward you with vivid colors and firm leaves. And don't forget: Always check first that the root zone is dry, and you will be fine. No fixed watering schedules. No daily misting. Just let them breathe.