bluename
 How to Make succulents Develop Denser Foliage Rosettes
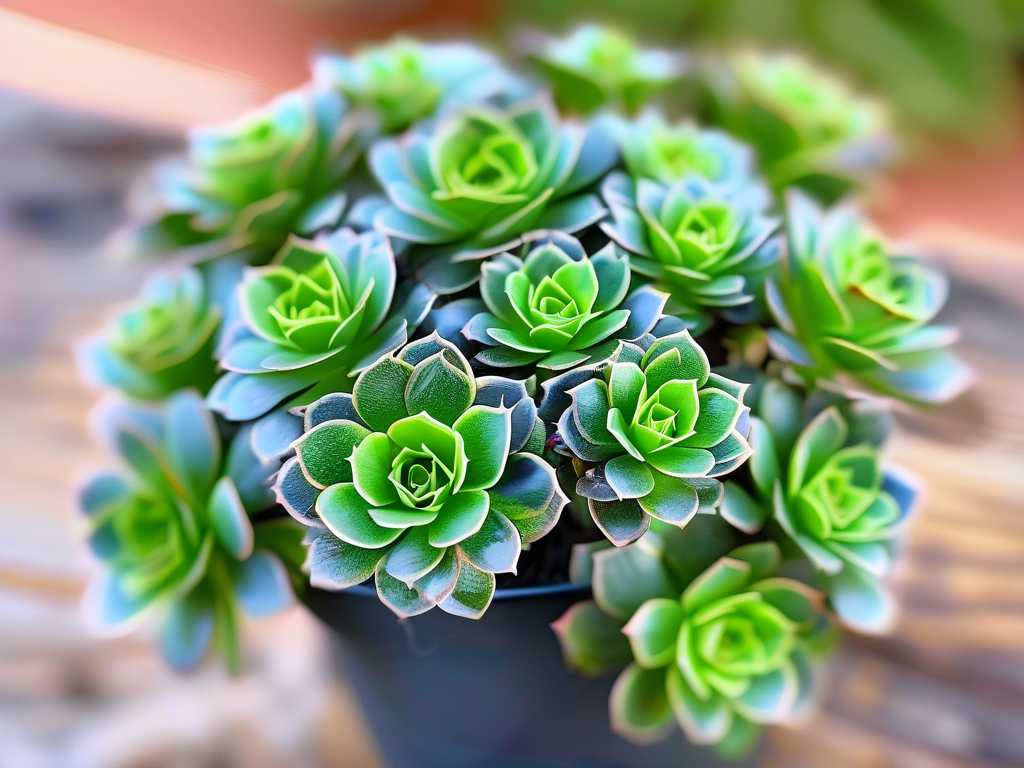
I love my succulents, but for the longest time, I was frustrated. My echeverias and sempervivums were alive, but they weren’t thriving. They were stretched out, with wide gaps between their leaves, looking more like lanky stems than the tight, beautiful rosettes I admired in photos. I knew there had to be a way to encourage that compact, dense growth. After extensive research, trial, and error, I finally cracked the code. This is my hands-on guide, born from two weeks of intense observation and adjustment, on how to make succulents develop denser foliage rosettes.
The core issue, I learned, is etiolation—the scientific term for a plant stretching for light. A dense rosette is a sign of perfect health and ideal conditions. It’s not magic; it’s a combination of light, water, and a few subtle tricks.
The Non-Negotiable Foundation: Light is Everything
My journey to denser succulents began with confronting my light situation. I thought my bright windowsill was enough. It wasn’t.
My Step-by-Step Light Audit and Fix: First, I moved my most stretched echeveria to a south-facing window (north-facing if you’re in the Southern Hemisphere). This provides the most intense direct sunlight indoors. For plants not near a prime window, I invested in a full-spectrum LED grow light. I set it on a 12-hour timer, positioning it about 6-8 inches above the plants.
The Two-Week Observation: The change wasn’t immediate. In the first week, I saw no new growth, but the existing leaves seemed to firm up. By day 10, I noticed tiny, bright green nubs at the very center of the rosettes. This was the new, compact growth starting! Crucially, the new leaves were emerging much closer together than the old, spaced-out ones.
The Pitfall I Hit and How I Solved It: My mistake was being too eager. I moved a succulent from a low-light area directly into blistering afternoon sun. Within two days, it had severe sunburn—ugly, bleached, crispy patches. I learned the hard way that acclimating succulents to brighter light is mandatory. The solution? I started with just 1-2 hours of direct morning sun, increasing exposure by about an hour every 3-4 days. For the sunburned plant, I moved it to bright, indirect light to recover. The damaged leaves won’t heal, but the new growth from the center will be adapted and healthy.
Watering for Strength, Not Stretch
Watering practices directly influence leaf spacing. Overwatering in low light is a recipe for a weak, stretched plant.
Implementing the "Soak and Dry" Method Correctly: I stopped watering on a schedule. Instead, I used the "taco test" for fleshy leaves or a moisture meter. I only watered when the soil was completely dry all the way to the bottom of the pot. When I did water, I took the pot to the sink and drenched it until water flowed freely from the drainage holes, ensuring the entire root zone got moisture.
Two-Week Impact on Foliage Density: Under correct light, disciplined watering forced the plant to grow steadily but slowly. This slow, steady growth is key for tight internodes (the spaces between leaves). The new central growth remained compact because the plant wasn’t being spurred into rapid, weak growth by excess water.
My Watering Pitfall: I used a decorative pot without a drainage hole for one of my haworthias. Even with careful watering, residual moisture sat at the bottom. The plant didn’t rot, but it grew slightly faster and less densely than its well-drained siblings. The fix was simple but crucial: I repotted it into a terracotta pot with a large drainage hole. Terracotta also wicks away excess moisture, promoting even better root and foliage health.
The Strategic Role of Fertilization
Succulents aren’t heavy feeders, but a slight nutrient boost during active growth can promote lush foliage.
Choosing and Applying the Right Fertilizer: I used a balanced, water-soluble fertilizer (diluted to 1/4 strength of the recommended dose) with a near-equal NPK ratio like 5-5-5. I applied it only once, at the beginning of my two-week experiment, during a regular watering session. The Royal Horticultural Society (RHS) advises that a low-nitrogen fertilizer is best to avoid soft, sappy growth. My balanced, diluted approach aimed for gentle support.
Observing the Effect on New Growth: The fertilized plants, alongside perfect light and water, showed a noticeable vibrancy in their new central growth. The leaves seemed slightly plumper and a more intense color. It didn’t cause a sudden stretch but supported robust development of the already-initiated dense leaves.
The Game-Changer: Stress Coloring and Tightening
Here’s a fascinating insider tip. Slightly stressing your succulents can intensify their color and compact their form. This isn’t about neglect, but controlled adjustment.
How I Applied "Good Stress": Once my plants were acclimated to strong light, I allowed them to experience cooler nighttime temperatures by leaving them near a slightly drafty window (around 50-55°F/10-13°C). I also let the soil stay dry for an extra 2-3 days beyond the usual "completely dry" point before watering.
Results After 14 Days: The stress colors began to show—beautiful pink and red tips on the echeveria. More importantly, the overall rosette seemed to contract slightly, like it was hugging itself tighter. The existing leaves felt firmer, and the new growth was exceptionally compact. The American Horticultural Society (AHS) notes that environmental stresses like cool temps can enhance pigmentation and form, which aligns perfectly with what I witnessed.
Pruning and Propagation for a Fuller Plant
Sometimes, you need to start over on a stretched plant to achieve density.
My Hands-On Beheading Process: For a severely etiolated sempervivum, I used a sterile knife to cut the top rosette off, leaving about an inch of stem. I let the cut end callous over for 3-4 days, then planted it in dry soil. I didn’t water for a week to encourage roots.
The Two-Week Propagation Timeline: After 14 days, the beheaded rosette remained plump and showed no signs of wrinkling, indicating it had likely started rooting. The original stem left in the pot began sprouting multiple tiny new rosettes around the cut edge! This technique, while drastic, is the fastest way to create multiple compact rosettes from one leggy plant.
Common Questions I Encountered
Can a succulent that has already stretched out become compact again? The stretched part itself will not compress. The key is to encourage new, compact growth from the center. With perfect light, the new growth will be dense, and eventually, you can propagate the compact top, making the plant beautiful again.
How long does it truly take to see results? You can see the first signs of new, tighter growth in 1-2 weeks, as I did. However, for the plant to fully transform and for the old, stretched leaves to be reabsorbed or overshadowed, plan on 1-2 growing seasons. Patience is essential.
Are there specific succulent varieties that form denser rosettes more easily? Yes. Echeveria ‘Perle von Nurnberg’, Sempervivum (Hens and Chicks), and Graptopetalum paraguayense are known for their rosette-forming tendencies and respond wonderfully to these techniques. Start with these if you’re new to promoting tight succulent growth.
Transforming your succulents into dense, stunning rosettes is a deeply rewarding process. It requires a shift from passive care to active observation. By mastering light acclimation, practicing disciplined watering, and not being afraid of a little strategic stress or pruning, you give your plants the signals they need to grow as they were meant to—compact, colorful, and healthy. The two-week experiment was just the beginning; watching that dense central growth unfold over the following months is the real joy.