bluename
 How to Water succulents Using a Handheld Spray Bottle: My 2-Week Experiment
For years, I considered myself a fairly competent plant parent. Yet, my succulent collection told a different story. I’d see plump, vibrant specimens online, but mine often looked wrinkled, stretched, or worse—mushy and brown from the base up. The culprit? Improper watering. I was either drowning them with a heavy pour or neglecting them until they shriveled. That’s when I decided to get precise. I embarked on a focused experiment: how to water succulents using a handheld spray bottle. This wasn't about a light misting; it was about using the bottle as a targeted tool for controlled, deep watering. For two weeks, I documented every step, observation, and setback. Here’s exactly what I learned.
Why I Chose the Spray Bottle Method for My Succulents
The traditional advice is to "soak and dry," drenching the pot until water runs out the drainage hole. This is sound wisdom, but with a large collection of small succulents in various pots, I found it messy and inefficient. Water would splash onto leaves, pool in saucers, and I’d worry about overwatering my most delicate varieties.
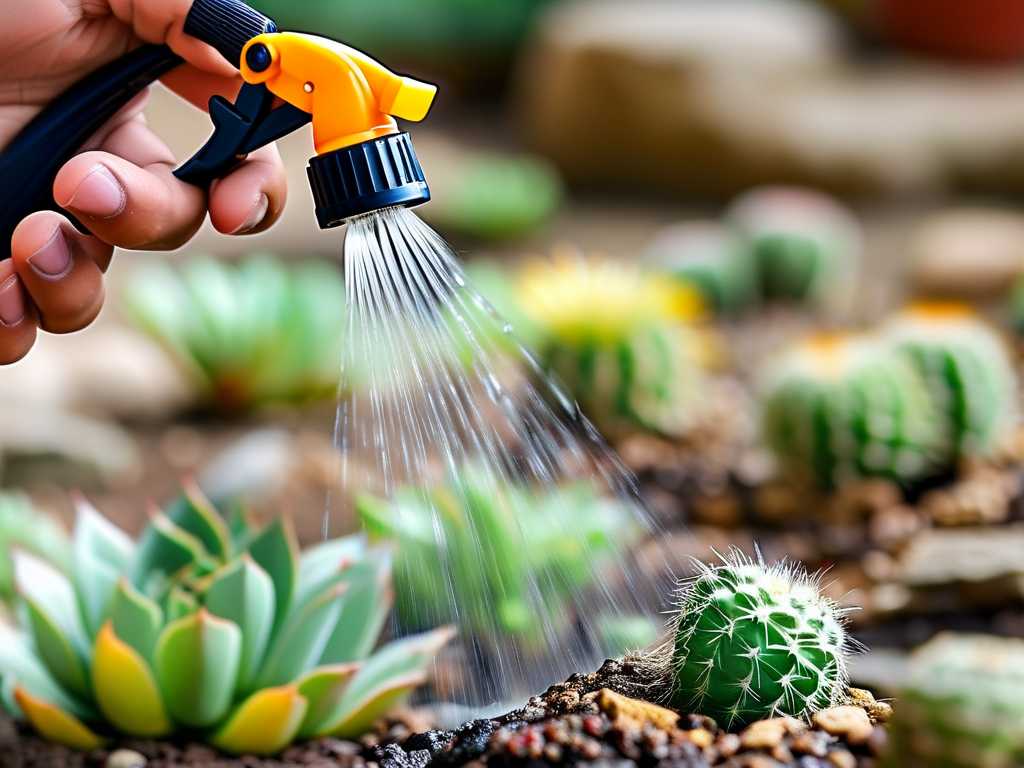
Using a handheld spray bottle appealed to me for control. I could direct the water stream precisely to the soil, avoiding the rosettes that are prone to rot if water sits in them. The goal wasn't to just wet the surface but to simulate a deep, thorough rain shower, one controlled squirt at a time. This method is particularly relevant for watering succulents with a spray bottle in tight arrangements or for newly propagated plants with shallow roots.
My Toolkit and Preparation
First, I gathered my supplies. Not all spray bottles are created equal. I chose one with a adjustable nozzle that could switch from a fine mist to a strong, direct stream. The stream setting was crucial for my experiment. I also used a simple wooden chopstick as a soil moisture probe—a trick recommended by many horticulturalists.
I selected six succulents for this trial: two Echeverias, two Haworthias, a Sedum cluster, and a young Jade plant. They were all in well-draining cactus/succulent mix in pots with drainage holes. I made sure each was thoroughly dry before starting; the soil was bone-dry and the leaves showed slight give when gently squeezed.
The Step-by-Step Process: A Two-Week Protocol
My protocol was simple but required patience. I committed to checking my plants every three days.
Step 1: The Soil Moisture Check Before even touching the spray bottle, I inserted the wooden chopstick deep into the soil, near the edge of the pot to avoid roots. I left it for 60 seconds. Upon removal, if it came out clean, with no soil sticking and no dark moisture marks, it was time to water. This objective check prevented me from watering on a schedule.
Step 2: Targeted, Pulsed Watering With the nozzle set to a steady stream, I placed the tip close to the soil surface. I did not spray the leaves. I would press the trigger in short, half-second pulses, moving around the pot's perimeter. I’d water until I saw the very first hint of moisture begin to seep from the drainage hole below. This took significantly more trigger pulls than I anticipated—sometimes 20-30 per pot. The key was going slowly, allowing the water to infiltrate and not just run down the inside wall of the pot.
Step 3: Immediate Drainage I never let the pots sit in water. After watering, I lifted each pot to ensure no water remained in the saucer or cache pot. This is non-negotiable for succulent health, as emphasized by the Royal Horticultural Society (RHS), which states that "succulents are most vulnerable to overwatering when left in saturated compost."
Step 4: Observation and Logging I kept a simple journal, noting the date, which plants I watered, and any visual changes in leaf plumpness, color, or form.
Week 1 Observations: The Learning Curve
The first week was revealing. My Haworthias and Jade plant responded beautifully within 48 hours. Their previously slightly wrinkled leaves plumped up noticeably, showing a healthy firmness. The spray bottle watering technique allowed me to hydrate them perfectly without any risk of crown rot.
However, I hit my first major坑. My largest Echeveria, in a wider, shallow pot, showed no improvement. The leaves remained soft. Upon investigation, I realized my mistake: I had watered evenly, but the stream hadn’t penetrated deeply enough to reach the entire root ball. The center of the soil mass was still dry. The surface looked damp, fooling me into thinking the job was done.
The Fix: I learned to water in stages. For wider pots, I would pulse water one section, wait 60 seconds for it to absorb, then move to the next. I repeated this until I achieved uniform drainage from the holes. This slower process ensured the water reached the roots, not just the perimeter.
Week 2 Observations: Mastery and Adjustments
In the second week, applying my staged watering fix, the struggling Echeveria finally plumped up. The Sedum cluster, which had been thriving, began to show a few yellowing lower leaves. This initially caused panic—was it overwatering?
Another坑: Assuming yellow leaves always mean too much water. I carefully removed a yellow leaf and checked the stem. It was firm, not mushy. I recalled advice from the American Horticultural Society (AHS), which notes that succulents will often reabsorb nutrients from their oldest leaves, especially during growth periods or after a dry spell followed by watering. This was a natural process. The plant was redirecting energy, not rotting.
By the end of the two weeks, all six succulents were in visibly better condition. They were uniformly plump, showed brighter colors (a sign of good health, not necessarily more sun), and had no signs of rot or edema. The controlled handheld spray bottle method for succulents had given me a level of precision I never had with a watering can.
Key Takeaways and Best Practices
This experiment taught me that the tool matters less than the technique and observation. The spray bottle is an excellent vehicle for applying the "soak and dry" principle with high precision.
- It’s About Deep Watering, Not Misting: Always use the stream setting. Misting only wets the top layer and encourages shallow roots.
- Patience is the Real Secret: Water slowly and in pulses. Let the soil absorb the water between rounds to ensure even saturation.
- The Chopstick is Your Best Friend: It provides an unbiased measure of soil moisture deep in the pot.
- Observe, Don’t Assume: Learn your plant's specific language. Wrinkles often mean thirst, but yellowing can be natural senescence.
Frequently Asked Questions
Can I use a spray bottle to water all my succulents? For established succulents in proper soil, yes, as a precise watering tool. However, for very large, deep pots, a long-spouted watering can might be more practical to achieve deep saturation efficiently. The spray bottle excels with small to medium pots and delicate plants.
Won’t water on the leaves cause rot? Yes, it can, especially for rosette-forming succulents like Echeveria. That’s why the core technique is to direct the stream solely at the soil base, avoiding the leaves entirely. If you do get water on the leaves, gently blot it off with a paper towel or use a dry paintbrush to wick it away.
How often should I water with this method? There is no set schedule. The frequency depends on your home’s humidity, temperature, light, and pot size. Always perform the chopstick test or wait until the soil is completely dry and the leaves show the slightest sign of softness before watering again. In my environment, this ranged from 10 to 14 days during this experiment.
My two-week journey transformed how I care for my collection. It moved me from guesswork to a confident, evidence-based practice. The handheld spray bottle, used correctly, is more than a tool; it’s a gateway to understanding the precise needs of these resilient but particular plants. By focusing on controlled delivery and keen observation, you can unlock the secret to keeping your succulents not just alive, but truly thriving.