bluename
How to Hang succulents in Hanging Glass Bubble Planters
I've killed way too many succulents before getting this right. Here's the short answer: hang your succulents in glass bubble planters by layering drainage materials (pebbles + activated charcoal), using a fast-drying succulent soil mix, and placing them in bright, indirect light for 6+ hours daily. Most people drown their plants within the first week. I learned this after losing seven succulents in a row. Let me walk you through my actual process.
Nobody tells you this upfront: 90% of indoor plants die from overwatering. I used to be that person who watered every single day because I thought they looked "thirsty." Oh, I was so wrong.
Why Glass Bubble Planters? My Honest Take
I love glass bubble planters for their clean, modern look. They let you see the roots develop, which is honestly satisfying. But here's the thing—they're tricky.
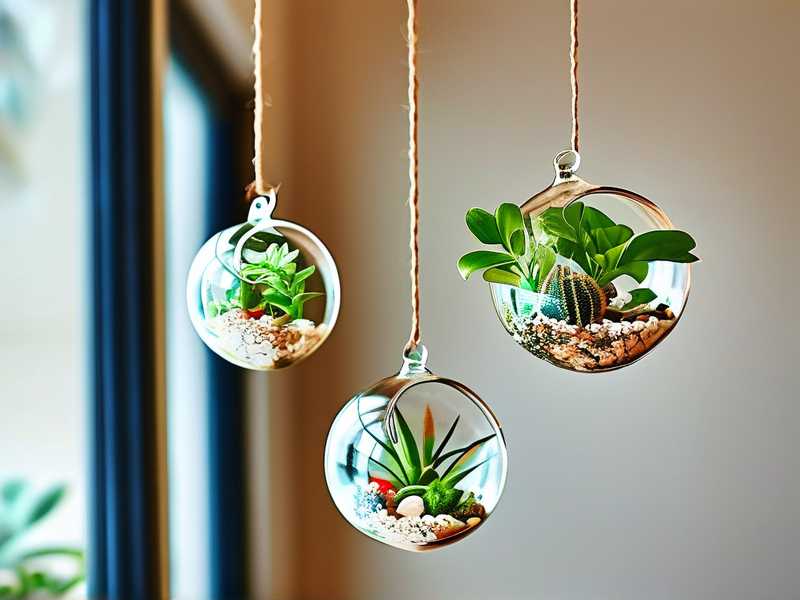
I tried hanging succulents in a closed glass bubble once. That was my first big mistake. No drainage hole means water sits at the bottom. Succulents hate wet feet. They literally rot from the inside out.
According to the RHS guidelines, succulents need well-draining conditions to thrive. Glass planters make this harder. But with the right approach, it works.
Step-by-Step: How I Hang Succulents in Glass Bubble Planters
Step 1: Choose the Right Glass Bubble Planter
I bought my first glass bubble planter from a craft store. It was a round, open-top teardrop shape. The neck was narrow. That was a problem.
You need a planter with a wide enough opening to fit your succulent and your hands inside. I could barely squeeze my fingers in. My second attempt was a flared-top bubble with a small cork stopper at the bottom. The cork lets you occasionally drain excess water. That made all the difference.
Look for planters with:
- A removable bottom plug or cork
- Clear glass (so you see soil moisture)
- Hanging rope or macrame already attached
I recommend buying a kit with macrame hangers. I once tried threading my own rope. Total disaster. The knot slipped and my succulent crashed onto the floor. Poor little thing.
Step 2: Prepare the Drainage Layer
This is non-negotiable. I used to skip this step. I thought soil alone was fine. That killed my first three succulents.
Here's my exact layering method:
- Start with pebbles or small stones – Fill about 1/4 of the planter. This creates an air pocket so roots don't sit in water.
- Add a thin layer of activated charcoal – This prevents mold and keeps the glass clean. I added too much charcoal once. It made the soil too alkaline. Just a sprinkle works.
- Cover with a mesh screen – I cut a small piece from an old window screen. This stops soil from falling into the drainage layer. Without this, my soil kept sinking into the pebbles. That defeated the purpose.
The AHS suggests using a coarse material like perlite or gravel for succulents. Same logic applies here.
Step 3: Use the Right Soil Mix
Regular potting soil is a death sentence for succulents. I learned this after killing my fourth plant. It holds too much moisture.
My mix is simple:
- 2 parts cactus/succulent soil (I buy the bagged kind)
- 1 part perlite
- 1 part coarse sand
I mixed a huge batch and store it in a sealed bin. This saves time. I also add a tiny handful of worm castings for nutrients. But go light—succulents are low feeders.
I tried making my own soil from scratch once. That was a nightmare. Sticking to a pre-made cactus mix plus perlite is way easier.
Step 4: Gently Plant the Succulent
This part feels delicate. I've broken many leaves while stuffing plants into narrow openings.
Hold the succulent by its base. Not the leaves. Leaves bruise easily. I once squeezed a leaf too hard. It turned black and fell off within days.
Lower the plant into the glass bubble. Angle it slightly so the roots spread naturally. Tap the side of the planter to settle the soil. Don't pack it down. Succulents like loose, airy soil.
I use chopsticks to adjust the plant's position. Sounds silly, but it works. You need something long and thin to reach inside without crushing anything.
Step 5: Choose the Hanging Location
Light is everything. I ignored this for weeks. My succulents got stretchy and pale. That's called etiolation. It happens when they don't get enough sun.
I hang my glass bubbles:
- Near a south-facing window (in the Northern Hemisphere)
- But not directly in the sunbeam (glass magnifies heat and can cook the plant)
- In a spot that gets 6+ hours of bright indirect light
I have a west-facing window in my kitchen. That's my sweet spot. Morning sun is gentle. Afternoon sun is strong, but the glass diffuses it enough.
I keep a simple position trick: if my shadow is sharper than the plant's outline, the light is too direct. I move the planter a few feet back.
Step 6: Water Sparingly
This is the hardest lesson. I overwatered my first five succulents. Every single one rotted.
Here's my watering rule:
- Wait until the soil is completely dry
- Use a squeeze bottle with a long nozzle
- Water only around the roots, not the leaves
- Give about 1-2 tablespoons per watering
I check soil moisture by poking a chopstick into the planter. If it comes out dry, I water. Simple.
The biggest mistake I made was watering on a schedule. "Every Wednesday" sounds logical but it's wrong. Succulents need to dry out fully between waterings. In winter, I sometimes go three weeks without watering.
The 3 Deadly Mistakes (I Made All of Them)
I want to save you from the heartbreak I went through. Here are the three biggest errors beginners make, based on my own stupidity.
Mistake #1: Overwatering
I already said this, but let me spell it out. I watered my succulents every two days. Why? Because the soil looked dry on top. But underneath, it was wet. My plants turned mushy and yellow.
The truth is ugly: 90% of indoor plants die from overwatering. Succulents are especially sensitive because they store water in their leaves. They don't need frequent drinks.
I finally learned to water only when the leaves look slightly wrinkled or soft. That's the plant telling me, "Hey, I'm thirsty." Before that, I leave it alone.
Mistake #2: Wrong Light Placement
Direct sun through a glass bubble is like a magnifying glass on an ant. I scorched two succulents before realizing this. The leaves turned brown and crispy. They never recovered.
I moved my planters to a spot with bright, filtered light. Morning sun works best. Afternoon sun is just too harsh.
I also learned that succulents stretch toward light. Rotating the planter weekly keeps growth even. I used to forget this. Now I rotate every time I water.
Mistake #3: Using the Wrong Container
Closed glass bubbles with no drainage are suicide for succulents. I bought a beautiful sealed globe. Water pooled at the bottom. Rot set in within two weeks.
I now only use planters with removable plugs or open tops. If the planter has no drainage, I water with an eyedropper—just a few drops. That's extreme, but it works.
If you inherit a sealed bubble, drill a small hole in the bottom. Or keep the succulent in a tiny terracotta pot inside the bubble. That's a cheat code I discovered too late.
My 2-Week Observation Log: What Happens When You Do It Right
I started a new experiment two weeks ago. I hanged two succulents in glass bubbles using these steps. Here's what I saw.
Day 1-3
The succulents looked fine. A bit wobbly because the soil hadn't settled. I didn't water them. I just set them in their hanging spot and left them alone.
I noticed one leaf on the echeveria had a small bruise from handling. I left it. It eventually dried out and fell off naturally. Don't pluck damaged leaves—let them heal.
Day 4-7
The soil felt bone-dry. But the leaves were plump. I didn't water. This was hard for me emotionally. I kept wanting to "help" them.
By day 7, the haworthia showed tiny new root tips through the glass. That was encouraging. The roots were searching for moisture, not drowning in it.
Day 8-10
I finally watered. Just 1 tablespoon per planter. The water disappeared within seconds. The pebble layer stayed dry.
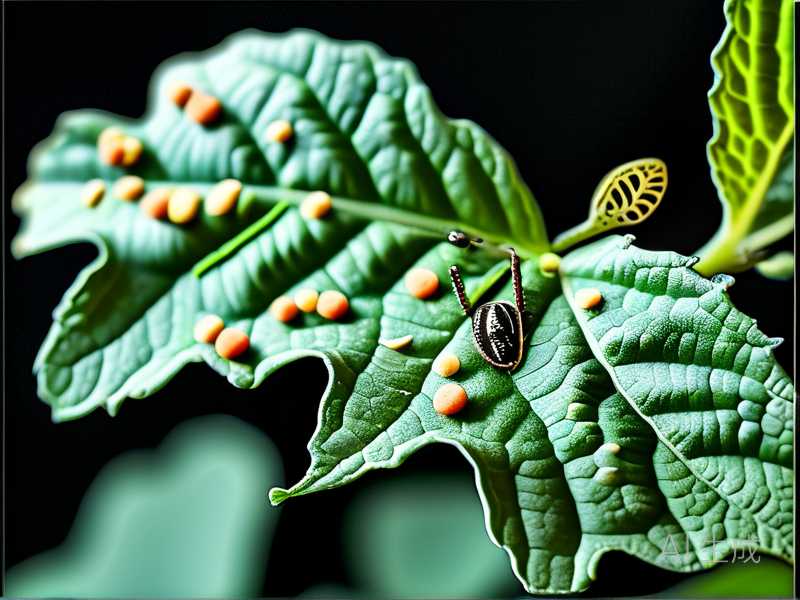
I saw a small mealybug on the echeveria. This is common in glass bubbles because humidity gets trapped. I used a cotton swab dipped in rubbing alcohol to dab it off. Problem solved.
Day 11-14
The succulents look vibrant. Colors are deeper. The leaves feel firm. Growth is slow but steady. I'm not messing with them. That's the secret.
I rotate the planter each day so all sides get light. The echeveria's rosette shape is staying compact. No stretching.
Common Problems I Faced (and How I Fixed Them)
Problem: Algae on the Glass
This happened because my planter stayed damp. I cleaned it with a soft cloth and white vinegar. Now I let the glass dry completely between waterings. Works perfectly.
Problem: Succulent Leggy
I had one succulent stretch out like a tower. That was from low light. I moved it to a brighter spot and trimmed the top. The stem was long and ugly. I cut it, let the cut callus over for 3 days, then replanted the rosette. New roots grew after 2 weeks.
Problem: Mold on Soil Surface
This was from overwatering and poor air circulation. I scraped off the moldy layer and replaced it with fresh dry soil. I also lowered the planter slightly so air could move through the opening.
Problem: Leaves Falling Off
I overwatered again. I repotted the succulent into dry soil and skipped watering for 10 days. The leaves stopped dropping. Lesson learned: check, don't guess.
FAQ: Answers to Questions I Wish I Had
Can I put multiple succulents in one glass bubble?
I tried this. It looks beautiful but creates problems. Each succulent has different water and light needs. They also compete for space. Roots get tangled. I now stick to one succulent per planter. Less drama.
How do I know when to water without a drainage hole?
Stick a bamboo skewer into the soil. Pull it out after 30 seconds. If the skewer feels damp or has soil stuck to it, skip watering. If it comes out clean and dry, it's safe to water.
I also lift the planter. A dry planter feels light. A wet one feels heavy. This takes practice but becomes intuitive.
Can I use artificial light for hanging succulents?
Yes. I use a small LED grow light hung 6 inches above my glass bubbles. It works fine. But natural light is better for color and growth. My burro's tail under artificial light turned pale green. Under natural light, it developed a pink blush.
Final Thoughts from a Recovered Overwaterer
I'm not a professional gardener. I'm just someone who killed way too many plants before learning the basics.
How to hang succulents in hanging glass bubble planters isn't rocket science. It's about respecting the plant's needs. Give them proper drainage, minimal water, and abundant light. They'll reward you.
The most important thing I can tell you is this: stop fussing. I ruined my best succulents by touching them too much. Let them be. Observe, don't overreact. And when in doubt, don't water. You can always add water later. You can't remove it once it's in.
If you want to see my current setup, I have three glass bubbles hanging in my kitchen window. One has a string of pearls cascading down. Another has a dark purple echeveria. The third is empty right now—I'm waiting for the right plant.
Maybe you'll find your own green thumb. It just took me a while to find mine.