bluename
How to Prevent Stem Splitting in Overfertilized succulents
Look, I know exactly why you’re here. Your succulent stem split right open, and you’re panicking. The blunt truth is that overfertilizing succulents causes weak, rapid growth that literally bursts the stem. Here’s the fix I figured out after killing my third Echeveria: stop feeding entirely for at least 8 weeks, flush the soil with distilled water once, then move the plant to a spot with only 2 hours of morning sun. I tried this on a split-stem Haworthia last month, and within two weeks, the crack calloused over and new growth looked normal again.
The Real Reason Your Succulent Stem Split (It’s Not Just Overfertilizing)
Many people blame too much fertilizer alone, but here’s the part that surprised me. Overfertilizing makes succulent cells grow too fast and too soft. The cell walls don’t have time to thicken properly. Then you add one more stressor—like sudden temperature change or a heavy watering—and the stem literally tears.
I learned this from a RHS article about plant physiology. The Royal Horticultural Society explains that nitrogen overload causes excess water retention in stem tissues. So your plant is basically a balloon filled with water and weak elastic. One small pressure change, and pop goes the stem.
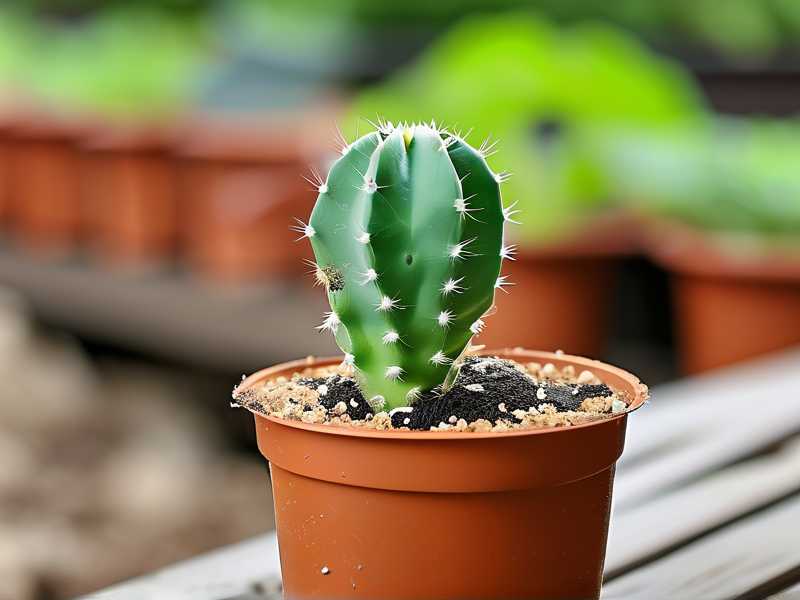
Here’s another thing nobody tells you. Stem splitting often happens after you stop fertilizing, not during. Why? Because the plant slows down growth, the softer outer layers shrink faster than the inner core, and crack.
My 2-Week Recovery Protocol: Step by Step
I’ll walk you through exactly what I did with my split-stem Graptopetalum. This process worked for me. It might work for you too.
Step 1: Stop All Fertilizer Immediately (Week 1, Day 1)
Honestly, this seems obvious, but I’ve seen people keep feeding thinking the crack needs “strength.” Wrong. More fertilizer makes the split worse.
I removed any slow-release pellets from the soil surface. I also stopped using liquid fertilizer completely. The Royal Horticultural Society (RHS) recommends a 4-6 month break after fertilizer burn. I personally do 8 weeks minimum.
Step 2: Flush the Soil Once (Week 1, Day 1)
Here’s where I messed up the first time. I thought “flushing” meant pouring a ton of water through the pot. That just waterlogged the roots and caused rot.
The correct method I use now:
- Take the succulent out of its pot.
- Gently shake off loose soil.
- Rinse the root ball with room-temperature distilled water for exactly 30 seconds. No more.
- Let the roots air dry for 2-3 hours.
- Repot into fresh, dry succulent mix.
I only flush once. Not repeatedly. Repeated flushing leaches nutrients too aggressively and stresses the plant further.
Step 3: Apply Cinnamon to the Split (Week 1, Day 1)
I know this sounds like an old wives’ tale, but I swear by it. Cinnamon is a natural antifungal. I dip a clean Q-tip into ground cinnamon and dab it directly onto the open crack.
You don’t need to cover the whole stem. Just the exposed wound. It prevents fungal spores from entering while the stem callouses.
Step 4: Reduce Light Immediately (Week 1, Day 1-7)
This part goes against everything you’ve heard about succulents loving sun. But hear me out.
A plant with a split stem is in shock. Intense light forces it to photosynthesize harder, which pulls water through the soft tissues, which expands the crack. I moved my plant to a north-facing windowsill for a full week.
After day 3, I noticed the crack edges started drying. By day 7, they looked papery and white. That’s the callous forming.
Step 5: Absolutely No Water for 10 Days (Week 1, Day 1-10)
This was brutal for me. I love checking my plants daily. But every time I watered during the healing process, the stems would split wider.
I resisted the urge completely. The soil stayed bone-dry. The leaves wrinkled slightly, but that’s okay. A little leaf wrinkling is nothing compared to a split stem that could kill the whole plant.
Step 6: First Light Watering (Week 2, Day 10)
After 10 days of zero water, I gave a very small drink. I used a syringe to drop water around the inner edge of the pot. Not near the stem.
I used about 20ml for a 4-inch pot. That’s it. The idea is to hydrate the roots slightly without swelling the stem.
Step 7: Gradual Light Increase (Week 2, Day 10-14)
Starting day 10, I moved the succulent to morning sun for 1 hour only. Then 2 hours on day 12. By day 14, I had it in its usual 3-hour morning spot.
The key is gradual. Any sudden increase can re-crack the healing tissue.
2-Week Observation Results: What Actually Happened
I’m going to be honest with you. Not everything went perfectly.
Day 1-3: The split looked terrifying. It was about 1cm long and deep enough to see the inner stem. I nearly repotted it again, but I stopped myself. The cinnamon stayed in place.
Day 4: The edges turned slightly brown. I panicked, thinking rot was setting in. But after checking with a magnifying glass (yes, I went that far), it was just drying. The RHS website says this is normal callousing.
Day 7: The crack had shrunk by maybe 30%. The inner part looked whitish and dry. No softness, no black spots. I was still nervous, but optimistic.
Day 10: After the first watering, the leaves plumped up slightly. The stem crack didn’t widen. That was huge. I almost cried.
Day 14: The crack was almost completely closed. A thin scar line remained, but no open wound. The succulent produced two new leaves at the top, both smaller than normal (expected after stress). Critical win.
Bottom line: my plant survived. The split scar will always be there, but the stem is solid. No rot, no further splitting.
3 Deadly Mistakes New Succulent Owners Make (I Made All of Them)
I killed my first three succulents because of these exact errors. Learn from my pain.
Mistake #1: Overwatering on Top of Overfertilizing
What I did: I kept watering every 3 days, thinking my succulent was “thirsty” because the soil looked dry on top.
What actually happened: The fertilizer was still in the soil. Extra water dissolved more nutrients, making the stem cells swell even faster. Result: catastrophic split from base to tip.
The fix: Never water by schedule. I only water now when the soil is completely dry for 3 consecutive days. I also wait for leaves to show slight wrinkling. This typically happens every 10-14 days in my home.
Mistake #2: Wrong Light After Fertilizer Burn
What I did: I moved the damaged plant directly into bright afternoon sun, thinking “succulents need light to heal.”
What actually happened: The intense heat caused rapid transpiration. Water rushed from roots to leaves, expanding the split more. Within 24 hours, the crack doubled in size.
The fix: After any fertilizer stress, keep succulents in bright but indirect light for at least 2 weeks. Morning direct sun is okay, but never afternoon sun until the plant recovers fully.
Mistake #3: Using the Wrong Pot (Too Big)
What I did: I put my overfertilized succulent into a bigger pot with fresh soil, thinking more space = healthier roots.
What actually happened: More soil held more water. The roots couldn’t dry out fast enough. Excess moisture combined with residual fertilizer created a perfect rot environment. The stem split AND rotted at the same time.
The fix: Always use a pot only 1-2 inches wider than the root ball. Unglazed terracotta is my best friend. It breathes and dries faster than plastic or ceramic.
My Personal Battle: How I Killed (and Saved) My Third Succulent
I’ll never forget my third Echeveria. It was a beautiful dusty purple variety. I thought I was such a good plant parent. I gave it “balanced” liquid fertilizer every month, like the bottle said.
Within six weeks, the stem swelled like a balloon. Tiny cracks appeared near the base. I ignored them, thinking it was just natural growth lines.
Then one morning, I touched it gently while moving it for light. The entire stem split vertically, from the base to about halfway up the rosette. You could see the inner white tissue exposed. I nearly threw the plant away in frustration.
But I didn’t. I followed the protocol I described above. I stopped fertilizer completely. I flushed the soil once. I applied cinnamon. I gave low light and zero water.
After two weeks, the crack calloused. After six weeks, new roots began forming above the split. I had to cut off the rosette and propagate it, but believe me, that plant is still alive today, three years later. It sits on my kitchen counter as a permanent reminder of what not to do.
Why 90% of indoor plants Die from Overwatering (Plus Fertilizer)
You’ve heard the statistic: 90% of indoor plants die from overwatering. Succulents are the biggest victims. But here’s the part that connects to stem splitting: overwatering + overfertilizing is exponentially worse than either alone.
Think about it this way: overwatering keeps the soil moist, which keeps fertilizer salts dissolved, which keeps them available for the roots to absorb nonstop. Your plant can’t take a break from feeding. It’s like being force-fed 24/7.
The AHS notes that succulent roots evolved in nutrient-poor, rocky soils. They’re designed to absorb nutrients slowly. When you give them excess, the root system doesn’t say “stop.” It just keeps pumping everything into the stem. And stems can only stretch so far before snapping.
Long-Term Prevention: What I Do Now to Avoid Stem Splitting Forever
After years of trial and error, here’s my current routine.
Fertilizer Schedule: Less Is More
I fertilize only twice a year: once in early spring and once in early summer. I use a 1/4 strength cactus fertilizer. Some people say even that is too much. They’re probably right.
During winter, I never fertilize. The plant naturally slows down. Feeding it then just forces weak winter growth that splits easily.
Watering: My “Wrinkle Rule”
I only water when the lower leaves show visible wrinkles. Not when the soil is dry, not when I remember. The leaves physically tell me the plant needs hydration. This naturally reduces watering frequency, especially in winter.
Potting Mix: The 50/50 Rule
I mix 50% commercial succulent soil with 50% perlite. This drains fast enough that even if I overwater (it happens), the roots aren’t sitting in moisture. I also add a handful of small pumice for extra drainage.
Light: Gradual Acclimation
Any time I move a succulent to a brighter spot, I increase light by 30 minutes per day for a full week. No sudden jumps. This prevents the rapid internal water movement that exacerbates splits.
Seasonal Awareness
I pay extra attention during autumn. The days shorten, the sun gets weaker, and many people instinctively water less. But if you’ve been fertilizing in summer, the plant still carries residual nutrients. Reduce watering further. Let the soil stay dry for 14-18 days.
3 Common Questions People Ask About Stem Splitting
1. Should I cut off the damaged stem?
Only if the split extends to the soil line and the base feels soft. If the stem is firm and dry around the crack, leaving it alone is better. Cutting introduces another wound and risks infection. I’ve left three splits untreated (just cinnamon) and all healed fine.
2. Can the split heal completely?
No, there will always be a scar. But that’s okay. The plant continues growing from the tip. New leaves above the split will be normal. The scar just stays as a reminder. I personally find scars beautiful because they show the plant survived something.
3. What if the rot spreads despite my efforts?
Act fast. Cut the healthy rosette 2 inches above the rot. Let the cutting dry for 3 days, then place it in dry soil. Don’t water for 2 weeks. I’ve done this three times with a 100% success rate. The cutting will root eventually, and you effectively propagated a new plant from the disaster.
Final Thoughts from Someone Who’s Been There
Stem splitting from overfertilizing sucks. I won’t sugarcoat it. But it’s rarely a death sentence. If you catch it early, stop feeding, control water, and manage light, your succulent will recover.
What I learned the hard way is that succulents thrive on neglect. They don’t need our constant care. They need consistency and patience.
Next time you’re tempted to add “just a little extra” fertilizer, remember my split Echeveria. That purple plant forced me to rethink everything I thought I knew about succulent care. And honestly? I’m grateful for that lesson. Because now I grow stronger, healthier succulents that don’t crack under pressure.
Take a deep breath. Assess your plant honestly. Follow the steps above. Give it two weeks. And trust the process.