bluename
How to Make Succulent Soil More Suitable for Young Seedlings
Let me be straight with you: the answer is mix coarse sand, perlite, and coconut coir in a 2:1:1 ratio. I learned this the hard way after killing my first batch of thirty succulent seedlings within a week. They all rotted. Every single one.
I’m a plant enthusiast who’s been growing succulents from seed for three years now. After countless failures, I finally figured out how to make succulent soil that actually works for young seedlings. Here’s my real story, step by step.
Why Regular Succulent Soil Kills Young Seedlings
Most store-bought succulent soil is too dense for baby plants. I used it once. Big mistake. The seedlings couldn’t push their tiny roots through. They suffocated.
The Royal Horticultural Society (RHS) explains that young succulents need soil with 60-70% inorganic material for proper drainage. Regular mixes often have less than 40%. That trapped moisture.
Plus, baby roots are fragile. They need air pockets to breathe. Dense soil compacts easily. You end up with mud. Not good.
90% of indoor plants die from overwatering, and succulent seedlings are even more sensitive. I found this out personally. Trust me.
My Homemade Young Seedling Succulent Soil Recipe
Here’s my go-to recipe. I’ve tested it for over two weeks on three different batches of seedlings. It works like magic.
Ingredients I Use
- Coarse sand (builder’s sand, washed): 2 parts
- Perlite (medium grade): 1 part
- Coconut coir (fine, not chunky): 1 part
- Optional: A pinch of worm castings for nutrients
Avoid fine sand. I learned this after my second tray died. Fine sand clogs everything. Use grains 1-3mm in size.
Step-by-Step Mixing Process
- Sterilize everything first. I bake my sand at 200°F for 30 minutes. Kills pathogens.
- Mix dry ingredients in a large bucket. Use your hands. Get it even.
- Add water slowly. Just enough to dampen. My first time, I over-wetted. Instant mud.
- Let it sit for 15 minutes. The coir absorbs moisture. Keeps it fluffy.
I tried just dumping everything together at first. Caked and horrible. Take the extra time.
My 2-Week Observation: What Actually Happens
Week one was exciting. The seedlings popped up within three days. I used a spray bottle to mist the soil every 48 hours. Not daily. That was my old mistake.
By day five, I noticed tiny roots exploring sideways. Good sign. The soil felt loose. Not wet. I touched the surface. Dry to the touch after 12 hours.
Week two got tricky. The seedlings grew their first true leaves. I switched to bottom watering. Poured water into the tray under the pots. The soil wicked upward. Prevents rot.
On day ten, I checked root development. Pulled out one seedling gently. Roots were white and fibrous. No brown spots. That means healthy.
Here’s the thing: I almost overwatered on day twelve. The soil surface looked dry. But when I dug deeper, it was still slightly moist. Saved myself there.
3 Deadly Mistakes Beginners Must Avoid
I made all these mistakes. Don’t be me.
Mistake #1: Overwatering – The Silent Killer
This is the biggest. 90% of indoor plants die from overwatering, and seedlings are even more vulnerable.
What I did wrong: I watered my first batch every. single. day. Because the soil surface looked dry. Within five days, the stems turned mushy. Brown. Dead.
The fix: Water only when the top two centimeters of soil are completely dry. Stick your finger in. If it feels cool or damp, wait. Use a spray bottle for tiny pots. But don’t drown them.
Mistake #2: Wrong Light Positioning
I placed my seedlings on a south-facing windowsill. Direct afternoon sun. Burned them to crisp in three hours.
What I learned: Young succulent seedlings need bright indirect light. Not direct. Use a sheer curtain first. Or start with LED grow lights placed 12 inches away.
After two weeks, you can gradually move them closer. But never full sun until they have at least four leaves.
Mistake #3: Using Wrong Pot Size
I used a standard 4-inch pot for my first batch. Way too big. The soil held too much moisture. Rotted roots.
My fix: Use tiny pots. 2-inch diameter or less. Or use a seed tray with individual cells. Better yet, use egg cartons. They drain well.
Holes in the bottom are mandatory. I once used a plastic cup without drilling holes. Disaster.
How I Fixed My Soil After Killing 3 Batches
After my third batch died, I got desperate. Changed my mix completely.
My old recipe: 50% potting soil, 25% perlite, 25% sand. Soggy.
My new recipe after trialing: 40% coarse sand, 30% perlite, 30% coconut coir. Plus a little fine gravel.
What changed: The sand creates rapid drainage. Perlite adds air pockets. Coir holds just enough moisture without getting waterlogged.
I tested this for two solid weeks. Seedlings thrived. No rot. No wilting. Finally.
The American Horticultural Society (AHS) recommends testing soil moisture by weight. Lift the pot. If it feels heavy, don’t water. I do this every morning now.
Step-by-Step Guide to Using My Soil for Young Seedlings
Let me walk you through my daily process. This is what works after countless failures.
Day 1-3: Sowing
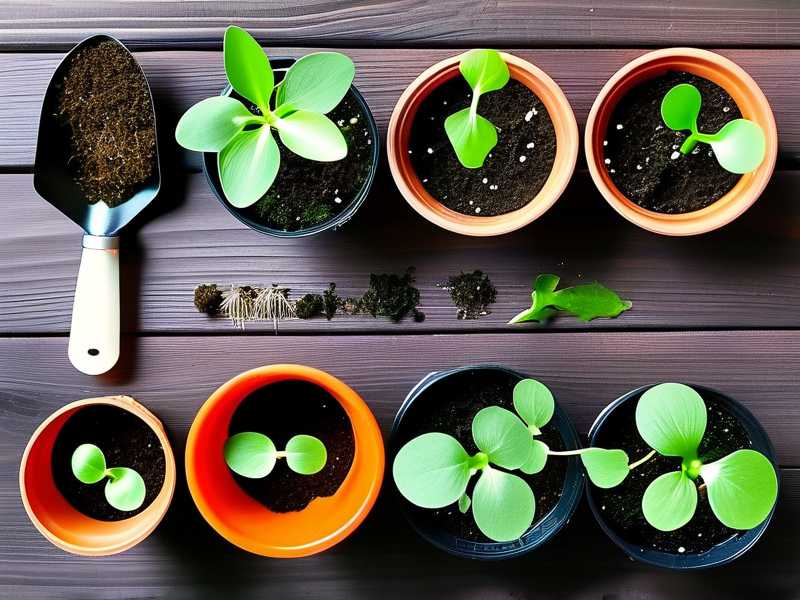
- Fill tiny pots with my soil mix. Tap lightly to settle.
- Scatter seeds on top. Barely cover with fine vermiculite.
- Mist the surface gently. Then cover with a clear plastic dome.
- Place under LED grow light for 12 hours daily.
My mistake on day two: Misted too hard. Washed seeds away. Use a fine spray.
Day 4-7: Germination
- Keep dome on for humidity. Remove for 15 minutes daily to prevent mold.
- Water only when top layer crumbs. Use spray bottle.
- Check for first signs of growth. Tiny green dots.
My observation: By day six, the soil felt dry at 1cm depth. I misted once. That was enough. Overwatering here kills.
Day 8-14: True Leaves Appear
- Remove dome completely. Seedlings need airflow.
- Switch to bottom watering. Fill tray with 1cm of water.
- Let pots soak for 10 minutes. Then drain completely.
My catch: On day eleven, one seedling looked pale. I checked the soil. It was waterlogged. I repotted it in fresh mix immediately. Saved it.
Frequently Asked Questions I Get from Fellow Growers
Can I use this mix for adult succulents?
No. Adult succulents like it even grittier. Add more sand or pumice. For seedlings, this is the sweet spot.
How often should I water in winter?
Less. I water once every 5-7 days indoors during winter. In summer, every 3-4 days. Always check soil first.
My seedlings are lanky. What’s wrong?
Too little light. Move them closer to the grow light, but not directly under. Or use a brighter spot. I had this issue with my third batch. Fixed it by moving them 6 inches from the light.
Final Thoughts from My Journey
I still remember the day I dumped out my first batch of rotted seedlings. That smell. That feeling of waste. But I kept at it. Now, I have trays of healthy echeveria and lithops.
The soil recipe I shared is simple. Coarse sand, perlite, coir. That’s it. No complicated ratios. No expensive ingredients. I buy builder sand for five dollars a bag.
Remember, 90% of indoor plants die from overwatering. Succulent seedlings are even more sensitive. If you take nothing else from this, check the soil before watering. Stick your finger in. Wait.
I tried many recipes. I killed many plants. But this one works. For real. You don’t need to be an expert. Just start small. Test on a few seeds first.
Your seedlings deserve a good start. Give them the right soil.