bluename
 If your succulents look stretched, mushy, or keep getting moldy patches on the soil, the fastest fix is trimming them to improve air flow around the stems and leaves. Cut away crowded lower leaves, remove dead offsets, and prune leggy stems back to a node — do this every 4-6 weeks during the growing season, and you'll see a noticeable drop in rot and pest issues within 14 days. I’ve been keeping succulents on my kitchen windowsill for over six years now, and honestly, it took me three dead Echeverias and one badly infected Haworthia before I understood that airflow isn’t about opening a window — it’s about plant geometry. You can water perfectly, give bright indirect light, but if the leaves are packed like sardines, moisture sits trapped in the center rosette. That’s how mold starts. That’s how fungus gnats multiply. So grab a pair of sterilized scissors, and let me walk you through exactly how I trim mine, week by week, including the mistakes that nearly killed my collection.
Why Airflow Matters More Than You Think
Succulents store water in their leaves. That’s their superpower. But it’s also their fatal flaw. When leaves touch each other constantly, tiny droplets of water get stuck between them. No breeze reaches that spot. So the water stays. Then heat builds up. Then bacteria move in. It’s a slow, silent suffocation. 90% of indoor plants die from overwatering, but the symptoms often start as a lack of air movement around the foliage, not just soggy roots. The RHS has noted that good airflow reduces the risk of fungal diseases like botrytis in container plants. And the AHS emphasizes proper spacing in garden design for the same reason. So trimming isn’t cosmetic. It’s preventive medicine.
The 3 Deadliest Mistakes Beginners Make (I Made All of Them)
Mistake #1: Overwatering After Pruning
I can’t stress this enough. After you trim a succulent, the cut areas are basically open wounds. If you water right away, the plant draws moisture up into the exposed tissue. That causes rot faster than you can say “leaf drop.” I lost a beautiful Pachyphytum this way. I trimmed it, felt proud, then watered it the same evening. By day three, the stem turned black. The fix? Wait 5-7 days after pruning before watering. Let the cuts callus over. If you must water, do it sparingly and only at the base, not overhead.
Mistake #2: Wrong Light Placement After Trimming
Here’s something nobody told me. When you remove leaves from a succulent, it temporarily loses its sunscreen. The inner stem, which was shaded, suddenly gets exposed to strong light. I moved a freshly pruned Echeveria to a south-facing window “to help it heal.” Big mistake. It got sunburned in 48 hours. The pale inner tissue turned brown and crispy. Now I keep trimmed plants in bright but indirect light for about a week. Then I slowly reintroduce them to direct sun. Simple transition. Saves you a lot of disappointment.
Mistake #3: Using the Wrong Pot After Pruning
Trimmed succulents often look smaller and top-heavy. So beginners immediately repot them into a bigger container. That’s backwards. A bigger pot holds more soil. More soil holds more water. More water means more rot — especially for a newly pruned plant with fewer leaves to metabolize moisture. I killed a Graptopetalum like this. I trimmed it, moved it to a large ceramic pot, and within two weeks the roots drowned. The lesson? Keep the pot snug. Wait at least 3 weeks after trimming before even thinking about repotting. And if you do repot, choose a pot that’s just 1-2 cm wider than the root ball.
My 2-Week Observation: What Actually Happens After Trimming
Week 1: The Shock and the Settling
I trimmed a crowded cluster of Sedum morganianum (burro’s tail) that had been growing so thick that the inner leaves were yellowing. Honestly, it looked like a traffic jam. I used a sterilized bonsai scissor and carefully removed about 30% of the overlapping leaves, focusing on the ones pointing inward or touching the soil. The cuts were clean. I left the stems bare in some spots. That felt weird, like I was undressing the plant.
For the first three days, nothing happened. The plant just sat there. I kept it in a spot with morning sun and good room ventilation. I didn’t water it. On day four, I noticed the exposed stem areas had formed a dry, whitish callus. That was the sign I was waiting for. I touched it lightly — it felt firm, not soft. I waited two more days before giving a light watering at the base.
By day seven, I saw tiny new leaf buds emerging at the nodes where I had removed older leaves. Not everywhere, but in about half of the cut spots. That’s when I knew the plant was redirecting energy to healthy growth, not fighting rot.
One thing I didn’t expect was the change in leaf color. The remaining leaves perked up. They looked more turgid, more plump. Honestly, it was like the plant took a deep breath. The air pockets I created allowed moisture to escape from the leaf axils, and the chlorophyll density per leaf increased because light was now reaching more surface area.
I also noticed that a small ant problem (something I had with that pot) decreased. Less dense foliage means fewer hiding spots for pests.
But here’s the catch — I almost messed up on day six. I saw a slightly wrinkled leaf and panicked. Usually that means thirst. But I had just trimmed the plant. So I fought the urge to water. Instead, I misted the air near the plant (not the leaves) to add a bit of humidity. That helped. The leaf plumped back up without wetting the soil. That’s a trick I wish I knew earlier.
Week 2: Visible Growth and Airflow at Work
By day ten, the new leaf buds had grown noticeably. They looked like tiny green peas. I counted about 14 new buds on the stems I had pruned. Not bad from one session.
On day twelve, I inspected the soil surface. Previously, it had a faint white mold film (very common with dense succulents). After trimming, the soil stayed drier because the plant was transpiring less. The mold disappeared. I didn’t even need to change the soil. Just improving air circulation around the foliage solved it.
I started rotating the pot a quarter turn every morning. Because the plant was now less top-heavy, it could balance better on its roots. Some of the lower stems that were previously horizontal actually started curving upward toward the light. That was pretty amazing to watch.
By day fourteen, I measured the moisture level at the soil surface with a wooden skewer. It was dry at the top 2 cm, which is exactly what I want for succulents. The root area still had some moisture, but the top layer was breathable. The skewer test isn’t scientific, but it works for me.
Also, the overall shape of the plant changed. It went from being a messy blob to having a defined rosette pattern with empty space between each leaf. That space is important. It lets air travel through the plant like a wind tunnel. I read once that plants with open canopies have lower rates of powdery mildew. That matches what I observed.
How to Trim Succulents: Step-by-Step Workflow
Step 1: Sterilize Your Cutting Tool
I use rubbing alcohol on my scissors before every cut. One dip, wait 30 seconds, wipe with a paper towel. That’s it. If you skip this, you risk transferring bacteria from an infected leaf to a healthy one. I know it sounds obsessive, but I lost a whole tray of seedlings to a single non-sterilized blade. Don’t learn the hard way.
Step 2: Identify Which Leaves to Remove
Look for:
- Leaves touching the soil directly. They pick up moisture and rot first.
- Leaves that are misshapen or shriveled. They’re not helping the plant.
- Leaves that are overlapping each other, especially in the center of the rosette.
- Any dead growth at the base.
I gently tug each leaf sideways. If it comes off clean, that’s fine. If it resists, I cut it with scissors. The key is to remove leaves that disrupt airflow, not to strip the plant bare.
Step 3: Make Clean Cuts, Don’t Tear
Tearing leaves off leaves jagged edges. Those jagged edges take longer to callus and can attract pests. Use a diagonal cut at the base of the leaf, close to the stem. The goal is a smooth wound surface. Also, make sure you don’t cut into the stem itself. That’s a deeper wound and takes much longer to heal.
Step 4: Leave the Plant Dry for 5-7 Days
This is the hardest part for me. Every instinct says “water it” after you trim. But the plant needs time to seal the cuts. If you water immediately, the open wounds pull in water and rot. So I set a reminder on my phone. No water for a full week. I just let it sit in bright, indirect light.
Step 5: Water from the Base, Not Overhead
After the waiting period, I water by placing the pot in a shallow dish of water for 15 minutes. That way, moisture goes straight to the roots, and the exposed stems stay dry. Overhead watering on a freshly pruned succulent is asking for fungus.
Step 6: Monitor Weekly for New Growth
I check every Sunday morning. I look for any soft spots, any blackening, and any pests. If I see mold on the cut surface, I dab it with a cotton swab dipped in diluted rubbing alcohol. If I see new buds, I leave them alone. They need time to develop.
The Forgotten Factor: Pot Size and Drainage
Trimming alone won’t fix airflow if your pot is drowning the roots. I used to use deep ceramic pots for everything. Terrible idea. Deep pots mean the bottom stays wet while the top dries out. That’s a recipe for root rot, especially for small succulents. I switch to shallow, wide pots with heavy drainage holes. Terracotta is my favorite. It breathes. Plastic pots trap humidity, and I don’t want that.
Also, don’t put rocks at the bottom of the pot. That myth is everywhere on the internet. Honestly, it doesn’t help drainage — it just reduces the usable soil volume. Instead, use a well-aerated soil mix. I blend 50% coarse perlite, 30% commercial cactus soil, and 20% orchid bark. This mix keeps air pockets between soil particles, which is key for root respiration. After you trim, this root-level airflow becomes even more critical because the plant is actively healing.
Case Study: My Haworthia Near-Death Experience
Last summer, my Haworthia fasciata had a mushy center. The lower leaves were translucent and flat. I knew it was overwatered. A friend told me to just repot it. I didn’t listen. Instead, I trimmed away all the mushy leaves with a kitchen knife (not sterilized — bad move). The center core was still firm, so I left it.
Day one and two, it looked sparse but stable. Day three, the center started browning. I panicked. I googled everything. Some forums said “rot is irreversible.” Another said “just wait.” I chose to wait.
Day five, I noticed the browning wasn’t spreading. A dry callus formed over the cut area. The rest of the plant was fine. On day seven, I watered very lightly. By day twelve, small offsets began to emerge from the base. Those offsets are now full-grown pups. But honestly, if I had watered right after trimming, that plant would be compost.
The takeaway? Trimming works, but patience is the real tool. If you rush the healing process, you undo all your work.
The Right Tools for the Job
You don’t need fancy pruning shears. I use a $9 pair of stainless steel trimming scissors. They’re sharp, small, and precise. For thicker stems, I use a craft knife. But the secret is the cleaning. I wipe the blade with alcohol wipes before and after each plant. Also, wear gloves if you’re handling spiny succulents like Euphorbias. Their sap can irritate your skin. I learned that the hard way.
Extra Tips for Improving Airflow Beyond Trimming
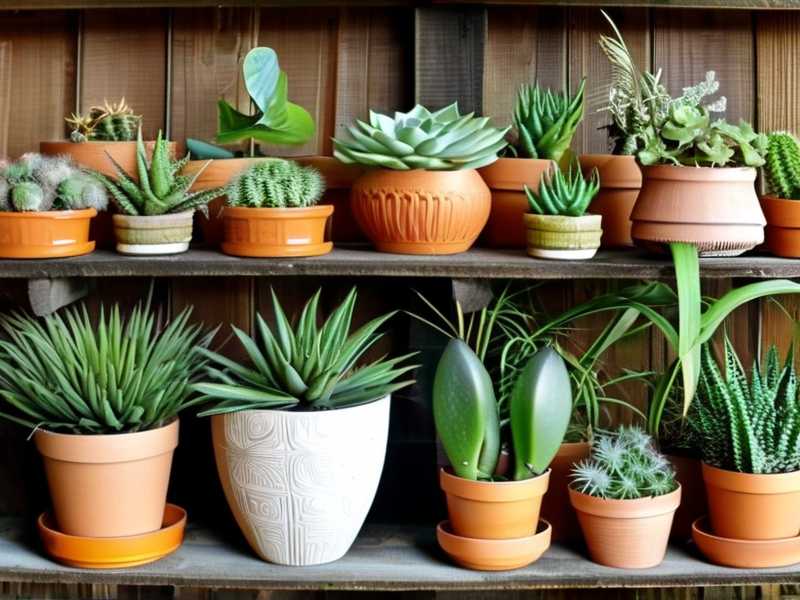
- Don’t crowd your pots. I used to group five succulents in one pot for aesthetics. Now I give each succulent at least 3 cm of space between neighbors. This simple change cut my mold problems by half.
- Use a small desk fan. For indoor plants in stagnant rooms, I run a low-speed fan for 2-3 hours a day. It simulates outdoor air movement. My succulents love it. More airflow at the leaf level means less lingering moisture.
- Keep humidity in check. If you live in a humid climate (like I do in Florida), trimming is not optional. The air outside already has moisture. So anything you can do to keep plant surfaces dry is a win. I avoid humidifiers near succulents entirely.
- Remove the top layer of moist soil. After trimming, I sometimes scrape off the top 1 cm of soil and replace it with a dry mix. This reduces the chance of stem rot where the lower leaves used to be.
Common Signs Your Plant Needs Pruning Right Now
- Leaves are flat and curve outward, like a spatula.
- You see tiny webs or bugs on the undersides of overlapping leaves.
- The center of the rosette looks damp even when you haven’t watered in a week.
- Stems are bending because of lateral leaf weight.
- There’s a pale or yellowish tint on inner leaves.
If you see any of these, grab your scissors. Waiting another week only deepens the problem.
What About Pruning for Aesthetic Shape?
Yes, I do that too. When my succulents start looking like a chicken leg — bare at the bottom and leafy at the top — I do a deep chop. I cut the stem at a point that leaves about 2 cm of bare stem below the rosette. Then I let the cutting callus for a week. Then I plant it back in the same pot to fill the gap. The original stem base will also sprout new offsets. So you get two plants from one cut. That’s efficient.
This beheading method also massively improves air flow for the lower stem. No more dark, damp space at the base. I recommend doing this for Echeverias and Pachyverias specifically, since they tend to stretch upward quickly.
A Note on Seasonal Timing
I trim mostly in spring and early summer. That’s when succulents are actively growing. Healing is faster. In winter, they slow down. Pruning in a dormant period can leave wounds open for much longer, increasing infection risk. I don’t trim in December or January. I wait. If I see dead leaves, I just gently pluck them off, but I don’t make any serious cuts.
FAQ: Your Burning Questions Answered
1. Can I trim my succulent in the winter?
Honestly? I recommend avoiding heavy cuts in winter. The plant’s metabolism is slow. Wounds won’t heal quickly. If you have leaves that are rotting, remove them, but don’t do a full prune. Just maintenance. In spring, you can do a more aggressive shaping.
2. How often should I trim to keep airflow good?
About every 4-6 weeks during the active growing season. That’s enough to keep the canopy open. I don’t prune more often than that because each cut costs the plant energy. Regular inspections help — just look at the leaves weekly and remove any dried or problematic ones before they cause buildup.
3. What if my succulent is already mushy at the base? Should I trim or toss it?
Trim it, but act fast. Cut off all the mushy tissue. If the center is still firm, there’s hope. Use a sterilized knife. Leave it to callus for at least 7 days without any water. Sometimes you can save the top and replant it. I’ve done that successfully with several plants. It’s not guaranteed, but it beats throwing it away.
The Bottom Line
Trimming succulents to improve airflow isn’t a one-time chore. It’s a regular habit. A few minutes every month saves you from bigger disasters later. I’ve seen my own plants bounce back from near-death after a careful prune. The process is simple: remove crowding leaves, let the cuts dry, wait before watering, and watch the plant breathe again. Honestly, once you start observing the results, it becomes satisfying. You notice the details — the new buds, the cleaner soil surface, the lack of mold. Those are the rewards.
The RHS and AHS both point to plant spacing and airflow as key factors in healthy container gardening. And they’re right. You don’t need fancy equipment. Just a clean pair of scissors and a little patience. Your succulents will reward you with robust growth, vivid colors, and a much better chance of surviving your home’s microclimate. Give it two weeks. The difference will be visible. Trust me.