bluename
 How to Choose succulents for Rock Gardens
Let me save you hours of trial and error. Choosing succulents for rock gardens comes down to three things: hardiness, drainage needs, and growth habit. Pick cold-hardy varieties like Sempervivum and Sedum, ensure your rock garden has sharp drainage, and match plant sizes to your rock scale. I killed my first three rock garden succulents before I figured this out. The biggest mistake? Buying tender succulents that couldn't survive winter. The second? Planting them in soil that held too much water. The third? Choosing varieties that grew too large for the space. Today, I will walk you through exactly how to avoid these pitfalls. I have been growing succulents in rock gardens for six years now. My current garden has over forty varieties thriving. It took real failures to get here.
My Journey with Rock Garden Succulents
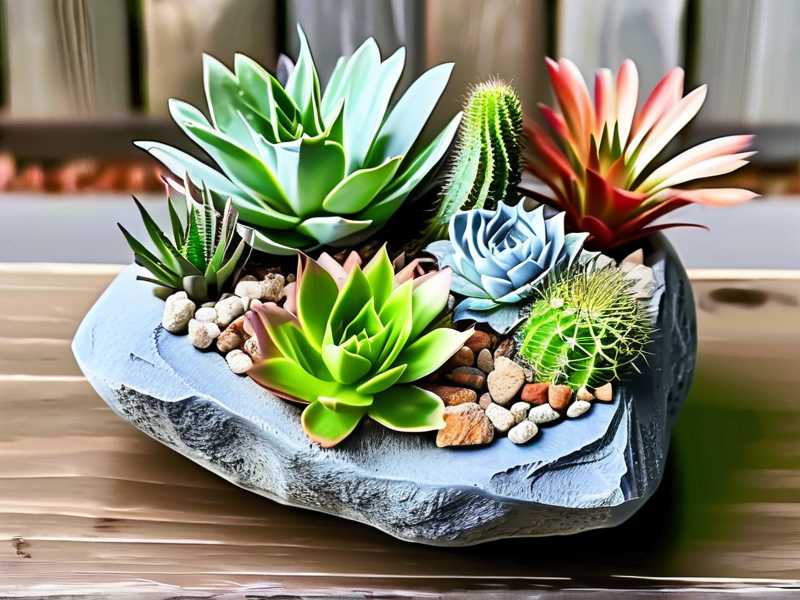
I started my rock garden in 2018. Back then, I thought any succulent would work. I was wrong. I bought a beautiful Echeveria from a big box store. It died within three weeks. Then I tried a Haworthia. Also dead. I lost four plants before I started researching properly. The problem was simple. I ignored the difference between indoor succulents and outdoor rock garden succulents. They need completely different conditions.
The Three Deadly Mistakes Beginners Make
Mistake 1: Overwatering
90% of indoor plants die from overwatering. Rock garden succulents die from the same issue outdoors. I used to water my rock garden every three days. I thought succulents needed constant moisture. They do not. In fact, most rock garden succulents prefer to dry out completely between waterings. The roots will rot if they sit in wet soil. I learned this the hard way with a beautiful Rosularia. It turned to mush within a week.
The fix is simple. Water deeply but rarely. Let the soil dry completely. Then water again. In most climates, natural rainfall is enough. I only water my rock garden during extended dry spells. That is maybe once every two weeks in summer. During winter, I do not water at all.
Mistake 2: Wrong Light Exposure
I placed my first rock garden in full afternoon sun. Within a week, the succulents looked sunburned. The leaves turned white and crispy. I had chosen varieties that preferred partial shade. Meanwhile, my sun-loving Sempervivums were in a shady corner. They stretched out and lost their rosette shape. It was a mess.
Here is what I learned. Different succulents need different light levels. Some thrive in full sun. Others need afternoon shade. Observe your garden before planting. Track how much sun each area gets. Then match your plants to the conditions. For full sun areas, choose Sempervivum, Sedum, and Delosperma. For partial shade, try Haworthia or certain Aloe varieties.
Mistake 3: Using the Wrong Containers and Soil
This mistake is about soil, not the garden itself. I initially used regular garden soil. It compacted and held water. My succulents suffocated. The rocks did not help either. I arranged them tightly, trapping moisture underneath. I had create a miniature swamp. A terrible environment for these plants.
The solution? Create a gritty, fast-draining mix. I now use one part coarse sand, one part perlite, and two parts potting soil. This proves much better. It drains quickly and does not compact. Also, leave space between rocks. Do not bury the rocks in soil. Place them on top. This keeps the area around the roots open and airy.
My Proven 2-Week Observation Process
Once you have planted your succulents, watch them closely. I developed a simple 14-day observation routine. This has saved many plants.
Day 1-3: Settling In Period
After planting, water thoroughly once. Then leave the plants alone. Do not touch them. Do not water again. The roots need time to recover from transplant shock. I check daily for physical damage. But I resist the urge to fuss.
Day 4-7: Watching for Stress Signs
By day four, I start looking for problems. Yellowing leaves mean too much water. Wrinkled leaves mean too little. Brown spots mean sunburn. Pale, stretched growth means insufficient light. I check every morning. Quick visual scan takes two minutes. If the plant looks good, I leave it alone.
Day 8-10: Root Establishment Check
Around day eight, I gently tug on each plant. If it resists, roots are establishing. If it comes out easily, it needs more time. During this phase, I keep the soil slightly moist. But just at the surface. The deeper soil stays dry. This encourages deep root growth.
Day 11-14: Full Assessment
By day fourteen, I know if the plant will survive. New growth appears at the center. Colors deepen. The plant looks firmly rooted. If a plant still looks bad, I dig it up and inspect the roots. Rotted roots smell terrible. They look dark and mushy. Healthy roots are pale and firm. Remove damaged ones, let the plant callus over, and replant.
How to Evaluate Your Site Before Buying Plants
Before buying anything, analyze your garden. This step is crucial. And often skipped.
First, test your drainage. Dig a hole about 12 inches deep. Fill it with water. Time how long it takes to drain. If it drains within 30 minutes, you are good. If it takes over an hour, you need to improve drainage. I do this every spring. It takes ten minutes and shows me how the soil is behaving.
Second, observe sun patterns. I mapped my garden over a week. I checked every hour and wrote down where the sun hit. This creates a sun map. I use this to place plants. Full sun areas get at least 6 hours of direct sunlight. Partial shade areas get 3-6 hours. Full shade gets less.
Third, check the microclimates. Rock walls and large stones create pockets of warmth. Low spots collect cold air. South-facing slopes get more heat. These subtle factors matter a lot for succulents.
15 Best Succulent Varieties for Rock Gardens
After years of trial and error, I have narrowed down my favorites. These fifteen have proven reliable. They survive winters, tolerate drought, and look great year-round.
1. Sempervivum arachnoideum (Cobweb Houseleek)
This plant is fascinating. It has tiny white webs across the rosettes. Extremely cold-hardy. Survives down to minus 30 degrees Fahrenheit. Perfect for rock crevices.
2. Sempervivum tectorum (Common Houseleek)
A classic choice. Grows in tight rosettes. Comes in green, red, and purple shades. The more sun it gets, the deeper the colors.
3. Sedum spurium (Dragon's Blood)
This is a groundcover succulent. It spreads quickly but stays low. Leaves turn deep red in full sun. Great for filling gaps between rocks.
4. Sedum album (White Stonecrop)
Tiny leaves form a dense mat. Very resilient. Handles poor soil well. Turns reddish in winter.
5. Delosperma cooperi (Ice Plant)
Stunning purple flowers in summer. Foliage is low and spreading. Needs excellent drainage. One of the showiest rock garden succulents.
6. Delosperma nubigenum (Hardy Ice Plant)
Yellow flowers appear in spring. More cold-tolerant than other ice plants. Forms a nice ground cover.
7. Jovibarba heuffelii
Similar to Sempervivum but without the offsets. The rosettes divide from the base. They grow slowly and make great container plants that you can insert into rock gardens.
8. Sedum rupestre (Blue Spruce Stonecrop)
Needle-like leaves look like a tiny spruce tree. Grows upright to about 8 inches high. Foliage is bluish-silver in full sun.
9. Sedum kamtschaticum
A great filler plant. Produces yellow flowers in early summer. Handles partial shade better than most succulents.
10. Orostachys boehmeri
This one is unique. The rosettes look like little artichokes. They are monocarpic, meaning the plant dies after flowering. But it produces plenty of offsets first.
11. Hylotelephium spectabile (Showy Stonecrop)
This grows taller than many succulents. Reaches about 18 inches. Large clusters of pink flowers attract pollinators.
12. Hylotelephium telephium (Live Forever)
Another upright Sedum. Handles partial shade well. The foliage is fleshy and green with a reddish edge.
13. Rosularia platyphylla
Forms small mounds of tiny rosettes. Good for rock crevices. Needs sharp drainage.
14. Lewisia cotyledon
This is a bit more challenging. But it rewards with spectacular flowers. In colors ranging from white to pink to orange. Prefers some afternoon shade.
15. Echeveria elegans (Mexican Snowball)
Not fully cold-hardy. But works in mild climates or containers. Has beautiful blue-green rosettes.
Matching Succulents to Your Climate Zone
Climate matters. I learned this after losing many plants. My friend in Arizona grows different succulents than I do in my zone 6 garden.
For cold climates (Zones 3-6), stick with:
- Sempervivum (all types)
- Sedum (spurium, album, rupestre)
- Jovibarba
- Delosperma (cooperi, nubigenum)
- Most hardy Sedums
For mild climates (Zones 7-9):
- All of the above
- Some Echeveria varieties
- Aeonium (with frost protection)
- Some Aloe species
- Crassula species
For warm climates (Zones 9-11):
- Agave species
- Aloe vera
- Echeveria
- Pachyphytum
- Graptopetalum
My personal experience: I tried growing Echeveria outdoors in my zone 6 garden. It died every winter. I finally decided to keep them in containers. I move them indoors during winter. The rest of the succulents stay outside. They handle the snow without issues.
How to Choose Succulents for Rock Gardens Based on Growth Habits
Understanding growth patterns matters. I group succulents into four categories.
Spreading Groundcovers: These fill space quickly. Sedum spurium, Delosperma, and Sedum album fall here. Use them for large areas between rocks. They suppress weeds and prevent erosion.
Clumping Rosettes: Sempervivum and Jovibarba form tight clusters. They multiply by producing offsets. Great for rock crevices and pockets. They stay small, usually under 6 inches.
Upright Growers: Hylotelephium and some Sedum species grow taller. They provide vertical interest. Place them behind low-growing varieties or near large rocks.
Trailing Succulents: For rock walls and edges. Sedum morganianum works well in containers placed on rocks. Not cold-hardy though. For hardy trailing options, try Sedum divergens.
The Role of Rocks in Drainage and Heat Retention
I initially thought rocks were just decorative. They are much more than that. Rocks absorb heat during the day. They release it at night. This creates a warmer microclimate. Useful in cool climates. I have seen this in my own garden. The succulents near large stones survive colder nights than those in open areas. The rocks also trap moisture underneath. This is tricky. If the soil under rocks stays wet, roots can rot. I solve this by placing gravel around the base of each plant. This keeps the crown dry.
Here is what I do these days. I add a layer of coarse gravel around every succulent. It must be at least an inch deep. This prevents moisture from sitting against the plant base.
Soil Preparation: The Foundation of Success
Getting the soil right changed my garden completely. I used to plant directly into native soil. It was heavy clay. Water pooled on the surface. My succulents had no chance.
Now I build raised beds or mounds. The recipe that every rock garden owner should know:
- 2 parts coarse sand
- 2 parts fine gravel or grit
- 1 part compost (or potting soil)
Mix it well. Fill the planting area with this blend. The gravel provides drainage. The sand prevents compaction. The compost gives just enough nutrients.
I also test the pH. Most succulents prefer slightly acidic to neutral soil, around 6.0 to 7.0. My soil tested at 6.5. That was good. If your soil is too alkaline, add sulfur. If too acidic, add lime.
Expert Support on Rock Garden Succulents
I want to share some expert confirmation on this topic. The RHS states that most succulents prefer gritty, well-drained soil. They suggest mixing grit into the soil before planting. They also report that many Sempervivum species tolerate extreme cold. This matches what I see in my garden.
The AHS has also shared guides on rock garden plants. They emphasize checking your hardiness zone first. A plant rated for zone 8 will not survive a zone 6 winter. I check the USDA hardiness zone map. Every plant label in the US shows this information. It is a great filter for beginners.
Designing Your Rock Garden Layout
Arrangement matters for both looks and plant health. I follow a few simple design rules.
Place tall plants at the back or center. This depends on whether the garden is viewed from one side or all sides. Medium plants go in the middle. Groundcovers fill the front and gaps.
Group plants with similar needs together. I put all full-sun plants in one area. Shade-tolerant ones go in another. This makes watering simpler. I do not have to worry about overwatering the shade plants when the sun plants need water.
Create pockets with rocks. Use large rocks as anchors. Build soil pockets between them. Plant rosette-type succulents in these pockets. The rocks protect the roots and provide stability.
Consider color and texture. Silver-blue Echeveria looks stunning next to dark green Delosperma. Red Sempervivum adds a pop of color. Mix different leaf shapes. Spiky leaves contrast nicely with round ones.
Seasonal Care Schedule
Different seasons require different actions. I have a simple schedule I follow.
Spring: This is the main planting time. Clear away winter debris. Check for frost damage. Remove dead leaves. Time to divide overcrowded clumps. Begin watering if spring is dry.
Summer: Watch for heat stress. Some succulents need afternoon shade in hot climates. Water during extended dry spells. Mulch with gravel to keep roots cool. Check for pests like aphids and mealybugs.
Fall: Reduce watering as temperatures drop. Remove dead flowers. Prepare for frost. In cold climates, cover tender plants with fleece. Move container succulents to shelter.
Winter: Mostly leave things alone. Do not water. Remove snow carefully. I never slap snow off my succulents. Heavy snow can damage the rosettes. Let it melt naturally. Check plants after severe frost. Look for signs of rot when the thaw comes.
Pests and Diseases to Watch For
Succulents are not completely trouble-free. I deal with a few common problems.
Mealybugs: These look like tiny cotton balls. They cluster at leaf joints. I remove them with a cotton swab dipped in rubbing alcohol. Inspect new plants before bringing them home.
Aphids: Usually appear on new growth in spring. Blast them off with water. Or use insecticidal soap.
Root Rot: The most common killer. Caused by overwatering. Also known as crown rot. There is no cure once it starts. Prevention is key. Ensure drainage and avoid water sitting on the crowns.
Powdery Mildew: Appears as white powder on leaves. More common in humid climates. Improve airflow by spacing plants properly.
My Worst Failure: A Lesson in Overwatering
I want to share my biggest failure. It taught me more than any success. I used to keep my rock garden near my lawn irrigation system. The sprinklers came on every morning. I thought it would help. It killed everything. Within two weeks, all my sedums rotted. The rosettes turned brown and mushy. It was heartbreaking.
I had to start over completely. I removed the affected plants. I rebuilt the soil mix. I installed a drip irrigation system on a timer. Now my succulents get water once every ten days during summer. They have never looked better.
The lesson was painful but lasting. Succulents want infrequent, deep water. Not daily sprays.
Should I Use a Container or Plant Directly?
Both approaches work. I use both in my garden.
Direct planting: Succulents grow more naturally. Roots spread wider. Plants tend to be sturdier. The soil volume is larger. This provides more insulation.
Container planting: Easier to control soil. You can move plants to adjust conditions. Better for tender succulents that need winter protection. You can sink pots into the rock garden. This keeps the aesthetic without risking the plant.
My suggestion: Use containers for tender species. Plant hardy species directly. This gives you flexibility where you need it.
Beyond the Basics: Creating a Thriving Ecosystem
My rock garden has become a small ecosystem. I intentionally added some features. These help everything thrive.
I added a small gravel path through the garden. This allows me to access plants without stepping on the soil. Foot traffic compacts the soil. Compacted soil prevents drainage.
I planted thyme between some succulents. It fills gaps quickly. It also attracts pollinators. The bees help pollinate the succulent flowers.
I leave some areas bare. The exposed gravel provides contrast. It also helps retain heat at night.
Final Recommendations from My Experience
I have shared many details. Let me summarize in clear points:
- Check your hardiness zone first. This avoids most failures.
- Build a well-draining soil mix. Use sand, gravel, and compost in the right ratio.
- Match plants to light conditions. Observe your garden before planting.
- Start with hardy varieties. Sempervivum and Sedum are forgiving for beginners.
- Do not overwater. Let the soil dry completely between watering.
- Watch your plants during the first two weeks. Adjust conditions based on what you see.
- Use rocks strategically. They provide heat, drainage, and visual interest.
Frequently Asked Questions
How often should I water succulents in a rock garden?
I water about once every ten to fourteen days during the growing season. This assumes no regular rainfall. In clay soil, even less. In sandy soil, slightly more. Always check the soil first. Stick your finger in. If it is dry two inches deep, water.
Can I mix succulents with other rock garden plants?
Yes. I combine succulents with herbs like thyme and creeping rosemary. These herbs like similar conditions. They also add fragrance and flowers. Avoid mixing with moisture-loving plants. Ferns or hostas would struggle in the same conditions. They need consistent moisture and shady conditions.
Which succulents survive frost in rock gardens?
Sempervivum and Sedum survival rates are the highest. They can survive temperatures down to minus 20 or minus 30 degrees Fahrenheit. Rosularia and Jovibarba are also very cold-tolerant. Delosperma cooperi survives to about minus 20 degrees. For extreme cold climates, stick to these hardy groups.
Do succulents in rock gardens need fertilizer?
Very little. I add compost when planting. That provides nutrients for a year. After that, I do not fertilize. Succulents actually grow tighter and more colorful in lean soil. Fertilizer causes leggy growth and fading colors. If your plants look weak, apply a diluted fertilizer. Use half strength and water it in well.
Should I bring my rock garden succulents inside for winter?
Only if they are tender varieties. Echeveria, Aeonium, and Graptopetalum need protection in cold climates. Hardy succulents like Sempervivum and Sedum stay outside. They need the cold period for dormancy. Bringing them inside fools them into growth. They do not look as good next spring.
My Honest Take
Choosing succulents for rock gardens is not difficult. It takes patience and observation. I learned through failures. Those lessons were valuable. The journey is enjoyable. Rock gardens offer something special. They transform ordinary spaces into points of interest. They require minimal water. They offer year-round texture and color. I genuinely believe anyone can succeed with them. Just follow the basics. Watch your plants. Adjust as needed. Enjoy the process.
In my six years of growing these plants, I have seen them survive snow, drought, and heat waves. They are remarkably resilient. Give them what they need and they reward you endlessly. Choose wisely at the start. Match plants to your conditions. Prepare the soil properly. The rest is simple maintenance. Soon you will have a thriving rock garden that lasts for decades.