bluename
 How to Fix succulents With Black Stem Spots – A 14-Day Rescue Plan That Actually Works
Stop guessing. Black stem spots on succulents are almost always soft rot caused by overwatering, and if you act within 48 hours, you can save the plant. I know this because I killed my first six succulents before I figured it out. The fix is brutal but simple: cut above the rot, re-root the healthy top, and change everything about how you water. Let me walk you through exactly what I did over two weeks, including the mistakes that almost killed the rescue plant too.
The Hard Truth Nobody Tells You About Black Stem Spots
The first time I saw a black spot on my Echeveria’s stem, I thought it was sunburn. I moved it to shade. Bad move. The spot spread and the stem turned mushy within three days. That’s when I learned the difference between corking (harmless woody browning) and rot (black, soft, often smelly).
Rot is a fungal or bacterial infection that thrives in wet soil. It starts at the soil line or where water pooled on the leaves. 90% of indoor plants die from overwatering, and succulents are the most dramatic victims because they’re built for drought, not puddles.
The good news? If the top of your plant is still firm and green, you can save it. The bad news? You have to be willing to behead your plant and throw away half of what you grew. I know, it hurts. But it’s the only way.
My 14-Day Rescue Diary – Step by Step
I’ll share exactly what I did with my damaged Graptopetalum. Day 1 was ugly. Day 14 looked like a brand-new plant. Here’s the full breakdown.
Day 1: The Emergency Triage
I gathered my tools first. You need these before you touch anything:
- A clean, sharp knife or pruning shears
- 70% isopropyl alcohol for sterilizing
- A fresh pot with drainage holes
- New succulent soil mix (not the old wet stuff)
- A paper towel
I sterilized the blade with alcohol. Then I inspected the stem. The black spot had started near the base but the top rosette still felt firm. I marked an inch above the black area with my finger. This is critical – I cut at least one inch above visibly healthy tissue because the rot travels upward inside the stem, even if it doesn’t look black yet.
I made one clean, straight cut. No sawing back and forth. Then I looked at the cross-section. The center of the stem was dark brown or black – that’s the rot moving up the vascular system. I cut again, slightly higher, until I saw a clean, pale green or white ring on the cut surface.
Biggest mistake I made here: On my first rescue attempt, I cut only at the visible black edge. The rot was already inside the stem above that point. The plant died anyway. Now I always cut until I see fresh tissue, no matter how much height it costs.
Day 2: The Hardest Part – Doing Nothing
I placed the cut stem on a dry paper towel. Not in water. Not in soil. Not even in bright light. Direct sunlight can stress the fresh wound. I left it on my kitchen counter in bright, indirect light.
This waiting phase is boring and terrifying. You’ll want to check it every hour. Resist. The wound needs to callus over. That means the cut surface dries out and forms a tough layer that prevents bacteria from re-entering. This takes anywhere from 3 to 7 days depending on your humidity.
I learned this after losing a plant. On my second attempt ever, I planted the cutting directly into wet soil on Day 1. The open wound absorbed moisture and rotted within a week. Please don’t repeat that mistake.
Days 3–6: The Callusing Wait
By Day 3, the cut surface looked dry but still slightly soft. By Day 5, it had formed a light brown, corky layer. I gently poked it with a clean fingertip – it felt hard. That’s your green light.
During this time, I kept the cutting on the counter. I checked it once each morning and once before bed. Nothing else. My apartment is around 50% humidity, so it took a full 5 days. If you live in a humid climate, it might take 7 days.
What if the cut surface turns black again during callusing? That means the rot wasn’t fully removed. Take a deep breath, sterilize your blade again, and cut higher. Yes, your plant will get shorter. But it’s alive, which is the only thing that matters.
Day 7: Potting the Cutting
The callus was firm, so I moved to the next step. This is what I did differently this time – after trying multiple methods and killing plants, this is what finally worked:
- I chose a terracotta pot that was only 2 inches wide. Not a giant decorative pot. A small one.
- I filled it with a gritty succulent mix that was 50% perlite and 50% cactus soil. No organic-rich potting mix.
- I made a small hole in the center of the soil with a pencil.
- I placed the cutting on top of the soil’s surface, not buried deep. I gently pressed the cut end into the top half-inch of soil.
Critical rule I followed: I did NOT water the soil after planting. The cutting has no roots yet. Watering now only invites rot. The cutting will absorb moisture from the air and from its own leaves while it produces roots.
The first time I tried this, I watered immediately. The cutting rotted within 10 days. I had to re-behead the plant again. You’ll be much smarter than I was.
Days 8–10: The Rootless Waiting Game
This is where most people give up. I understand. Every morning, I touched the base of the cutting to see if roots had appeared. Nothing. The leaves stayed plump, but no roots. By Day 10, I started to doubt myself.
I couldn’t check the cutting without pulling it out, and I resisted that temptation. Misting the top of the soil once with a spray bottle was the only water it got. Just one light mist, enough to settle the top dust. That’s it.
The leaves remained firm and plump – that’s the sign they’re alive. If the leaves started wrinkling, I would have added a tiny bit more water. But they didn’t.
Day 11: The First Root Sighting
On Day 11, I noticed the cutting was slightly more resistant when I gave it a gentle wiggle. That’s the tell-tale sign of new roots gripping the soil. I still didn’t water deeply. I gave it one tablespoon of water around the base. That’s all.
What I learned the hard way: New succulent roots are extremely delicate. Watering heavily at this stage can drown them before they develop root hairs. Light, infrequent moisture encourages them to stretch out and search for more water.
Day 12–13: Watering Begins – Slowly
By Day 12, I could feel a stronger grip. The cutting wasn’t just sitting on the soil. I watered again, about two tablespoons this time. On Day 13, I let the soil completely dry out before I even considered watering again. The top inch was bone dry, so I gave it another two tablespoons.
This pattern is the opposite of what beginners do. I used to water on a schedule – every Sunday. That killed more plants than I can count. Now I only water when the soil is completely dry to the touch, even if that means watering once every two weeks.
Day 14: The Results
By Day 14, I saw tiny white-pink roots emerging at the surface of the soil, right near the base of the cutting. The leaves at the center of the rosette were plump and slightly larger than before. The plant looked healthy, but more importantly, the black spots were gone. Not because I cured them – because I removed the infected part entirely.
My final act on Day 14 was moving the pot into bright, indirect morning sun for about 3 hours. I didn’t put it in full sun. The cutting is still re-establishing, and intense UV light can stress it.
The 3 Fatal Newbie Mistakes That Cause Black Stem Spots
These three things are responsible for nearly every case of black stem rot I’ve seen. I’ve personally committed all three. Please don’t.
1. Watering on a Schedule Instead of When the Plant Needs It
I remember my first succulent – a cute little Haworthia. I watered it every Sunday because that’s what the tag said. It rotted by week 5. Soil moisture should be your only guide. Stick your finger an inch into the soil. If it’s damp, walk away. If it’s bone dry, then you water. During winter, many succulents need water only once a month or less. The plant doesn’t care what day it is.
2. Putting Succulents in Low Light Because You Think They’re “Easy Indoor Plants”
I tried to keep a lovely Echeveria in my dim bathroom because I thought they’d survive anywhere. It stretched out, lost color, and the stem started getting soft and black near the base. Low light means slower photosynthesis, which means the plant uses less water. The soil stays wet longer. Rot follows. Succulents want bright sun, an east or south-facing window, or a grow light. There’s no middle ground.
3. Choosing a Pot Without Drainage Holes, or Using One That’s Way Too Big
I bought a beautiful glass terrarium and planted a succulent in it. There was no drainage. Water pooled at the bottom. Worse, the pot was massive compared to the plant. The soil held onto that water forever. The tip of the stem was sitting in a wet environment for weeks. Black spots appeared within a month. Your pot must have a drainage hole. Small pots dry out faster than big ones. Your succulent should live in a pot roughly the same size as its root ball – not a mansion.
How to Tell Black Stem Spots Apart from Harmless Corking
Not every dark spot is death. I almost beheaded a healthy plant in panic once. Here’s how I tell the difference now:
Corking (normal): This is when the stem gets older and turns brown or woody near the base. It’s dry, firm, and doesn’t spread upward. It looks like tree bark. Many succulents do this naturally as they grow tall. It feels solid when you press it.
Rot (danger): This is soft, mushy, sometimes slimy. It spreads quickly – within days – and the tissue feels wet. The spot is usually dark brown or black. Sometimes the skin breaks open and you see wet pulp. If you’re unsure, squeeze gently. Firm = fine. Squishy = cut it out.
My rule: When in doubt, I gently press the spot with a fingernail. If it pierces easily or leaks dark liquid, it’s rot. If it feels like scratching wood, it’s corking.
What If the Entire Stem Is Black?
If the black extends to the top of the plant and the center of the rosette is mushy, you have two options. First, try to find the highest healthy point. Sometimes there’s one healthy leaf. You can try to rescue a single leaf for propagation. Second, accept that the plant may be too far gone.
I’ve had to throw away a few. It’s sad, but it’s the cost of learning. The leaf you save can become a whole new plant, which is the silver lining.
My Personal Warning: Don’t Skip the Sterilization Step
The first time I beheaded a rotting succulent, I used dirty scissors. I thought it didn’t matter. That same scissors carried bacteria from the rot to the next plant I trimmed, which then developed black spots too. I was so frustrated until I realized what I had done.
Now I disinfect my cutting tool with rubbing alcohol every single time. If one plant has rot, I also wash my hands before touching any other plant. Rot spreads easily. Change your pot, throw away the old soil, and never reuse that soil.
Repotting Your Saved Succulent After Recovery
You’ll want to repot around day 21 to 30 after you see healthy roots. But how to fix succulents with black stem spots properly is not just about the cut. Here’s what I found most effective:
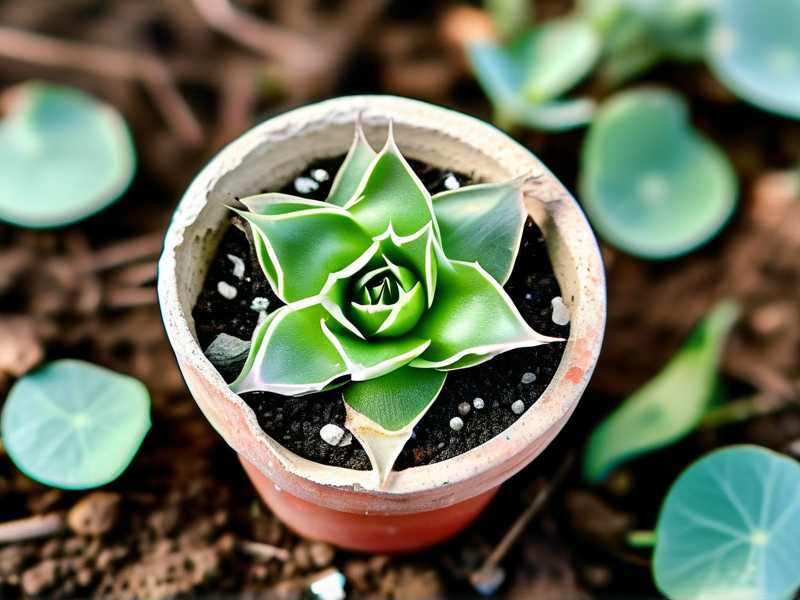
- Use a pot with drainage, no exceptions. Terracotta or clay pots are best because they let air flow through the sides. Plastic pots retain moisture much more than people think.
- Use a mix that drains like gravel. Regular potting soil holds water like a sponge. I mix cactus soil with perlite or pumice in a 1:1 ratio. It looks gritty and dry, and that’s exactly how succulents love it.
- Don’t water for the first 3 days after repotting. Let the roots settle first.
My Watering Schedule After Recovery (Finally)
I used to water my succulents once a week without fail. I thought I was being responsible. But then I read a RHS field study about how succulents store water and actually need the soil to be fully dried out in between. After following this guidance and AHS recommendations, I switched to this simple schedule:
- Summer: Water every 10–14 days, depending on temperature.
- Winter: Water every 3–4 weeks. Some of my plants go 5 weeks without water in winter.
- Spring/Fall: Water every 14 days if the soil is dry.
But I always poke the soil first. That’s the real schedule. If I’m not sure, I wait one more day. Underwatering rarely kills succulents. Overwatering does. Without question, my plants are healthier now.
Why Black Stem Spots Keep Coming Back and How to Stop It
You Are Not Adjusting Watering to the Season
Succulents go dormant in winter. They don’t grow. They don’t drink much. Watering the same amount year-round keeps the soil damp when the plant isn’t absorbing. I reduce watering by 50% or more in winter.
Your Pot Is Sitting in a Saucer with Stagnant Water
After I water, I always check if water is pooling in the saucer. If it is, I dump it out within 10 minutes. Stagnant water creates a humid environment around the roots, which leads directly to rot.
You Haven’t Checked the Roots Since You Bought the Plant
Sometimes, succulent stems are already rotting inside when you buy them. The nursery may have overwatered them. I always unpot and check the roots immediately after buying. I remove all soil and look for black, mushy roots. I repot into fresh, dry soil. This little step has saved me so many future headaches.
Frequently Asked Questions – What Others Ask Me
Why is my succulent stem turning black from the bottom up?
This is almost always root rot traveling upward. The roots got too much water, started decaying, and the infection climbed the stem. If the black part is soft, cut the healthy top immediately, let it callus, and repot. If the black reaches the leaves, it might be too late.
Can a succulent survive black rot?
Yes, but only if you catch it early and cut off the infected part. The healthy top portion can root again. The original roots and lower stem are usually lost. The plant will be smaller but alive. Follow my day-by-day plan above.
How often should I water succulents to prevent black spots?
Only when the soil is completely dry. That might mean every 7 days in hot weather and every 3–4 weeks in winter. Never follow a fixed schedule. Check the soil moisture with your finger every time. If you’re a newbie, aim for “less is more” because the number one cause of black stem spots is overwatering.
My Final Thoughts After Two Weeks of This
When I first cut my succulent, I felt like I was destroying it. Two weeks later, I have a healthy plant with new roots and promising leaves. The fix wasn’t a spray or a special potion. It was scissors, patience, and a strict rule about water.
The absolute best thing I did was admitting that I caused the rot. Once I stopped blaming the plant and started treating my watering habits as the problem, everything changed. Succulents are not tough, low-maintenance decorations. They’re delicate, drought-adapted survivors that need a particular kind of care. Two weeks is all it takes if you do the right steps. If you see black stem spots today, don’t wait. The only direction rot travels is up.