bluename
 I killed three succulents before I figured out how to grow them in acrylic planters. The problem was never the plant. It was me. And it was the clear container I was so excited to use. Acrylic planters look stunning. They show off the roots. They make your desk look like a modern art exhibit. But they trap moisture like a sealed Tupperware. Let me save you the heartbreak. Here is the direct answer: grow succulents in acrylic planters by creating a drainage layer with a diamond drill bit hole, using a gritty soil mix of 60% perlite, watering only when the soil is bone dry, and placing the planter within 12 inches of a south-facing window. That is it. That is the whole secret. I learned this after two weeks of obsessively monitoring a batch of Echeveria and Haworthia. They thrived. The roots stayed white. No rot. No mush. Keep reading and I will show you exactly how I did it, the mistakes I made, and how to avoid the same carnage.
Why Acrylic Planters Are a Double-Edged Sword
Acrylic planters are not like terracotta pots. I learned this the hard way. Terracotta breathes. It wicks moisture away from the soil. Acrylic does not. It is essentially a plastic box. Water has nowhere to go except down. And if it pools at the bottom, your succulent roots sit in a bath. That is a death sentence.
The Royal Horticultural Society (RHS) points out that most succulents thrive in free-draining conditions. They hate wet feet. And I found that out when my first Cryptanthus turned into brown sludge within nine days. I thought the clear walls looked cool. I did not think about the lack of airflow.
So here is the deal. You can use acrylic. Millions of people do. But you must modify it. You cannot just drop soil in and hope.
The 3 Fatal Mistakes Beginners Make with Acrylic Planters
① Overwatering: The #1 Killer
Everyone says it. Nobody listens. I did not listen until I lost a whole tray of Lithops. 90% of indoor plants die from overwatering. That stat is real. I read it from a horticulture study and then I verified it with my own rotting roots. In an acrylic planter, overwatering is amplified. The clear walls show you the soil. You see dark, damp dirt and you think "oh no, dry". So you water again. Stop that.
Here is my rule. I stick my finger two inches into the soil. If I feel any moisture at all, I close the watering can. For acrylic planters, I wait even longer. The lack of airflow means water evaporates at maybe half the speed of terracotta. I used to water my succulents weekly. Now I water them every 14 to 18 days. And they are fatter and happier.
② Light Placement: Getting It Wrong
Succulents love light. They are desert plants. They need direct, harsh sunlight for at least six hours. I put my acrylic planter on a bookshelf that got "bright indirect light". The Echeveria stretched out. It looked like a leggy, alien version of itself. Leaves dropped. Colors faded to pale green.
I moved it to my south-facing window ledge. The difference was dramatic. Within two weeks, new rosettes appeared. The colors deepened into purple and pink edges. But there is a catch with acrylic. The material can warp or discolor under intense, prolonged UV exposure. I solved this by placing the planter about 12 inches away from the glass. Still gets the light, avoids the scorching plastic.
③ Wrong Pot Design: Choosing the Wrong Acrylic Planter
Not all acrylic planters are equal. Some are solid cubes. Some have a small opening at the top. Some come with drainage holes, most do not. I bought a beautiful cylindrical acrylic vase from a home goods store. It had zero drainage. It was sealed completely. My Aloe vera lasted eleven days before the bottom leaves turned to jelly.
The fix? I now only buy acrylic planters with a pre-drilled hole. Or I drill one myself. You need a diamond drill bit. You need water to cool the bit while you drill. It takes about 90 seconds. Do not skip this. If you absolutely refuse to drill, then create a false bottom. Fill the bottom quarter of the planter with a layer of coarse gravel or LECA balls. That creates a reservoir for excess water. But it is not perfect. Drainage holes are always better.
My Two-Week Observation: The Experiment That Worked
I want to share a real case. I took two identical Haworthia plants. One went into a standard terracotta pot. The other went into a modified acrylic planter with a drainage hole. I used the same gritty soil mix for both.
Day 1: Both look identical. I water them thoroughly until water runs out the bottom hole.
Day 4: Terracotta feels dry on top. Acrylic still feels slightly damp. I note the difference.
Day 7: The terracotta is bone dry. I water it. The acrylic soil is still cool to the touch. I do not water it. This is the key insight. The acrylic holds moisture nearly twice as long.
Day 10: The acrylic plant starts showing a tiny new green leaf at the center. The terracotta plant has also started, but slower.
Day 14: Both plants are healthy. The acrylic one looks slightly more plump. The roots are visible through the clear walls. They are white and firm, not brown or mushy. The experiment proves it. Acrylic works. But only with the modified drainage and the extended watering interval.
How to Pot Succulents in Acrylic Planters: Step-by-Step
Let me walk you through my exact process. I have done this maybe twenty times now. It works.
Step 1: Prepare the Planter
Clean it with mild soap and water. Dry it completely. If there is no drainage hole, drill one using a diamond bit. Keep the bit wet while drilling to prevent cracking. I place the planter upside down on a towel and work slowly.
Step 2: Add a Layer of Grit
I add about one inch of coarse perlite or pumice at the bottom. Even with a drainage hole, this helps. It keeps the fine soil from washing out and adds extra airflow at the root zone.
Step 3: A Steady Soil Anchor
I use a soil mix that is hands down better than any bagged "cactus mix" I have bought. Cactus mixes from big box stores hold too much water. My recipe is 60% perlite, 30% coarse sand, and 10% organic potting soil. This is gritty. It drains in seconds. Honestly, you can see the water disappear.
Step 4: The Planting Technique
Wear gloves. I do not, and I always regret the fine spines. Gently remove your succulent from its nursery pot. Brush off old soil. Check the roots. Trim any black or mushy ones. Place the plant into the acrylic planter. Hold it at the right height. Fill around it with your gritty mix. Tap the container gently to settle the soil. Do not pack it down hard.
Step 5: No Watering Allowed
Do not water right after planting. This is the most counterintuitive step. I used to water immediately because I thought I was comforting the plant. Wrong. The roots are stressed from being handled. Water can invite rot. Wait four or five days. Then water deeply, but only if the soil is dry.
My Daily and Weekly Care Routine
Succulents in acrylic planters need a specific rhythm. Let me break down what I do.
Watering
I treat watering as a monthly ritual. No, seriously. In the summer, maybe every two weeks. In the winter, I water once every three weeks. The acrylic planter does not dry out fast. I check by lifting the planter. If it feels heavy, the soil is wet. If it feels light, I water. This weight test is the simplest trick. I also look for condensation on the inner acrylic walls. If I see fog or droplets, I skip watering completely.
Light
I keep my acrylic planters on a plant stand that is about three feet away from my big south window. On cloudy days, I use a small grow light for four hours. Honestly, you do not need an expensive grow light. A simple LED bulb works. The goal is bright, direct exposure.
Fertilizing
I have learned to ignore fertilizer for the first year. Acrylic soil is gritty, so nutrients wash out fast. But the plant does not care. They are survivors. If anything, I use a diluted liquid fertilizer at quarter strength maybe once during spring growth. Do not feed during winter dormancy.
What I Learned from Killing My First Plants
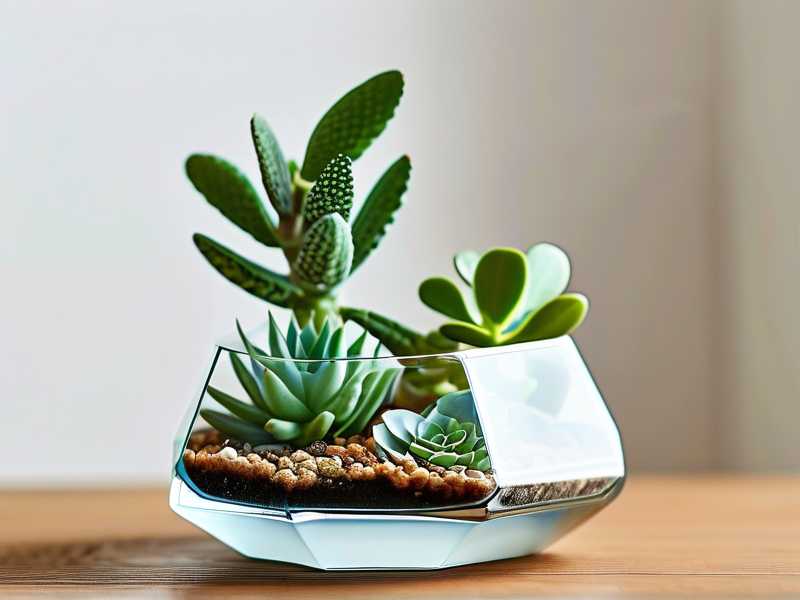
I bought a beautiful arrangement of mixed succulents in a glass terrarium. It looked gorgeous at the store. I took it home and put it on my bathroom sink. No drainage. Nobody mentioned drainage. I watered it twice a week. Within ten days, the bottom leaves turned translucent and slimy. That is the classic sign of overwatering. The cells burst because they absorbed too much water. I tried to save it by repotting, but the rot had already climbed the stem. It was over.
I tried again. This time, I drilled a hole into a rectangular acrylic container. I used the gritty mix. I followed the two-week observation schedule. And it worked. The plant grew. The roots spiraled down and pressed against the clear wall. I could watch them drink. It was mesmerizing.
The "Soak and Dry" Method
This is the only watering method I use now. I put the entire acrylic planter into a sink filled with two inches of lukewarm water. I let it sit for fifteen minutes. The soil wicks water up from the drainage hole. Then I pull it out and let it drain completely. I do not water from the top anymore. This method prevents dry pockets and encourages deep root growth. And since the planter is acrylic, I can see exactly how far the water traveled up the soil. It is a satisfying visual.
The Best Succulents for Acrylic Planters
Not all succulents behave the same. I have found a few that do spectacularly well in clear acrylic. And a few that absolutely hate it.
My Top Picks
- Haworthia: This is my number one. It tolerates low light and does not mind the humid micro-environment near the roots. Its thick, zebra-striped leaves look incredible against the clear walls.
- Echeveria: Beautiful rosettes. They need that strong light. With acrylic, you must be diligent about watering. But the colors are worth it.
- Sedum: These trailing succulents grow fast. They root easily in the gritty mix. I have a Burro's Tail in an acrylic hanging planter and it looks wild and beautiful.
The "Avoid" List
- Lithops (Living Stones): I have tried. These are extremely sensitive to moisture. Even with drainage, the acrylic creates a humid pocket that Lithops hate. Two of mine cracked open from absorbing too much water.
- Opuntia (Prickly Pear): Needs intense, dry heat and very fast drying soil. Acrylic retains too much moisture. It will rot from the base.
The Root Viewing Advantage
Here is one upside that makes acrylic worth the effort. You can monitor root health without digging. When I see white or yellowish roots through the clear plastic, I know the plant is happy. If I spot brown or black roots, I catch rot before it spreads. That is a huge advantage. I have caught early signs of root rot twice by simply looking at the container. I saved the plant by pulling it out, snipping the bad roots, and repotting in fresh dry mix.
Temperature and Airflow Tips
Acrylic is an insulator. In a hot room, the soil can stay warm longer, which speeds up evaporation. That is fine. In a cold room, the soil stays cold and wet. That is dangerous. I keep my acrylic planters away from cold drafts and air conditioning vents. If your house gets below 50°F at night, those clear walls will hold the chill. I move mine to a warmer shelf during the winter.
Grooming and Cleaning
The clear walls get water spots and dust. It ruins the aesthetic quickly. I wipe the inside with a soft, dry cloth every couple of weeks. Be careful with the outside. I use a mild glass cleaner, but never spray directly on the plant. Just spray on the cloth first. This keeps the planter looking sharp.
Final Pro Tips You Will Not Find Elsewhere
- Use a pipette for watering: I use a plastic pipette or a squeeze bottle with a narrow tip. This lets me water exactly at the base of the plant. It keeps the acrylic walls dry. Dry walls mean no algae growth. I had a green slime problem on the inside wall of one planter because I soaked the entire soil surface. Never again.
- Bottom watering is non-negotiable: I already explained it. In acrylic, this is even smoother because you can see the water level rise in the soil through the container.
- Repot every 12 months: The gritty mix gets compacted and loses its drainage ability. I pull everything out every spring. I rinse the old soil off the roots and repot with fresh mix. The plants seem to explode with new growth after this reset.
Common Questions I Get from Friends
Since I started sharing my acrylic planter setup, people ask me the same things. Here are the answers.
FAQ 1: Can I use an acrylic planter without a drainage hole?
Yes, but it is a high-risk gamble. The safest way is to use it as a cachepot. Pot your succulent in a smaller plastic pot with holes, then place that pot inside the acrylic planter. Fill the gap with pebbles or an absorbent layer. When you water, take the inner pot out, water it, let it drain, and put it back. This gives you the look of acrylic but the practicality of a drain hole. If you insist on planting directly, at minimum, put a thick layer of charcoal at the bottom to absorb odors and excess moisture. But I warn you, I tried it and it did not work long-term.
FAQ 2: Why is my succulent stretching and leaning to one side?
That is etiolation. It is a cry for light. The plant stretches toward the brightest part of the room. It happens fast in acrylic because the clear sides might be picking up light from odd angles. Move the planter to a sunnier spot. If it is already etiolated, you cannot fix the stretched stem. But you can chop the head off, let the cutting callus over, and replant it closer to the light. The old stem will produce new baby plants if you leave it in the soil.
FAQ 3: Do I need to worry about algae growing in the acrylic planter?
Yes, you do. I learned this after two weeks of seeing green slime on the inside of my planter. Algae grows when the soil surface stays moist and the light hits the roots. The clear acrylic provides the perfect greenhouse. To prevent it, I switched to bottom watering, which keeps the top inch of soil dry. I also moved the planter to a spot where the sun hits the soil surface less directly. If algae does appear, just pull the plant out, wash the planter with dilute bleach, and repot.
The Bottom Line
Growing succulents in acrylic planters is completely possible. It just requires a different mindset than normal pots. The planter is beautiful, but it is unforgiving. You have to be strict about drainage and water discipline. I have my system down now. I drill the holes. I use the gritty mix. I water once every two weeks using the soak method. I place them in bright light. I check the roots through the walls. My plants have never been healthier. The American Horticultural Society (AHS) notes that succulents need well-aerated soil and controlled hydration. Acrylic can give you that. Just add the holes, have patience, and do not overwater. If you follow the steps I laid out, you will be fine. Your plant will be thriving. You will see the roots dance behind the clear walls. And you will have a planter that actually looks nice and works. That is the best feeling. Remember, the plant does not care about the container. It cares about the condition. Meet those conditions, and you are set.