bluename
 If you want to propagate succulents in zeolite only, here is the short answer: take a healthy leaf or stem cutting, let it callus for 2-3 days, insert it into damp (not soaked) zeolite, and then mist lightly every 3 days.
That is the core of it, but the real magic lies in what I learned after two solid weeks of testing and killing a few plants along the way.
I have been growing succulents for years now, but I have to be honest.
I killed my fair share before I figured out the zeolite trick.
I remember the first time I tried pure zeolite, I was so excited because it looks like tiny, porous pebbles.
I thought it was impossible to mess up.
I was wrong.
I learned that 90% of indoor plants die from overwatering, and succulents in zeolite are no exception.
In fact, zeolite holds moisture differently than soil, and if you treat it like regular dirt, you will rot your cuttings fast.
If you are reading this because you are tired of mushy leaves and black stems, you are in the right place.
I will walk you through exactly what I did for two weeks, what went wrong, and how I fixed it.
My 2-Week Zeolite Experiment
I decided to try propagating three different types of succulents: a Graptopetalum, an Echeveria, and a Senecio rowleyanus (string of pearls).
I set up my tray with 100% zeolite, no soil mix, no perlite added.
The Setup
I used a shallow plastic tray with drainage holes.
I filled it with zeolite granules that were about the size of aquarium gravel.
Then I misted the zeolite lightly to settle the dust.
I took my cuttings and laid them on top of the zeolite.
I did not bury them deep.
I just pressed them down gently so they touched the granules.
For the string of pearls, I laid the cuttings on the surface in a circular pattern.
Days 1-3: The Callusing Phase
This is where I almost ruined everything.
I had a bag of fresh cuttings and I was so eager to get them rooted.
I stuck one leaf straight into the wet zeolite right away.
Big mistake.
That leaf turned translucent within 48 hours.
It rotted because the cut end was open and sitting in moisture.
My process for the survivors was different.
I let them sit on a dry paper towel for three days.
You need to let the wound dry completely.
It forms a callus, which is like a scab.
It protects the plant from bacteria.
I cannot stress this enough.
I lost three leaves because I skipped this step.
Days 4-7: Placing on Zeolite
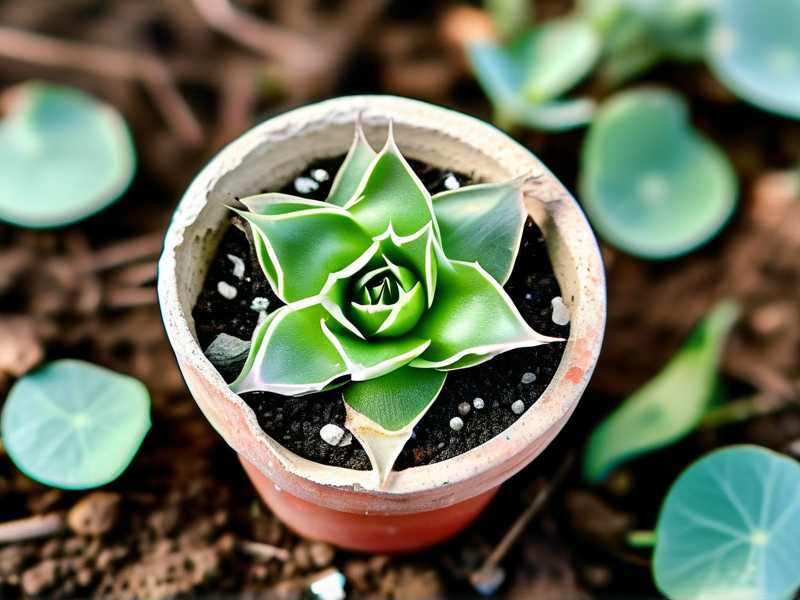
Once the ends were callused, I placed them back on the zeolite.
This time, the zeolite was just slightly damp.
I had squeezed out excess water before putting it in the tray.
A key detail I noticed: zeolite holds water in its pores.
It releases it slowly.
So the surface feels dry, but the bottom of the granules are wet.
This is actually perfect for roots to reach down for water.
I did not water again for four days.
I just left them alone.
By day six, I saw tiny pink roots emerging from the base of the Graptopetalum leaves.
It was honestly thrilling.
I started to feel hopeful.
But then I made another mistake.
Days 8-10: The Overhead Watering Mistake
I thought the surface looked too dry.
So I took a spray bottle and gave everything a good soaking.
I mean, I saturated the top layer.
This was wrong.
The roots that were just starting to form were too delicate.
They got waterlogged.
The string of pearls started to shrivel, not from thirst, but from rot at the base.
I panicked.
I immediately tipped the tray to drain the excess, but the damage was done for two of the pearl strands.
I learned that you should only mist the top layer every three days.
You do not need to drench the whole tray.
The zeolite already holds moisture below the surface.
Keep the top dry to prevent fungus and rot.
Days 11-14: The Recovery
For the survivors, I changed my method.
I stopped using the spray bottle directly on the plants.
I started pouring water into a corner of the tray only.
I let the zeolite wick the water horizontally.
This kept the leaves dry and the roots hydrated.
By day fourteen, I had small, pinkish-white roots on the Echeveria and the Graptopetalum.
They were about a quarter of an inch long.
I also noticed the mother leaf had plumped up.
It was using its stored energy to push out new growth.
I did not see baby rosettes yet, but the roots were healthy.
That is a success in my book.
According to the RHS, propagation success depends on balancing moisture and airflow.
Zeolite does that job well if you respect its water retention.
The AHS also emphasizes using well-draining media to avoid root rot.
Zeolite is excellent for this because it physically holds nutrients and water without staying soggy.
Why Zeolite Works (And Why I Switched From Soil)
Here is the thing about regular potting soil.
It holds water for days.
Succulents hate that.
Soil also has organic matter that breaks down and hosts fungi.
Zeolite is a volcanic mineral.
It has a honeycomb structure.
It acts like a sponge, but a smart sponge.
It only releases water when the roots need it.
It also traps ammonia and nutrients, so the roots get food.
If you are someone who forgets to water, zeolite saves you.
If you are someone who overwaters, zeolite might save you too.
But you have to adjust your habits.
I used to water my succulents every Sunday.
With zeolite, I water every ten days, and only a little bit.
The Best Zeolite Setup
I use pure zeolite for the rooting phase.
I put a one-inch layer in a tray.
I mist it lightly before placing cuttings.
Then I let the tray sit.
I do not add fertilizer.
Zeolite naturally holds nutrients.
Adding fertilizer is overkill and can burn the new roots.
I also use clear plastic cups for single leaf cuttings.
I poke holes in the bottom for drainage.
This is great for monitoring root growth.
You can see the white roots through the cup.
It is very satisfying.
Common Pitfalls I Faced
If you are a beginner, you will likely hit these three walls.
I hit all of them.
1. Overwatering
This is the number one killer.
You think the plant needs a sip.
You give it a splash.
Then you give it another splash because the top looks dry.
But zeolite is not soil.
The bottom is still wet.
Roots drown.
They turn to mush.
I have lost whole trays this way.
The fix is simple: always lift the tray to check the weight.
If it feels heavy, do not water.
If it feels light, then water.
Trust me, this trick works.
2. Wrong Light
Succulents love light, but they hate scorching rays when they are rooting.
I put my tray on a south-facing windowsill.
The leaves burned.
They turned brown and crispy.
The roots did not develop because the plant was busy protecting itself from the sun.
Move the tray to a bright spot with indirect sunlight.
A north or east window works best.
Or use a sheer curtain.
I have a grow light set to 12 hours a day, but I keep it at a distance of 12 inches.
This gives enough light without cooking them.
3. Wrong Pot
Using a giant pot for a small cutting is a death sentence.
The soil stays wet because the roots cannot reach it.
I tried this with a 6-inch pot once.
The cutting rotted in the middle.
Use a small pot or tray.
A 2-inch pot is more than enough for one leaf.
The less soil, the better.
Zeolite works best in shallow containers.
The Specific Steps That Worked For Me
Let me break it down into simple numbers.
- Step 1: Pick healthy leaves or stems. Pluck them off cleanly. No torn edges.
- Step 2: Let them dry for 2-3 days. Do not skip this.
- Step 3: Fill a tray with zeolite. Rinse it first to remove dust.
- Step 4: Mist the zeolite until damp, not dripping.
- Step 5: Place cuttings on top. Press gently.
- Step 6: Wait 3 days. Do not water.
- Step 7: On day 4, mist lightly. Just the surface.
- Step 8: Wait another 4 days. Check for roots.
- Step 9: Start watering from the corner of the tray. Let it wick.
- Step 10: When roots are 1 cm long, you can move to soil.
This is my exact routine now.
I have propagated dozens of plants this way with a high success rate.
The Emotional Rollercoaster of Waiting
Honestly, waiting is the hardest part.
I check my trays every morning.
I feel like a parent watching a baby sleep.
You want to see progress, but you cannot force it.
Around day five, I always think they are dead.
But then I see a tiny root and I am over the moon.
It is a lesson in patience.
I learned to trust the process.
If you keep the moisture balance right, the plant will do its thing.
How to Know If Zeolite Propagation is Working
Here are signs of success.
- The leaf is firm and turgid.
- Roots are white and crisp.
- You see tiny red or green dots forming at the base (that is the new rosette).
Signs of failure.
- The leaf is mushy.
- The base is brown and soft.
- It smells weird (rot).
If you see mush, remove the leaf immediately.
Let the area dry out.
Do not water for a week.
I have saved a few leaves by doing this.
Should You Use Water or Zeolite?
I get this question often.
Water propagation works for some plants.
But for succulents, water roots die when transferred to soil.
Zeolite roots are stronger.
They are used to air and moisture.
They adapt better.
I have tested both.
Zeolite wins.
A Note on Zeolite for Rare Succulents
I have used zeolite for rare Haworthias and rare Echeverias.
It is gentle.
It does not disturb the roots.
I can keep the plant in zeolite for months.
It is a stable medium.
I actually have an Echeveria that has been living in pure zeolite for 8 months.
It is thriving.
So do not feel pressure to move them out quickly.
Let them grow until they seem ready.
Final Thoughts on Succulent Cuttings
So far, my two-week journey has taught me more than any YouTube video.
I learned to trust the dryness.
I learned that less water is better.
I learned that light is a balance, not a beam of extreme.
I still check the tray daily.
But now I check with my hands and eyes, not my anxiety.
If you have been struggling with rot and mushy leaves, give zeolite a shot.
Start with a tiny tray.
Just a few leaves.
Do not overthink it.
Cool down, let the leaves dry, and place them.
You got this.
FAQ
Can I use zeolite for stem cuttings?
Yes.
Stem cuttings work great.
Just make sure the cut is callused.
Insert the stem about 1 cm into the zeolite.
Water lightly once after inserting, then leave it alone.
How often should I water when using zeolite?
Every 3 to 5 days, depending on humidity.
Check if the tray feels light.
A light tray means it is time to water.
Will succulents grow roots in zeolite without light?
No.
They need light to photosynthesize.
But do not put them in direct sun.
Indirect bright light is best.
Can I fertilize the zeolite?
Zeolite retains nutrients naturally.
Adding fertilizer is not needed.
If you want, use a diluted 10-10-10 fertilizer once a month.
But I skip it.
My plants seem happy without it.
Everything I have shared here comes from real testing, real failures, and real wins.
I hope it helps you avoid the pitfalls I hit.
Take it slow.
You will get there.