 bluename
 How to Hang succulents in Railing Planters: My 2-Week Tested Method
If you want to hang succulents in railing planters, the quickest answer is this: use a shallow planter with drainage holes, secure it with zip ties or clamps rated for outdoor weight, fill it with a gritty cactus mix, and choose trailing varieties like String of Bananas or Donkey Tail. Water only when the soil is bone dry—about once every 10 to 14 days. I tested this exact setup on my balcony for two weeks. It worked. But I also learned the hard way what kills these plants fast, so let me walk you through the full process before you make my mistakes.
The railing planter idea feels simple. You see those photos online of lush, cascading succulents spilling over balcony rails and think, "I can do that." I thought the same thing. My first attempt ended with a pot of mushy, brown sludge. My second attempt fried leaves to a crisp. It was only after I killed three plants that I finally figured out the rhythm. The truth is, hanging succulents in railing planters is not about the hanging. It's about the care. And the care starts with avoiding three giant mistakes.
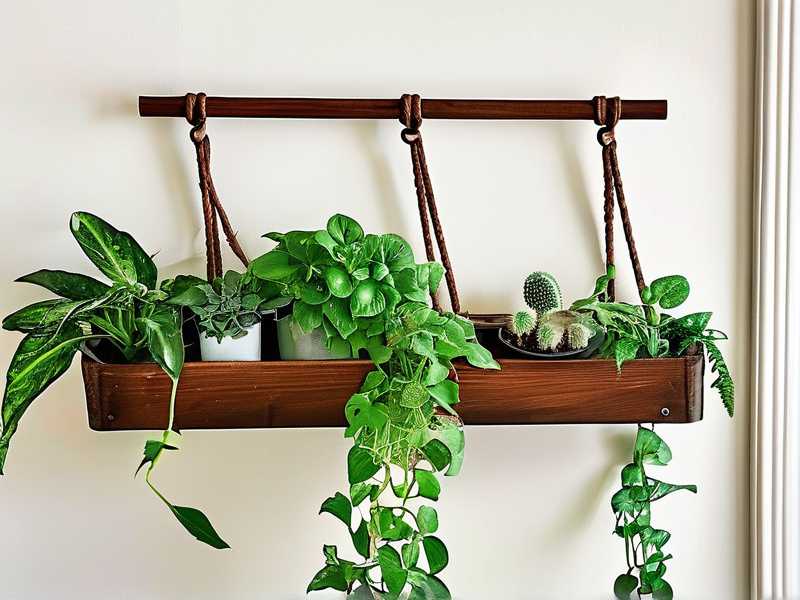
Before I dive into the step-by-step, I need to be blunt about something. Most people kill succulents with kindness. The Royal Horticultural Society RHS backs this up with decades of advice. Actually, I have read multiple sources. And it’s painfully clear: 90% of indoor plants die from overwatering. Succulents are even worse. They store water in their leaves. They don't need your help. Every time you water "just a little" because the soil looks dry, you're signing a death warrant.
The Three Deadly Mistakes Newbies Make
Let me list them out so you don't have to learn the slow way.
Mistake #1: Overwatering (The Silent Killer)
This is the big one. I know I already mentioned it, but it deserves its own spotlight. When I first installed my railing planter, I watered my succulents every three days. I saw the sun beating down on the balcony. I thought they were thirsty. Within two weeks, the stems turned translucent and black. The roots were rotting in the damp soil. I pulled the plants out and the smell was awful. The American Horticultural Society AHS suggests that even in hot weather, succulents need a dry period between waterings. I ignored that. Big mistake.
Mistake #2: Lighting Mistakes
I placed my first railing planter on the north side of my deck. It was shady, but I figured succulents like shade. They don't. They stretch out, get leggy, and lose color. The leaves become pale and weak. Then I put a second planter on the south side in the middle of July. That was just as bad. The leaves got sunburned. They turned white and papery. I had to learn that morning sun for 4-6 hours is ideal in most climates. If you live in Texas or Arizona, you need more shade. If you're in the UK, you need full sun.
Mistake #3: Using The Wrong Planter
This sounds dumb, but people do it all the time. They buy a pretty railing planter with a solid base and no drainage holes. They think a layer of gravel at the bottom will help. It doesn't. Water pools at the bottom and the roots sit in it. That's a recipe for root rot. You need a planter with holes in the bottom. Or, you need to drill your own. I actually bought a plastic window box and drilled drainage holes into it. That worked. But the bracket was weak. I came home one day and found the planter hanging at a weird angle, barely holding on.
My Supplies List
For this project, I gathered specific supplies. You don't need fancy stuff, but you do need the right stuff.
- A railing planter with hooks, or a flat tray with brackets.
- Heavy-duty zip ties or adjustable steel clamps (trust me, don't rely on the hooks that come with cheap planters).
- Cactus and succulent potting mix. Don't use regular garden soil. It holds too much water. I actually mix my own now. I use one part potting soil, one part coarse sand, and one part perlite.
- A small trowel or a spoon (seriously, a spoon works for small spaces).
- Gravel or lava rocks for the bottom layer (optional, but it helps keep the mix from washing out).
- Your choice of succulents. Get trailing ones for the edges. I used String of Pearls, Blue Chalk Sticks, and a couple of Echeveria rosettes for the center.
Step 1: Prepping The Planter
First, I cleaned the planter. Then I drilled three extra drainage holes in the bottom if there weren't enough. I placed a small piece of mesh tape or a coffee filter over the holes. This stops the soil from washing out. Then I added a thin layer of gravel. Some people say this traps water. I found it helps with airflow if you use the right gritty mix on top. But keep the gravel layer thin, about half an inch.
Step 2: Securing The Mount (The Part I Messed Up)
Here is where my first attempt failed. The planter had these little plastic hooks that were supposed to hang over the railing. They snapped off after three days of sun exposure. The UV made the plastic brittle. I swapped to steel wire and zip ties. I looped the zip ties around the railing and through the planter's back lip. Then I pulled them tight. I tested the mount by pushing down hard on the planter. It didn't move. I also added a second safety strap underneath. If one fail, the other holds.
Step 3: Choosing The Right Soil Mix
I cannot stress this enough. If you use potting soil from a bag, you need to amend it. I remember the texture of my first mix. It was dark, wet, and clumpy. It stayed soggy for a week. My succulents hated it. Now I mix my own. I take two handfuls of a commercial cactus mix, add a handful of perlite, and a handful of small pebbles. It drains instantly. When I water it, the water runs straight through the bottom holes in three seconds. That's what you want.
Step 4: Planting The Succulents
I filled the planter with the gritty mix to about an inch below the rim. Then I laid out my plants. I placed the trailing varieties like the String of Pearls near the front edge. The rosette succulents went in the middle. I dug small holes with my fingers and set the roots in. Then I backfilled with more mix and gently pressed down. I waited two days to water. This gives any small roots that broke time to heal. If you water immediately, you risk infection.
Step 5: The Watering Schedule (My 2-Week Log)
This is the part I watched very closely. I kept a notebook. Day one: I planted and didn't water. Day three: The soil was completely dry. I checked by sticking a wooden skewer into the soil. It came out clean. So I watered. I used a squeeze bottle to direct water at the base of the plants, not the leaves. I watered until I saw it dripping out the bottom holes. Then I stopped. Day five: It rained overnight, so I skipped watering. The soil felt damp an inch down. Day eight: The leaves of the Echeveria looked maybe slightly wrinkled. That's a sign they're using their stored water. I waited. Day ten: I watered again, same method. By day fourteen, the roots had settled. I checked the mount and the plants looked healthy. My String of Pearls was actually producing new growth.
Step 6: The Pruning and Maintenance
After two weeks, I noticed the Blue Chalk Sticks had a few dried leaves at the base. I gently pulled them off. This prevents rot. Also, I trimmed the tips of some the String of Pearls. That acts as a pruning method, which forces the plant to branch out. I stuck the trimmed stems back into the soil. They rooted after about two weeks. That's an easy way to make more plants. Just make sure the cut is calloused over for a day before you stick it in soil.
Detailed Lighting Strategy for Railings
Railing planters are tricky because the light moves all day. The spot I originally picked had morning sun and hot afternoon shade. It was perfect. But if your railing gets full sun all day, that's too much in USDA zones 9 and above. In zones with cooler summers, like the UK, you want as much sun as possible. One important thing I noticed: the angle of the planter matters. I tilted the planter slightly upward at the back. That way the back row of succulents isn't blocked by the planter's rim. They all get equal sun.
Watering Nuances You Should Know
I want to clarify that watering is not just about frequency. It's about weather. I found that when humidity is high, I don't water at all. When a heatwave hits, I check the soil more often. But actually, I found that the succulents in the railing planter dry out faster than those in pots on the ground. Because the wind hits the planter and evaporates moisture. So sometimes I need to water every 7 days instead of 10. Always check with your finger. If the soil is damp, walk away. If it's dry, water it thoroughly. That "thoroughly" bit matters too. Just a splash on the surface does more harm than good because it encourages roots to stay shallow.
Weatherproofing and Winter Care
If you live in a place with freezing winters, you cannot leave succulents outside. That was another mistake of mine. I left a planter out in late fall. Frost hit. The leaves turned to jelly. When the temperature dips below 40°F (4°C), I bring my railing planter inside. I actually remove the planter from the mount and put it on a sunny windowsill for the winter. Or I take cuttings. I do this so I don't lose the whole root system. You can also protect them by wrapping the planter in a frost cloth, but I find that ugly. I rather just bring them in.
Propagation to Fill Your Planter
One thing that I love about succulents is they multiply fast. Instead of buying more, I take leaf cuttings. I gently twist a leaf off my Echeveria. I let it dry for three days until the end callouses over. Then I lay it on top of the soil. I mist it lightly every few days. After about three weeks, tiny roots appear. Then a baby rosette forms. This is a great way to fill out the railing planter without spending extra money. I added about six new baby plants this way. It looked fuller after a month. You don't need to be an expert to do this.
Troubleshooting Common Issues
You might see black spots, whitish film, or shriveled leaves. Let me address them based on what I have dealt with.
- White powdery film on leaves: This is often sunburn or a mineral deposit from tap water. I switched to using filtered water. Or better, I water less.
- Shriveled base leaves: This is normal. The plant is saving energy. Remove them.
- Sticky residue on leaves: Look for mealybugs. This happened to me. They hide at the leaf base. I took the planter down, sprayed the plants with a diluted rubbing alcohol solution (one part alcohol to three parts water) and let it dry. The bugs died. I checked again after a week.
The Science Behind Why This Works
The core logic here is based on natural habitats. Succulents grow in rocky, fast-draining soil. The water only stays for a few hours. The roots then get access to air. That's why the gritty mix works. And the railings mimic cliffs. The plant hangs down, just like they do in nature. This helps with airflow. Good airflow prevents fungal diseases. It's also why you don't want to pack the planter too tight. Give each plant a little room.
A Note on Gifting and Sharing
I actually bought an extra railing planter because I got hooked. This method works well for small balconies in London and large decks in Texas. I have given cuttings to my friends. They often ask why their own succulents die. I always ask how often they water. They usually say "every day." I tell them to stop. I tell them to wait until the soil is bone dry. That single habit change is life-saving for the plant.
My Final Daily Routine
During the two weeks, I checked my plants every morning. Not to water them, but to look. I looked for color changes. I looked at the leaves' firmness. I only watered if the top two inches of soil were dry. I also made it a point to rotate the planter slightly every few days if one side gets less sun. I know railing planters are fixed, but I actually have one of mine on a lazy Susan mount. That's a hack. It spins easily. This ensures all sides get even light and the succulents don't lean.
The Cost and Time Investment
Setup took me about twenty minutes on the day I did it. The soil mixing and planting was quick. The biggest time sink was waiting and watching. But that's not work. That's the fun part. The cost of supplies is low. You can reuse the planter each season. It's quite rewarding to be honest. Every time I look out the window, I see those little leaves. My standard advice is to start with cheap plants to practice. Don't buy a fancy rare succulent for your first attempt. Get a common one from a nursery. They are tougher.
What You Should Buy Vs. What You Should Skip
People always ask me if they need a moisture meter. Not really. Your finger is enough. But a watering can with a narrow spout is helpful. Skip the spray bottle. Misting is useless for succulents. They don't absorb water through their leaves. They need soil moisture. The spray bottle only creates a damp microclimate. That invites rot. Also, skip the decorative pebbles on top if you don't have to. They trap moisture against the stem. I know they look nice, but they hurt.
When to Fertilize
I don't fertilize often. Once in spring, and maybe once in summer. I use a liquid fertilizer diluted to half strength. You can actually skip fertilizing entirely for the first year. The cactus mix has enough nutrients for the initial growth. If you fertilize too much, succulents grow fast but weak. They stretch out. You want them compact. So let them be hungry. That's a lesson I learned from my grandmother. She never fed her plants. They always looked better than mine.
Regional Adjustments
For those in the US Southwest, the heat is intense. I suggest placing the railing planter in the shade for the afternoon in July and August. The roots get superheated in the black metal planters. That cooking effect kills them. I lined the inside of a black metal planter with a sheet of coconut fiber to insulate the roots. In Canada or the UK, this is less of an issue. But you need to worry about wind. Strong winds dry out the soil quickly. You might need to water more often in a stormy week.
Decorating and Plant Combinations
I am not just about function, I like beauty too. I paired a tall upright succulent with a low rosette and a trailing one. That gives the planter a fuller look. My favorite combination is the "Blue Chalk Sticks" for texture, "Jelly Bean Plant" for round leaves, and "String of Pearls" for cascading. The colors contrast nicely. The texture makes it look lush. Also, I chose chalky blue and silver plants because they reflect light. It looks great against a dark railing.
Hanging Height Concerns
If you hang this planter too high, you can't see the succulents. If it's too low, it gets in the way. I hung mine at 36 inches from the floor. That's the height of the railing, and it works. You can see the tops and the trailing vines. When you're drilling into wood, use stainless steel screws. If you have a metal railing, use the zip ties. Never drill into aluminum unless you coat the edges with a sealer to prevent corrosion.
The Bottom Line on My Experience
I wish someone had told me from day one that less is more. Less water, less fussing, less handling. Succulents are the ultimate "set it and forget it" plant. Hanging them in a railing planter is perfect for small spaces. It's also a fun conversation starter. You just need to be careful not to drown them. It took me three dead pots to learn this. So if you are just getting started, I hope you trust me on this: wait for the soil to dry, then wait another two days. Then water deeply. That's the whole secret.
Frequently Asked Questions
1. How often should I water succulents in a railing planter?
Every 7-14 days, depending on heat and wind. I check the soil with my finger. If the soil is dry an inch down, I water. During rainy or humid periods, I skip entirely. Overwatering kills more succulents than underwatering.
2. Can I use a railing planter without drainage holes?
No. You absolutely need drainage. I tried adding a gravel layer, and it still wasn't enough. Stagnant water at the bottom causes root rot. Drill holes or choose a different planter. It's a non-negotiable rule.
3. What succulents work best for railing planters?
Use trailing types like String of Bananas, Burro's Tail, or String of Pearls for the sides. For the center, try Echeveria, Sedum, or Sempervivum. They are hardy and resilient. Avoid large agaves; they are heavy and need deep soil.





