 bluename
 How to Choose succulents for Minimalist Gardens
Minimalist gardens and succulents feel like they were made for each other. I’ve spent years testing this combo, and the short answer is: choose succulents with strong architectural shapes, muted tones, and slow growth habits, then put them in gritty, fast-draining soil. That’s the core. But I learned that the hard way. I killed about seven plants before I figured out what actually works. In this guide, I’ll walk you through every step I use now, plus the two-week observation method that caught my mistakes early.
Why Most People Fail With Succulents in Minimalist Designs
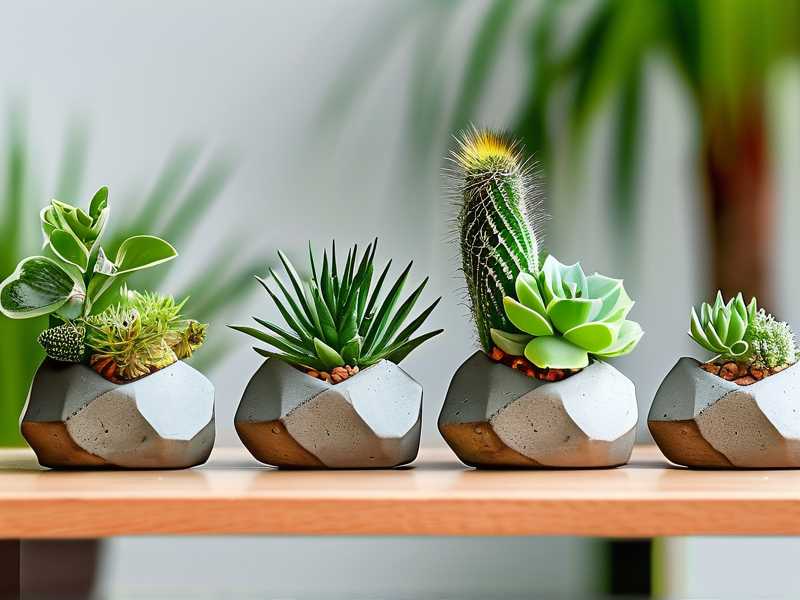
The biggest lie I believed? That succulents are "set and forget" plants. They aren't. Not in a minimalist setting where every leaf shows. The visual simplicity you want requires very specific plant choices. If you pick the wrong species, your clean aesthetic turns into a droopy, stretched-out mess within a month.
The 3 Deadliest Mistakes Beginners Make
I’ve made every single mistake on this list. Maybe twice.
Mistake #1: Overwatering (The Silent Killer)
This is the big one. Honestly, 90% of indoor plants die from overwatering, and succulents are the most frequent victims. I used to water mine on a schedule. Every Sunday, like clockwork. That killed my first Echeveria within three weeks. The roots rotted before I even saw the leaves wrinkle. The fix? Forget schedules. Only water when the soil is completely bone dry, and even then, wait another three days. If you’re unsure, don’t water.
Mistake #2: Wrong Light Placement
I put a Haworthia in a dark corner of my living room because I liked the vase there. The plant stretched out, looking for light. It became tall, pale, and floppy. It wasn't ugly in a quirky way. It was ugly in a "plant is dying" way. Most succulents need about six hours of bright, indirect light. A few need direct morning sun. Match the plant to the spot before you buy it.
Mistake #3: Using the Wrong Pot
I thought any pot with a drainage hole was fine. I was wrong. I used a deep ceramic bowl once. The roots sat in moisture at the bottom while the top inch of soil looked dry. Root rot again. The solution? Shallow, wide pots. They mimic the natural environment of most succulents. Terracotta is my go-to. It breathes, and it pulls extra moisture away from the roots.
My Step-by-Step Process for Choosing the Right Succulents
Let's get into the actual selection process. I do this every time now.
Step 1: Ditch the trendy hybrids first
I know the pastel pink ones are pretty. I bought them too. They failed. High-color hybrids are often weaker and need pampering. For a minimalist look, stick to the classics. Look for plants with clear, simple geometry.
- For round, sculptural shapes: Echeveria elegans or Echeveria agavoides. Their rosette patterns are clean and symmetrical.
- For vertical accents: Sansevieria trifasciata (Snake Plant) or Senecio mandraliscae (Blue Chalk Sticks). They give height without bulk.
- For texture contrast: Haworthia fasciata (Zebra Plant) or Sedum morganianum (Burro's Tail).
Step 2: Check the roots before you buy
You wouldn't buy a car with a rusty frame. Check the roots. I pull the plant out of the nursery pot in the store. I'm not shy about it. Healthy roots are white or pale yellow and firm. If they're brown, mushy, or smell like rot, put it back.
Step 3: Match leaf color to your design palette
Minimalist design usually uses a restrained palette. I learned this from my design background. If your room is all beige and white, go for blue-gray succulents like Dudleya or Pachyphytum. If you have warmer wood tones, try darker green varieties like Haworthiopsis attenuata. Avoid the neon greens unless your room is very bright and modern.
Step 4: The "two-week" test that saved my collection
This is the part that changed everything for me. I don't just buy a plant and place it in its final spot. I quarantine it in a holding area for two weeks. This is my observation period. I do three things:
- Monitor for pests: I check the undersides of leaves every two days. Mealybugs show up fast. Catching them early is much easier than treating a full infestation.
- Observe the light reaction: I place the new plant next to my existing ones. I watch for leaf color changes. If the plant starts to pale or elongate, I move it a few feet closer to the window.
- Test the watering response: I don't water for the first ten days. Then I give a deep soak. I observe how fast the soil dries. This confirms my pot and soil mix are working.
I found that most of my past failures showed symptoms within this two-week window. If the plant was going to rot, it started showing black spots on the stem. If it was getting too little light, the rosette started to flatten. This test has saved me from buying sick plants that would have infected my healthy collection.
My Exact Soil Mix and Potting Routine
People overcomplicate this. I use a simple formula.
- 2 parts regular potting soil.
- 1 part coarse sand.
- 1 part perlite or pumice.
I mix it in a bucket until it looks uniform. It should feel gritty, not muddy. When you squeeze a handful, it should fall apart immediately. That's the secret. This mix dries out in two to three days in my climate.
When I pot, I do this:
- Fill the pot a third full with the mix.
- Place the plant in the center.
- Gently backfill, but I don't pack it down hard. Loose soil is better.
- I leave a half-inch gap at the rim. This prevents water from spilling over the edge.
Watering: The "Soak and Dry" Method That Actually Works
I used to spray my succulents with a mist bottle. Stupid. That only wets the topsoil and leaves the roots thirsty.
Now, I soak them. I take the pot to the sink. I run water through the soil until it pours out the bottom drain hole. Then I let it drain completely. I leave it on the counter for an hour to make sure there's no sitting water in the saucer.
For my indoor succulents, this means watering roughly every 2 to 3 weeks in winter. In summer, maybe every 10 days. But I always check the soil first.
Lighting: What I Learned From Moving Plants Around
I have a south-facing window. That's prime real estate for most succulents. But not all of them.
I placed a String of Pearls there once. It got scorched. The leaves turned brown and crispy. I moved it to an east-facing window a week later. It bounced back. Here's my rule now:
- South window: Echeverias, Sedums, Agaves. They love direct light for 6 hours.
- East window: Haworthias, Gasterias, and any dark green variety. They prefer gentle morning sun.
- North window: Only Shade-tolerant succulents like some Sansevierias or Rhipsalis. Everything else will stretch and die.
Pot Selection: Form vs. Function
Minimalist gardens usually have concrete, matte black, or terracotta pots. I love the look. But here's the thing I screw up with: pots that are too deep.
I bought a tall, sculptural concrete cylinder once. It looked amazing. But my small Echeveria had roots only two inches long. The pot was ten inches deep. The bottom six inches of soil stayed wet. Rot city.
The fix is simple. Match the pot depth to the root ball. The pot should be about 1-2 inches wider than the root ball. For shallow-rooted plants, use bonsai-style pots or even shallow dishes with a drain hole.
My Favorite Species for a Clean, Minimalist Look
I’ve narrowed my collection to five core species that never fail. I recommend these to friends who just want a clean aesthetic without fuss.
- Echeveria 'Lola': A pale, almost pastel lavender rosette. It grows slowly and keeps its shape. I’ve had one in the same pot for two years without repotting.
- Haworthiopsis fasciata: The white stripes on dark green make a strong linear pattern. It tolerates lower light than most. Very forgiving.
- Crassula ovata 'Hobbit': The tubular leaves are distinct. It forms a small, tree-like structure. Perfect for a single statement piece on a desk.
- Sedum japonicum 'Tokyo Sun': A tiny, bright chartreuse groundcover. It spills over the pot edge, softening the harsh lines of a concrete planter.
- Agave victoriae-reginae: This one has perfect white lines against dark green. It looks like geometric art. Slow enough to stay small for years.
I tend to arrange these in odd numbers. Three pots of varying heights in a cluster looks intentional. Five looks like a collection. Two looks like a mistake.
How to Arrange Them for the Full Minimalist Effect
I arrange succulents not by color, but by form. This is a trick I picked up from a landscape designer. Put contrasting shapes next to each other.
- A round rosette (Echeveria) next to a spiky vertical (Agave).
- A trailing plant (Sedum) next to a sturdy upright (Crassula).
The contrast creates visual interest without clutter. And don’t overcrowd them. Succulents like their space. Leaving an inch of bare soil between each plant looks more deliberate and high-end.
Common Problems I Still Encounter
Even with my careful setup, issues come up. Here’s what I see most and how I fix it.
Problem: Etiolation (Stretching)
If the stem starts to grow long and the leaves space out, that’s etiolation. It’s a sign of insufficient light. My fix? I cut the top rosette off. I let it dry for two days. Then I stick it back in the soil. It roots again quickly. The old stem also grows new pups. This is a free propagation method.
Problem: Shriveled Leaves
This usually means thirst. But it can also mean root rot, because rotted roots can’t absorb water. I check the stem first. If the stem is firm, I water. If the stem is soft, I cut off the rotted parts and repot.
Problem: White Cottony Spots
That’s mealybugs. I use a cotton swab dipped in rubbing alcohol to wipe them off. I do this weekly until they’re gone. It’s tedious, but it works.
The RHS and AHS Perspective
I follow the Royal Horticultural Society guidance on succulent care. They emphasize well-drained compost and avoiding cold, damp conditions. Root rot is the leading cause of death for houseplants, which aligns with what I see in practice. The American Horticultural Society also highlights the importance of understanding a plant’s native habitat. Succulents come from arid regions. Mimicking that – bright light, lean soil, dry periods – is the key to success.
Seasonal Care Adjustments I Make
Winter: Growth slows. I reduce watering to once a month. I move pots closer to the window or add a grow light.
Summer: Active growth. I water more frequently, but I also watch for sunburn. I shield plants from harsh afternoon sun.
Spring/Fall: This is the best time to repot. I do any major repotting in spring. I divide plants then as well.
If you're buying online
I read the vendor reviews carefully. I inspect the plant the day it arrives. I repot it into fresh soil within a week. Online plants often ship in pure peat moss, which holds way too much water. I throw that soil out immediately.
My Final Take on Starting This Process
Choosing succulents for a minimalist garden is not difficult. But it requires patience. I suggest buying one or two plants first. Test them out. Use my two-week observation routine. See how they react to your home environment. Once you understand your light and water conditions, you can scale up. I went from a graveyard of dead plants to a thriving collection of about forty pots by simply changing my selection criteria and my watering habits. It’s all about the prep.
Frequently Asked Questions
Q: How often should I really water succulents in a minimalist indoor space?
A: Every 2-3 weeks in the growing season, and once a month in winter. But it’s never about a schedule. It’s about checking the soil. Stick your finger an inch deep. If it’s dry, wait three more days. If it’s still cold and damp, wait a week.
Q: Can I use any pot I like if I add a drainage hole?
A: You can. But the material matters. Terracotta is best for moisture control. Glazed ceramic looks nicer but holds moisture. If you use glazed ceramic, reduce watering by about 30%. Always use a pot that is shallow rather than deep.
Q: Why do my store-bought succulents die within a month, no matter what I do?
A: I’d bet on poor soil from the nursery. They often use peat-based mixes that get waterlogged. The plant looks fine in the store, but the roots are already weak. My advice: repot into a gritty mix the day you bring it home. Remove all the old soil from the roots first. This step alone extends the life of my plants dramatically.





