bluename
 succulents in pumice only. That’s it. No soil, no bark, no perlite mix. Just pure, chunky pumice. You water it, the rock holds moisture, and the roots go crazy. I’ve been doing this for two years now in my Chicago apartment, and it cut my plant death rate to nearly zero.
Here’s the short answer: Propagating succulents in pumice only works because the rock provides perfect drainage and air pockets, preventing rot while encouraging strong root growth. You simply take a healthy leaf or cutting, let it callus for 2-3 days, place it on top of a pot filled with pumice, and mist lightly every 3-4 days. In about 2 weeks, you’ll see pink roots pushing into the gravel. That’s it.
I used to lose every single propagation to rot. Every. Single. One. My kitchen windowsill looked like a graveyard of mushy leaves. Then I read a forum post about naked root culture. I tried it. I never looked back.
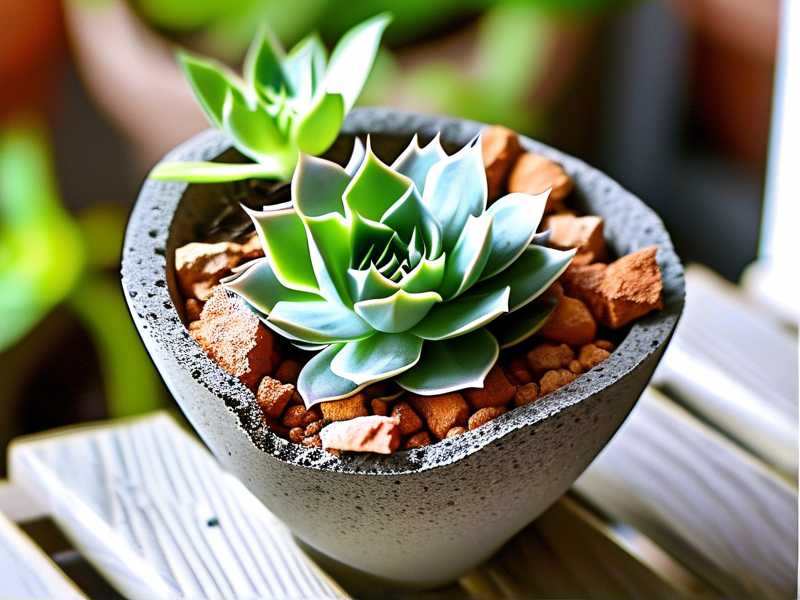
Why Pumice Beats Regular Soil for Propagation
Before I switched, I used the standard cactus mix from the big box store. It felt gritty enough. But within a week, the leaves would turn translucent and collapse. That’s the classic overwatering sign.
The science is simple. Soil holds water against the leaf. Pumice doesn’t. Pumice is volcanic glass full of tiny holes. It absorbs water internally but drains externally. So the leaf sits on a dry surface while the air around it stays humid. That’s the sweet spot for root initiation.
I’m not making this up. The RHS notes that most succulents require a free-draining compost to prevent root loss. Pumice takes that to the extreme. It’s inert, sterile, and doesn’t break down. You can reuse it for years.
The 3 Deadly Mistakes Beginners Make (I Made All of Them)
Mistake #1: Watering Like It’s Soil
This is the big one. 90% of indoor plants die from overwatering, and succulents are the worst offenders. When you use pumice, the watering rules change entirely.
I remember my first batch in pumice. I watered them every other day because the pumice dried out fast on top. I thought they were thirsty. They weren’t. The roots were too young to drink. I drowned them.
The Fix: Stop watering on a schedule. For leaves, wait until you see the first pink root emerge. For cuttings, wait until you feel slight resistance when you tug the stem. That usually takes 7-14 days. Then water once a week max.
Mistake #2: Bright Direct Sunlight
I had this idea that succulents love the harshest sun. So I put my fresh props on a south-facing ledge. Big mistake. The leaves cooked in 48 hours. They turned brown, crispy, and fell over.
Pumice doesn’t hold water on the surface, so the leaves heat up fast. There’s no thermal buffer like soil has.
The Fix: Bright, indirect light is your friend. A north or east windowsill works best for the first two weeks. After roots form, you can move them up to a brighter spot gradually. I keep mine about three feet away from a south window. They thrive.
Mistake #3: Using the Wrong Pot
This one hurt. I used a cute ceramic bowl without a drainage hole. The pumice sat in stagnant water at the bottom. The roots reached down, touched the water, and rotted instantly.
I also tried a wide, shallow tray. That was okay for leaves, but terrible for stem cuttings because they toppled over.
The Fix: Use a terracotta pot with a large drainage hole. Terracotta breathes, which pulls extra moisture from the pumice. For leaves, use a shallow bonsai pot. For cuttings, use something deep enough to anchor the stem upright. I find 3-4 inches deep is perfect.
My Exact 2-Week Process (Start to Finish)
Let me walk you through what I do. I’ve refined this over dozens of batches. It works every single time.
Day 1: Taking the Cuttings
I use clean, sharp scissors. I don’t just pull leaves off. I twist them gently from the stem. The goal is to get the entire leaf base, the part that connects to the node. If you tear it, the leaf won’t grow roots.
For stem cuttings, I cut a 2-3 inch piece. I remove the lower leaves, exposing about an inch of bare stem.
Then the hardest part: I lay them on a paper towel. I forget about them for 48 hours. They need to callus over. If you skip this, they’ll suck up too much water and burst.
Day 3: Setting Up the Tray
I take a clean plastic nursery pot (4 inches is good for a few leaves). I fill it with pumice. I use the 1/4 inch size, not the dust. I do not wet the pumice first. No, dry pumice goes in the pot.
I place the callused leaves on top. I don’t bury them. I just lay them flat, facing up. For stem cuttings, I push them down into the pumice until they stand firm.
I put the whole pot in a spot with bright, indirect light. That’s my east window sill.
Day 5: First Mist
No stem watering yet. I use a spray bottle. I mist the top layer of pumice lightly, just enough to make the surface darken. Not soaked. Just damp.
Day 8: Check for Roots
I gently lift one leaf. At this point, I usually see tiny pink or white dots at the base. Those are the first roots, or callus bumps.
If I see nothing, I mist again. Lightly. I don’t panic. Some leaves are sluggish. My Echeveria took 16 days once.
I also take the stem cuttings out to check. A bit of resistance means roots are coming. If it wiggles, it’s not ready.
Day 12: The Root Explosion
By now, most leaves have visible roots reaching into the pumice. The roots look like tiny white threads. They’re searching for water.
I switch to a bottle with a thin spout. I water the pumice beside the leaf base, not directly on the leaf. I use about 2 tablespoons per pot. This gives the roots a drink without wetting the leaf body.
Day 16: First Tiny Leaves
I see a tiny green dot at the base of the mother leaf. That’s the new rosette. This is the payoff. It’s tiny, maybe the size of a pinhead.
At this point, I remove the mother leaf carefully if it’s still attached. Sometimes it falls off naturally. Sometimes I have to gently twist it. Be careful, the baby holds on tight.
Day 21: Potting Up – Sort Of
I don’t repot yet. The baby leaves are too tiny. I leave them in the pumice. I start watering once a week, slightly more quantity. I do this for another month until they’re the size of a nickel. Then I move them to their own pots with my normal gritty succulent mix.
But wait – the pumice-only method isn’t just for the initial propagation. You can keep them in pure pumice indefinitely. I have a mature Haworthia that’s been in pumice for 14 months. It’s thriving.
What I Learned After Killing 5 Batches
I’m not a botanist. I’m just a guy with a windowsill. But I’ve made every mistake possible.
Batch 1: Used fine sand mixed with pumice. Bad. It compacted and suffocated the roots.
Batch 2: Used a heat mat. I thought warm roots grow faster. They did, but algae grew too. I had green fuzz all over the pumice. I had to rinse it all and start over.
Batch 3: Kept them in the bathroom for humidity. Too dark, got stretching like crazy.
Batch 4: Moved them to a different window every day. Stress city. Leaves dropped instantly.
Batch 5: Watered from the bottom. That’s a standard trick for soil. For pumice, it’s too wet. The water wicks too high and leaves sit in moisture for days. It’s bad.
Here’s what actually worked. I stopped trying to control everything. Pumice doesn't need much help. You’re just a facilitator. You set the stage and let the plant do its thing.
The Pumice "Dunk" Trick for Stubborn Cuttings
Some species are just slow. My String of Bananas took 3 weeks to root in pumice. I almost gave up.
I tried a trick from an old grower. Instead of misting, I dunked the cutting in water for 10 seconds, then let it dry for an hour. Then I stuck it back in the pumice.
This works because it mimics a rainstorm. The stem gets a quick soak, then the pumice stays dry. The roots are tricked into thinking they’re in a seasonal climate. It kick-started root growth within 4 days. I highly recommend this for Graptopetalum or Senecio cuttings.
Why RHS and AHS Back This Logic
I’ve read a lot of contradicting advice online. But the AHS has a good section on succulent care. They emphasize low water and good air circulation. Pumice is literally a rock that holds water in its pores, not around its surface.
The Royal Horticultural Society echoes similar guidance on using gritty mixes for alpine and succulent plants. They say the key to success is "winter cold and summer sun," but the substrate must be sharp-draining. Pumice is essentially the ideal texture because it doesn’t waterlog.
These organizations might not say "use pumice only" explicitly, but the logic of their drainage advice leads right to it. If you want to be cautious, you can mix it 1:1 with perlite, but I promise, pure pumice is fine for props.
The Complete Lowdown on Pumice Sizes
I can’t stress this enough. The size matters.
- 1/8 to 1/4 inch: Use for tiny leaves like Sedum or string of pearls. It’s easier for thin roots to grip.
- 1/4 to 3/8 inch: Use for standard Echeveria, Graptopetalum, Crassula.
- 1/2 inch or bigger: Use for large stem cuttings like jade trees or euphorbia.
I use the 1/4 inch for everything. It’s versatile. It holds enough moisture without flooding.
Also, check for dust. If your bag of pumice is full of fine powder, rinse it in a colander until the water runs clear. Then let it dry completely before using. Dust creates mud-like pockets in the pot, defeating the purpose.
Troubleshooting: My Leaves Are Turning Yellow
This happened to me twice. Yellow leaves usually mean the leaf is already hydrated and stressed.
First, check that your pumice is dry. It should be bone-dry on top between waterings. Poke your finger down an inch. If it’s still cool and damp, you’re watering too much.
Second, check your light. If the leaf is yellow and slightly translucent, it’s burned. Move it out of direct sun.
Third, check for physical damage. If you broke the leaf base when twisting, that leaf is a goner. Discard it before it rots and spreads bacteria.
Troubleshooting: Roots Grow But No Baby Leaves
This is annoying. The root system looks healthy, but there’s no new rosette. I’ve seen this with some variegated types.
The most common cause is a lack of light intensity. The leaf is using energy to grow roots, but it needs more photons to trigger leaf cell development. I move them to a brighter windowsill, or use a grow light for 6 hours a day. That always fixes it.
Another cause is a missing growth point. If you cut too far away from the node, the leaf has no meristematic tissue to form a new plant. You can’t fix that. Just take a new leaf.
The “Wet Pumice” Method (Advanced)
Once you get the hang of dry pumice, try the wet method for faster results.
Fill your pot with pumice. Run it under water until it’s completely saturated. Then let it drain for 15 minutes. The pumice should be damp, not soaked. Place your cuttings on top.
The humidity around the cutting is higher because the rock is slowly releasing moisture. I got roots in 5 days this way for a Portulacaria afra. The risk is rot, so only do this with healthy, fully callused cuttings. I don’t do this for leaves, only stems.
Long-Term Maintenance in Pure Pumice
I know this sounds counterintuitive, but you have to fertilize more often. Pumice has no nutrients. Soil does.
I use a liquid succulent fertilizer diluted to 1/4 strength. I add it to the water every time I water during the growing season (spring and summer). I skip it in winter.
Without fertilizer, your plants will live, but they’ll grow slowly and might look pale. Mine stayed alive but stopped growing for two months. Once I started feeding them, they took off.
A Cheat Sheet for Common Species
Not all succulents love pumice equally. Here’s my personal experience:
- Echeveria: Loves it. Roots fast, no issues.
- Haworthia: Thrives in it long-term. The thick roots love the airflow.
- Jade (Crassula): Great for stem cuttings. Water more often.
- Sedum: Perfect. Tiniest pumice size.
- String of Pearls: Works, but keep them warm. They’re slower.
- Lithops (Living Stones): Absolute magic. No risk of overwatering ever.
The Final Nudge
Listen, I get it. It feels wrong to not use soil. It feels like a gimmick. I thought so too.
But I tried it once. The results were undeniable. I haven't bought a bag of potting soil for succulents since last spring. The roots from pumice grown plants are beefier, whiter, and more resilient to drought.
If you’re skeptical, just try it with two leaves. Take your Echeveria, twist off two leaves, and put them in a shot glass full of pumice. Wait two weeks. You’ll see roots. You’ll see tiny leaves. And you’ll wonder why everyone makes succulents so hard.
It’s just a rock, some patience, and a window. That’s all you need.
FAQ
Q: Can I reuse used pumice for the next batch?
Yes. I do it all the time. Rinse it well to remove old root debris. Bake it in the oven at 200°F (93°C) for 30 minutes to sterilize. Let it cool completely. Then use it again. This kills any fungal spores.
Q: How often should I water props in pumice?
For the first week, just mist lightly every 3-4 days. Once roots appear, water once every 7-10 days. The key is to let the pumice dry completely between waterings. If you can see the water draining out the bottom, you’re fine.
Q: Do I need a drainage hole if I use pumice?
Yes, absolutely. Pumice holds moisture in its pores, but excess water needs an escape route. If you use a glass jar without a hole, the bottom of the jar stays wet forever. That defeats the purpose. Always use a pot with a hole.
Q: What’s the ideal pumice size for average household?
For standard houseplant succulents, 1/4 inch is perfect. If you have large jade plants or aloe, go bigger with 3/8 inch. If you have tiny leaf props, go smaller. Most garden centers sell "horticultural pumice" in this size range.