bluename
How to Fix succulents With Purple Leaf Margins: A 2-Week Rescue Plan
If your succulent leaves are turning purple at the edges, the fix is almost always stress from light, water, or temperature—and you can reverse it in 14 days. I’ve killed more succulents than I care to admit before I figured this out. The purple margin is not a disease. It’s a signal. And once you learn to read it, your plants will bounce back faster than you think. Let me walk you through exactly what I did, what went wrong, and how you can fix it without losing another plant.
Why Are My Succulent Leaves Turning Purple?
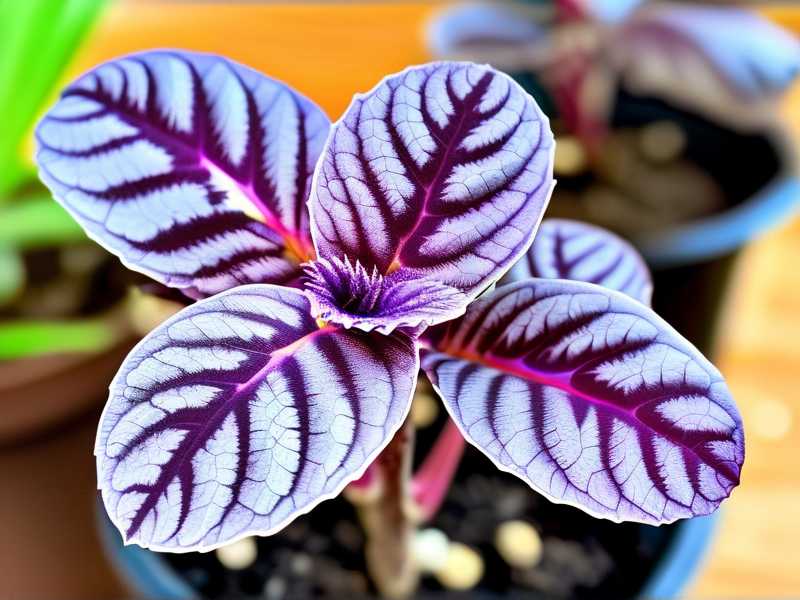
You might panic when you see that purple tinge creeping along the leaf margins. I did. My first thought was some exotic fungus. Turns out, purple margins on succulents are usually a stress response. Think of it like a plant blushing. It happens when the plant produces anthocyanin—a pigment that acts like sunscreen. It’s not inherently bad. In fact, some growers chase that color on purpose.
But here’s the catch. If the purple appears suddenly, or if the leaves start looking shriveled or mushy, you’ve got a problem. The color is telling you something about its environment. I’ve learned that 90% of indoor plants die from overwatering, but light stress is a close second. And honestly, most of the time, it’s a combination of both.
The 3 Biggest Mistakes I Made (And You’re Probably Making Too)
Before I give you the step-by-step fix, let’s talk about the mistakes. I made all of these. You probably are too, even if you don’t realize it.
Mistake #1: Overwatering—The Silent Killer
I can’t stress this enough. When I first started, I watered my succulents like they were thirsty ferns. Every few days. On a schedule. That’s the fastest way to turn those gorgeous leaves into mush.
Here’s what happens. Purple margins often show up when the roots are waterlogged. The roots can’t breathe. They start to rot. The plant gets stressed and sends out those purple pigments as a distress call. And you, thinking it’s thirsty, water it even more. It’s a death spiral.
The truth is, 90% of indoor plants die from overwatering. Succulents are even more sensitive because they store water in their leaves. They don’t need your help. They need you to back off.
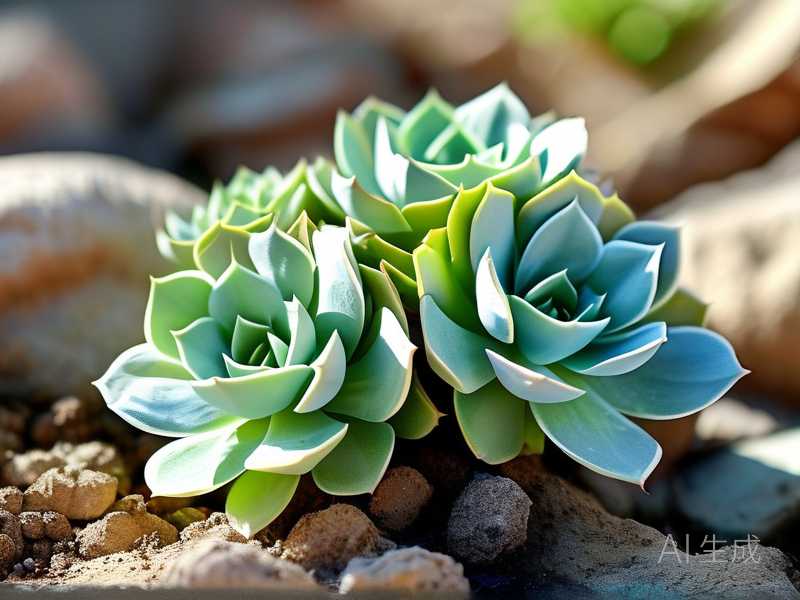
I remember my third Echeveria. It was beautiful. Powder-blue leaves with hints of pink at the tips. I watered it twice a week because the soil looked dry on top. Within a month, the leaves turned translucent purple and dropped off at the slightest touch. That’s when I learned about root rot. By the time I pulled it out of the pot, the roots were black and slimy. There was no saving it.
Mistake #2: Getting the Light Wrong
This one took me forever to get right. Succulents love light. But there’s a sweet spot. Too little light, and they stretch out, looking pale and weak. Too much intense, direct sun—especially if they’re not acclimated—and they get sunburned.
Now, sunburn on a succulent looks like brown, crispy patches. But the purple margin? That’s often a sign of just slightly too much light. It’s like the plant is tanning. It’s not burning, but it’s producing extra pigments to protect itself from the intense rays.
I tried putting my succulents on a south-facing windowsill in Texas. In July. Big mistake. They didn’t burn right away. Instead, they turned a very deep, dark purple within three days. The leaves were still firm. No rot. Just… purple. I thought it looked cool at first. But then I realized the growth had completely stopped. The plant was in survival mode, not growth mode.
Mistake #3: Using the Wrong Pot
You wouldn’t think the pot matters that much. Oh, but it does. I learned this the hard way.
I bought this beautiful glazed ceramic pot with no drainage hole. It looked perfect on my shelf. I added a layer of gravel at the bottom, thinking that would help with drainage. News flash: it doesn’t. Water pools at the bottom, below the gravel, and the roots sit in it. That’s a recipe for disaster.
Succulents need pots with drainage holes. Period. They need the water to flow out freely. They also need a pot that allows airflow. Terra cotta is great because it’s porous—it wicks moisture away from the roots. Plastic pots hold in moisture longer. Glazed ceramic pots are basically waterproof.
I won’t even tell you how many plants I lost to that stupid cute pot with no hole. It was my first year of succulent parenting. I thought I knew better than the rules. I didn’t.
My 2-Week Fix Plan: What I Actually Did
Okay, so after killing a few specimens, I finally got my act together. I decided to document a full 2-week rescue on a Graptopetalum that was showing those classic purple margins. The leaves were just starting to feel a bit soft. Not mushy yet. But not plump and firm like they should be.
Here’s my exact process.
Week One: Diagnosis and Recovery
Day 1-2: The Unpotting
The first thing I did was pull the plant out of its pot. You need to see the roots. This is non-negotiable.
I carefully tipped the pot on its side and gently slid the plant out. The soil was damp. Too damp. It had been four days since I last watered, and the soil in the middle of the pot was still clinging to moisture. That was my first clue.
I brushed off as much soil as I could from the roots. What I found was concerning but not hopeless. Some of the feeder roots had turned a dark brown color. They were soft. That’s early-stage rot. The main taproot was still white and firm, though. So I had a chance.
I took a pair of clean, sharp scissors and cut away the dead, mushy roots. I was careful not to damage the healthy ones. This part is scary. I know. But it’s necessary. Leaving the rot will only let it spread.
Day 3-4: The Drying Period
Here’s something nobody told me when I started. After you cut away rotten roots, you cannot put the plant back in soil right away. You have to let the cuts callus over.
I laid the plant on a dry paper towel. It sat on my kitchen counter, out of direct sunlight, for two full days. The roots were exposed to the air, drying out completely. The cut ends formed hard, white calluses. That’s what you want to see.
This step feels wrong. You’re leaving a plant out of soil for days. It looks like it’s dying. But it’s not. It’s healing. I can’t tell you how many people skip this step and then wonder why their plant rots again.
Day 5-6: Fresh Potting Mix
While the plant was drying, I prepared a new pot and soil. I chose a small terra cotta pot—about 4 inches wide. It had a nice big drainage hole in the bottom.
For the soil, I didn’t use the bagged “cactus mix” straight out of the bag. That stuff is usually too water-retentive on its own. I mixed it with perlite. About 50/50. Perlite is those little white balls that look like styrofoam. They create air pockets in the soil, which helps it drain faster and prevents compaction.
I filled the pot about halfway, then placed the plant on top. I carefully spread the roots out over the soil. Then I added more soil around the roots, taping the pot gently on the counter to settle it. I did not bury the stem too deep. The base of the lowest leaves was just above the soil line.
Day 7-10: The First Watering
This is where you have to be disciplined. I know you want to water it. I know you think it needs a drink. But you have to wait.
After potting the dried plant, I waited another three days before giving it any water. This allows any tiny root breaks to heal. It minimizes the chance of rot.
When I finally did water, I didn’t just pour it on top. I bottom-watered. I filled a shallow dish with room-temperature filtered water and placed the terra cotta pot in it. The water wicked up through the drainage hole and moistened the soil from the bottom up.
I left it in the dish for about 15 minutes. Then I took it out and let it drain completely. The soil was moist but not soggy.
Week Two: Encouraging Recovery
Day 11-13: Adjusting the Light
Now we get to the light issue. Those purple margins were caused by light stress in my case. So I couldn’t just put the plant back in the same spot.
My succulents sit on a south-facing windowsill. It gets about 6 hours of bright, direct sun in the summer. That’s too much for some species right after a stressful repotting.
I moved this recovering plant to my east-facing window. It gets direct morning sun—gentler, less intense. That’s about 3-4 hours of sun. The rest of the day is bright, indirect light. This is the sweet spot for stressed plants.
Day 14: The Pivot Point
By day 14, I was checking for signs of new growth. You have to be patient. The plant won’t show dramatic new leaves in two weeks. But it will show signs of recovery.
The leaves started plumping up. The purple margins weren’t as dark as they were before. The new growth at the center of the rosette was a healthier green with just a hint of pink at the tips. The roots, which I checked carefully, were holding firm.
This was my signal that the rescue was working. The plant wasn’t 100% back to perfect, but it was on the right track.
The Step-by-Step Guide You Can Follow Right Now
Let’s break this down into a simple list. If you’re dealing with purple margins on your succulent right now, here’s what you should do today.
Step 1: Check the Roots
This is the most important step. Gently remove the plant from its pot. Good roots should be white or light tan and firm to the touch. Bad roots are dark brown or black and mushy. If all the roots are mushy, don’t panic.
You can still save the plant. Use a clean knife to slice off the stem above the rotten area, essentially decapitating the plant. Let the cutting callus over and replant it. I’ve done this more times than I want to count.
Step 2: Let It Air Out
Once you’ve removed any damaged roots or leaves, lay the plant on a paper towel in a dry, well-ventilated area. Keep it out of direct sun for 2-3 days. The wound needs to dry completely.
If you skip this step, you’re just inviting the rot back. Trust me on this. I lost a Haworthia because I replanted immediately after cutting off rot. The cut touched wet soil and rotted all over again.
Step 3: Choose a Better Pot and Mix
Your pot needs a drainage hole. That’s non-negotiable. If your current pot doesn’t have one, get a new one. A pot that’s one size larger than the plant is fine. Too large a pot means too much soil. Too much soil means it stays wet longer.
Use a gritty, fast-draining mix. I recommend making your own with 1 part commercial cactus soil, 1 part perlite, and 1 part coarse sand. This mixture drains almost instantly. Water flows through it easily.
Step 4: Wait 5-7 Days Before Watering
Yes, you read that right. After repotting, wait at least 5 days. Then do a gentle bottom-water. Wait another 1-2 weeks before watering again.
Step 5: Give It Bright, Indirect Light
Don’t throw your newly potted succulent back into full, scorching afternoon sun. Give it time to acclimate. Place it in a spot with bright, indirect light for the first week. Then gradually increase the sun exposure.
According to the RHS, most succulents prefer bright light but can suffer from sunburn if moved suddenly from shade to full sun. I’ve learned to transition my plants slowly over 7-10 days. It makes a huge difference.
Step 6: Monitor and Adjust
After two weeks, look at your plant. The leaves should feel plump and firm. The purple hue should be fading from the leaf margins unless it was already naturally purple. If the purple remains, check your light levels. If the leaves feel soft or wrinkled, you may have under-watered. Adjust accordingly.
Understanding the Causes of Purple Margins
I want to go deeper into the why. It’s not just about light and water. Temperature plays a big role too.
Temperature Stress
When temperatures drop below 50°F (10°C), some succulents produce purple pigments. It’s a cold-protection mechanism. The anthocyanin acts like antifreeze for the leaf cells. This is common in outdoor succulents in the fall.
My partner keeps some Sempervivums in a porch pot. They’re pretty hardy. When the nights started getting cold in October, their leaf tips turned deep purple. The following spring, they went back to a normal green with only slight pink tips. So if you notice purple margins in the cooler months, it might just be a seasonal response. No action needed.
But if it happens indoors, during a temperature stable period, check for cold drafts near windows. I had a plant sitting too close to a drafty window in the winter. The leaves closest to the glass turned purple. I moved it back a few inches, and the color returned to normal.
Natural Coloration
Some succulents are just purple by nature. Echeveria ‘Perle von Nurnberg’ is a classic example. It has pinkish-purple margins even when perfectly healthy. Other species, like certain Sedums and Sempervivums, have a natural reddish-purple edge.
If your plant has always had that color, even when growing healthily, then you have nothing to worry about. The problem is when the color suddenly appears or deepens significantly alongside other symptoms like shriveled leaves or soft spots.
Root Health Issues
We touched on this early, but it warrants repeating. Soggy soil leads to root rot. Root rot prevents the plant from taking up water and nutrients. The plant becomes stressed. One of the stress signals is the production of anthocyanin.
Check the soil. If it’s soggy and the leaves have purple margins, you’re overwatering. Cut back immediately. Let the soil dry out completely before watering again. If the rot has set in, you need to repot.
Nutrient Deficiency
Sometimes, a lack of proper nutrients can cause stress responses. Phosphorus deficiency, in particular, can cause purple leaves in some plants. While succulents are not heavy feeders, they do need a balanced diet.
I tried fertilizing my succulents with a regular houseplant food at full strength. That was another mistake. It burned the roots. Succulents need a diluted, low-nitrogen fertilizer—like a 2-4-4 or something formulated for cactus. You should only feed them during the growing season (spring and summer). I feed mine at half-strength, once a month.
Tools and Products That Helped Me
You don’t need a lot of fancy gear, but a few items made my life so much easier.
A Moisture Meter
I used to stick my finger in the soil, but that was unreliable. The surface would feel dry, but deep down, it was still wet. I bought a cheap moisture meter on Amazon. It has a metal probe that you stick into the soil. It gives you a reading on a scale from 1-10.
Now I only water when the moisture level is at 1 or 2. This single tool has saved me from so many overwatering incidents. The American Horticultural Society AHS stresses the importance of understanding your plant’s water needs. And honestly, a moisture meter helps you do that.
A Spray Bottle
This is for pests, not watering. I had a small bout of mealybugs once. Those little white cottony pests. They suck the sap from succulents and cause stress. Stressed plants turn purple. I treated them with a 70% isopropyl alcohol solution in a spray bottle. It worked. Just make sure you don’t spray in direct sunlight, or the alcohol can burn the leaves.
A Good Potting Mat
This sounds silly, but it helps. I do all my repotting on a large, waterproof mat. It keeps the soil from getting everywhere. It makes cleanup so much faster. It also means I’m more likely to actually repot a plant when it needs it, instead of dreading the mess.
Common Questions About Purple Leaf Margins (FAQ)
Q1: Should I remove leaves with purple margins?
Not necessarily. If the leaves are still firm and plump, leave them. The purple color is just pigment. The leaf is still photosynthesizing and helping the plant. Removing it will only create a wound and stress the plant further.
If the leaf is soft, mushy, or translucent, then remove it. Use clean scissors. Tug gently. The leaf should come off cleanly. Let the wound callus over before watering.
Q2: Can purple margins go back to green?
Yes, they can. Once you correct the environmental stress, the plant will stop producing excess anthocyanin. The existing pigment will break down over time. New growth will be normal-colored.
It doesn’t happen overnight. But within a few weeks, you should notice the purple fading, especially if the stress was light or water-related.
Q3: Is purple on succulents a sign of sunburn?
Not exactly. Sunburn on succulents looks different. It usually appears as brown, flat, crispy patches on the skin of the leaf. It’s dry and papery.
Purple margins are a sign of stress before sunburn. It’s like the early warning system. If you see purple, you should reduce light intensity. If you see brown crispy patches, you need to move the plant out of direct sun immediately.
Q4: How often should I water my succulents?
There’s no one-size-fits-all answer. In the summer, I water my indoor succulents every 10-14 days. In the winter, I water them once a month or even less. The key is to check the soil.
Stick your finger about an inch into the soil. If it’s dry, water. If it’s damp, wait. It’s that simple. You want that soil to completely dry out between waterings.
Q5: What if my succulent is turning purple AND dropping leaves?
That’s a more serious sign. If leaves are dropping off, you likely have root rot. The roots have failed, and the plant is shedding leaves to stay alive. Immediate action is required.
Unpot the plant, inspect the roots. Cut away any black or brown rot, let it dry, and repot in fresh, dry soil. Don’t water for at least a week. It’s a gamble, but it’s better than leaving it as is.
My Final Thoughts
Look, I’ve been where you are. I had a shelf of succulents that all looked sad and stressed. I was convinced I was “plant cursed.” Turns out, I was just making the same three mistakes over and over: too much water, wrong light, and pots that trapped moisture.
Once I started treating succulents like the desert plants they are, everything changed. They need less than you think. They want more light than you think, but not sudden scorching sun. And they need a pot that lets their roots breathe.
The purple margins are your plant talking to you. It’s not a death sentence. It’s a request. Listen to it. Adjust the water. Change the light. Give it a fresh pot. Give it a couple of weeks. You’ll see it bounce back.
I’ve had plants that went from looking like a sad science experiment to thriving centerpieces in my living room. That recovery process is one of the most rewarding parts of this hobby. You don’t just buy a plant and watch it. You learn to understand it. You learn to fix it when things go sideways.
So go check on your succulents right now. Peek at those purple edges and ask them what’s wrong. With a little patience and a few adjustments, you can get them back to a gorgeous, healthy state. I promise you that.