bluename
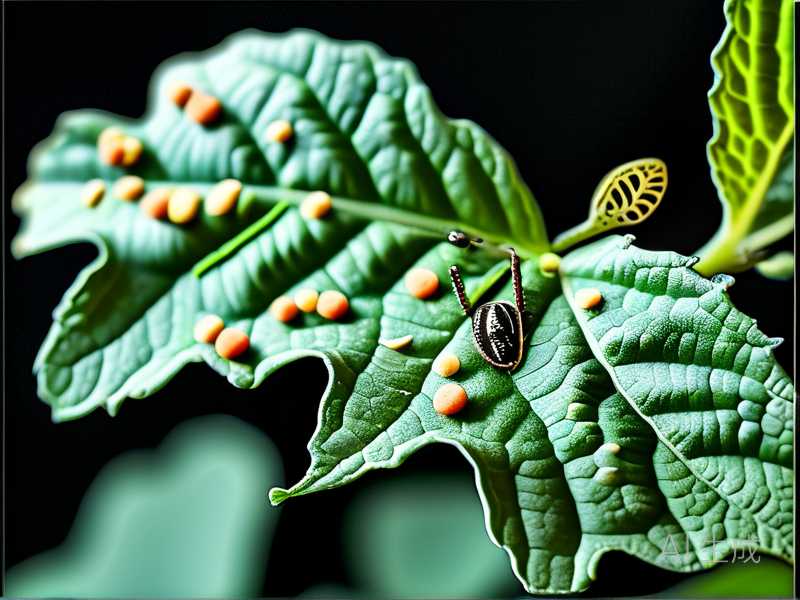
Finding mealybugs or scale on your prized Echeveria is a gut punch. I know that feeling. You inspect your collection one morning, coffee in hand, and spot that telltale white fluff nestled in the rosette's core. Panic sets in. You think about tossing the whole plant. Don't. Here is the short answer: grab sterilized scissors, cut the infected stem or leaf cleanly at the base, discard the debris far from your other pots, and immediately isolate the patient. I have done this dozens of times over the years, and it works. But the real lesson, the one that took me a while to learn, is that trimming is only stage one of a two-week rescue mission.
I remember my first real infestation. I was so naive. I thought a quick wipe with alcohol would fix everything. It didn't. The bugs came back with a vengeance. That is when I learned that cutting off the damaged parts is non-negotiable. You have to be ruthless. If you leave one single mealybug hidden in a leaf axil, it will spread. I have been growing succulents for over a decade now, and I have seen what happens when people are too hesitant to snip. It is not pretty.
This guide is the result of my own trial and error. I have made every mistake possible. I have overwatered the leftovers. I have placed the freshly cut plants in direct sun and watched them crisp. I have used the wrong soil and caused root rot on top of pest damage. So let me walk you through the exact process I use now. It is simple. It is effective. And it will save your collection.
Why Trimming Is Your Best Defense Against Pests
Let’s be real about something. Many succulent pests, like mealybugs and aphids, love to hide in the tight spaces between leaves and stems. Spraying alone rarely reaches them all. The foliage acts like a shield. I have found through experience that physically removing the infested area is the only way to guarantee you have excised the problem. Think of it like surgery. You do not just clean the wound. You cut out the dead tissue.
Another reason trimming works is that it removes the weak part of the plant. Pests often target the newest growth or the stressed areas. By cutting these away, you force the succulent to push out fresh, clean growth from the roots or the main stem. This new growth is usually stronger. It is untainted by the pests. I have seen plants bounce back with more vigor after a good prune than they had before.
But you have to do it correctly. A half-hearted trim is worse than no trim at all. If you leave jagged edges or broken stems, you invite fungal infections. That is a whole other nightmare. I always aim for a clean, straight cut. I never leave a stub. The key is to remove the pest and the habitat in one decisive move.
The 3 Fatal Mistakes Beginners Make with Pest Pruning
Before I give you my step-by-step process, I need to address the elephants in the room. These are the mistakes that kill more succulents than the pests themselves. In fact, a lot of my early failures had nothing to do with the bugs. It was my reaction that killed the plant.
1. Overwatering the Wounded Plant
This is the big one. I cannot stress this enough. 90% of indoor plants die from overwatering, and this statistic skyrockets after you prune. Here is what I used to do: I would see the plant looking sad after I chopped off a stem, so I would give it a big drink of water. Terrible idea. The roots are already stressed. They have less foliage to support, so they need less water. If you flood the soil, you create a perfect breeding ground for root rot fungus. The roots suffocate. The plant dies within days.
I have learned to hold off on watering for at least five to seven days after a major trim. The cuts need to callus over first. If water touches that fresh wound, it can cause stem rot. This is a slow death that is very hard to reverse. You have to let the plant heal. It is a dry environment that succulents need to recover. I usually wait until the soil is completely bone dry and the plant shows signs of thirst, like slightly wrinkled leaves, before I water again.
My specific routine: After I cut, I do not water for a full week. Then I water deeply but infrequently. I never mist the plant after pruning. Dryness is your friend here.
2. Placing Them in Wrong Light After Cutting
I thought I was helping. I thought, "Hey, the plant is hurt, let me give it lots of sunshine to recover." That was a rookie mistake. Fresh cuts are like open wounds. Intense direct sunlight will literally burn the exposed tissue. I lost a beautiful Aeonium this way. The cut stem turned brown and crispy within hours of being put outside in the afternoon sun.
The correct approach is to place the trimmed succulent in bright, indirect light. You want it to have energy, but you do not want to stress it further. I keep my freshly pruned plants on a shelf that gets morning sun only. It is warm but not scorching. After about a week, I gradually move them back to their regular sunny spot. This acclimation period is crucial. It allows the plant to harden off the cut area naturally.
Think about it this way. If you have a cut on your finger, you do not go swimming in salt water. You protect the wound. The same logic applies to your plants. Give them a gentle environment. Let the callus form. Then reintroduce the harsh conditions.
3. Using the Wrong Pot or Soil
You might wonder what the pot has to do with pests. The answer is ventilation. If your succulent is sitting in a pot that is too big, or soil that retains too much water, the plant is already weak. A weak plant is a magnet for pests. I used to grow everything in fancy ceramic pots without drainage holes. They looked great, but my roots were always sitting in water. The plants were stressed. They had no natural defense.
I also realized that the soil mix matters. If you use standard potting soil, it compacts and stays wet. This is a death sentence. I now use a gritty mix. It is about 50% pumice or perlite and 50% soil. It drains immediately. Air reaches the roots. My plants are stronger. They don't get pests as often.
When you trim for pests, you should check if the pot is actually suitable. If the plant is root-bound, or the soil is degraded, the shock of the trim might be too much. I have started repotting the healthy part of the plant into fresh, gritty soil after a severe pest removal. This gives it a new lease on life. It is like moving to a clean house after getting rid of the bed bugs.
My Step-by-Step Process for Removing Pest-Infested Parts
Alright, let us get down to business. Here is exactly what I do. I have refined this process over many years. I have tried various tools and techniques. This is what consistently yields the best survival rates.
Step 1: Gather Your Tools and Sterilize Everything
This is non-negotiable. I cannot tell you how many times I have seen people use unsterilized scissors and spread bacteria from one plant to another. I use a sharp pair of pruning shears or a craft knife. Before I start, I wipe the blades with rubbing alcohol (70% isopropyl). I let it air dry. You do not want to rinse it off with water, as that negates the purpose. I also keep a cotton ball with alcohol nearby to re-sterilize between cuts, especially if I am pruning multiple plants. This simple step has saved me from cross-contamination disasters.
Do not use dull scissors. I made this mistake once with a thick stem. The scissors crushed the stem instead of cutting it cleanly. That crushed tissue became mushy and rotted. A sharp blade is essential for a clean cut that heals fast.
Step 2: Identify the Extent of the Infestation
Before you start hacking away, you need to look closely. Examine the plant. Are the pests just on the leaves? Or are they in the stem? Check the roots too, if you can. I usually tilt the pot to inspect the base. If the soil is crawling with ants, that could indicate aphids or mealybugs feeding on the roots. Sometimes, you have to cut more than you initially planned. It is better to cut off a healthy leaf to ensure you have removed the entire infection site than to leave a tiny piece of the problem behind.
I look for the "mother" colony. Often, there is a central cluster of pests near the soil line or in the crown. I remove all the affected leaves first. I gently wiggle them loose. If they resist, I use my knife to slice them off close to the stem. The goal is to expose the core of the plant.
Step 3: Execute the Clean Cut
When you find the inflection point, make your move. I usually cut about half an inch below the visible signs of damage. If the stem is black or mushy, I cut higher up until I see clean, white sap. This indicates you have reached healthy tissue. It breaks my heart to cut off a beautiful rosette, but I know it is necessary. I often propagate the healthy rosette top, but that is for another article.
For leaf removal, I use a sharp sideways motion. I do not pull straight down, as that can tear the stem. I slice the leaf away, making sure to get the entire leaf base. A tiny piece of leaf left behind can rot and attract fungus gnats.
Step 4: Dispose of the Infested Material Properly
Do not put the infested leaves in your compost bin. You will spread the problem. I put them in a sealed plastic bag and throw them in the trash. I immediately wash my hands and sterilize my tools again. I also clean the area around the plant. Mealybugs can crawl off and hide in crevices. I wipe down the shelf with an alcohol solution. This is a step many people skip, but it is one of the most important parts of pest control. I have had reinfestations happen simply because I didn't clean the pot's rim.
Step 5: Treat the Fresh Wound and the Remaining Plant
Once the cut is clean, I dab the wound with a cotton swab dipped in rubbing alcohol. This kills any lingering pests or eggs on the exposed tissue. It also helps to dry out the wound faster. I do this carefully. Too much alcohol can burn the healthy cells. A light dab is enough. Then I dust the cut with a sulfur powder or cinnamon. Cinnamon is a natural antifungal. I have used it many times with no adverse effects. It helps prevent rot while the callus forms.
Do not skip this step. I used to just cut and leave the wound open. It worked sometimes, but other times, the stem would start to turn black from fungus. The powder gives you an extra layer of protection. It is a cheap insurance policy.
Step 6: Isolate the Plant Immediately
You have to quarantine the plant. I know it is tempting to put it back with its friends, but do not do it. I keep a "hospital" spot on a different windowsill. Sometimes, I even use a separate room. Pests are excellent travelers. A mealybug can crawl from one pot to a neighboring one in a matter of hours. Keep the affected plant away from your main collection for at least two weeks. This prevents the spread of the infestation.
I spray the remaining leaves with a neem oil solution as a preventive measure. I mix one teaspoon of pure neem oil with a few drops of dish soap and a liter of water. I spray the entire plant, getting into all the crevices. This suffocates any pests I might have missed. It also leaves a slightly bitter residue that repels future bugs. I reapply this spray once a week during the recovery period.
The Two-Week Observation: What to Expect
Now comes the hard part. Waiting. I have learned that the two weeks following the trim are critical. This is where you see if your surgery was successful. I check on the plant every day. I am looking for new growth or signs of rot. Patience is necessary here. Here is a timeline of what I typically observe.
Days 1 to 3: The Callusing Phase
The new cut will look wet. By day two, the edge should start to dry out. By day three, you should see a hard, white callus forming. This is the plant's natural bandage. If the cut is still mushy or turning black, you have a problem. You will need to cut again sterilely and higher up. I had to do that with a stem that had hidden rot I didn't see. The second cut saved the plant. Do not be afraid to repeat the process if necessary.
During this phase, I do not water. I keep the plant in bright, indirect light. I also ensure the air circulation is good. A stagnant, humid environment will cause rot. I crack a window open if the weather allows.
Days 4 to 7: The No-Water Rule Continues
I keep holding off on watering. The plant is still using its own stored moisture to survive. I saw a small amount of shriveling on the bottom leaves. This is normal. It means the plant is using its reserves. I do not panic when I see this. It is a sign that the plant is alive to recover. The shriveling usually stops once the roots are fully able to provide for the smaller canopy.
I check for pests again. If I see a single bug, I remove it with a cotton swab dipped in alcohol. I do not wait. I am vigilant. I have had cases where I missed a nest of eggs, and they hatched on day five.
Days 8 to 10: The First Watering
Now that the callus is hard and dry, I give the plant its first drink. I water it thoroughly until the water runs out of the drainage hole. This encourages the roots to grow. I only do this if the soil was completely dry. If the soil was still damp, I would wait longer. Overwatering at this stage is deadly.
Within a day or two after this watering, I look for signs of life. Tiny green dots in the leaf axils are great. This is a sign of new growth. It is the most rewarding sight. It tells me that the plant has overcome the trauma.
Days 11 to 14: The Resilience Test
I gradually move the plant back to its original spot. I start with a few hours of morning sun and increase it daily. I look for new roots appearing at the base of the stem. This means the plant is secure. The color of the leaves should be brightening. If it is looking pale and stretched, it is not getting enough light. If the new growth is brown or crispy, it is getting too much sun.
At the end of week two, if I see no new pest activity and active growth, I declare the mission successful. I can move the plant back to the main display. But even then, I do not immediately water it on the same schedule as the others. I give it an extra week to fully acclimate.
Common Pitfalls During the Recovery Period
I have been through this many times. Even with a successful trim, things can go wrong. Here are a few issues I have encountered and how I fixed them.
The "Ghost" Infestation
You thought you got them all, but they are back. This usually happens because you missed a root mealybug. Root mealybugs look like white dust on the roots. They are invisible unless you unpot the plant. In severe cases, I have uprooted the plant, washed the root ball, and cut off the most affected roots. I soaked the remaining roots in a hydrogen peroxide solution (1 part 3% hydrogen peroxide to 3 parts water). This kills the bugs. It is a drastic step, but it works.
Stem Rot After Cutting
This is my nightmare. You cut too low, and the interior of the stem is brown. When you cut it, the core is not solid white. It is hollow or brown. This means Fusarium or another fungus has entered the stem. If this happens, you have to cut even higher. Everything brown must go. If you reach a point where there is no solid stem left, you cannot save the plant. But you can save the healthy leaves. I have had to resort to beheading a plant that was rotting from the ground up and propagating the individual leaves instead. It is a salvage operation.
Overwatering Out of Sympathy
I have touched on this, but it deserves a repeat. We humans want to fix things by providing water. It is our natural instinct to "nourish" a sick plant. Do not give in. Succulents do not operate like that. They need drought. I have started setting a timer for my watering during quarantine. I force myself to wait a full week. If I feel the need to do something, I wipe the leaves clean with a soft brush. I remind myself that the plant is healing.
Propagating the Healthy Cuttings
One of the best parts of trimming for pests is that you often have a healthy top rosette that you can save. Do not just throw it away. I have built at least half of my collection from cuttings saved from pest infestations. If you beheaded a tall, leggy succulent because the bottom was infested, let the cutting sit in a dry, shady place for two to three days. Then plant it in gritty soil. It will root quickly. This is a way to create a new, clean plant from the old.
Similarly, healthy leaves that you removed during the trim can be propagated. I lay them on top of dry soil. I mist them lightly every few days. Soon, baby plants will form. This gives me a sense of triumph over the pests. They tried to kill my plant, but instead, I multiplied it.
Tools and Products I Recommend
You don't need fancy gear, but having the right stuff helps. I prefer sterilized bonsai shears for their precision. For larger stems, a sharp knife is better. I always have a bottle of 99% isopropyl alcohol in my gardening kit. Neem oil is a staple in my pest control arsenal. It is organic and effective. I also use a small, soft paintbrush to clear away pests and dust from tight rosettes.
I get my supplies from local nurseries or online. I usually buy the concentrated neem oil. It lasts longer. I also use a systemic insecticide granule directed into the soil for severe cases, but I am cautious with this. I rarely rely on it because I prefer physical removal and organic treatments. But for a stubborn infestation, you might need it.
Addressing the Reality: How Pests Get There in the First Place
Prevention is better than cure. This is a phrase we hear all the time. I have learned that the hard way. Most pests come from new plants. I never introduce a new succulent directly into my collection anymore. I always quarantine them for a month. I check them thoroughly every day. This has prevented outbreaks on my main shelf.
Pests can also come in via open windows or on your clothes if you visit a nursery. It is a constant battle. I inspect my plants weekly. I look at the back of the leaves. I look in the axils. Early detection is your best weapon. If you catch the infestation early, you can just pick off the bugs and trim a single leaf instead of decapitating the whole plant.
Look at resources from the RHS if you want scientific backup on pest lifecycles. They have incredibly detailed guides on RHS pest management. The American Horticultural Society also provides excellent regionally specific advice on AHS for those in North America. I consult their databases often. They often mention specific biological controls that I can buy on order.
The Role of Soil Quality in Pest Prevention
I briefly mentioned this earlier, but it is worth repeating. The soil is the foundation of health. I have switched almost all my plants to a very inorganic mix. This means I use about 70% pumice and 30% organic matter. This mix dries out within two days of watering. Fungus gnats cannot survive in that environment. They need consistently damp soil. Mealybugs also struggle to move in such coarse material.
I have experimented with different ratios. A 50/50 mix is still effective. But if you are prone to overwatering, go with a 70/30 mix. Your plants will be thirsty more often, but it is nearly impossible to rot their roots. Healthy roots are your pest defense. They allow the plant to produce natural chemicals that repel pests. A stressed plant produces sugars in its sap that attract pests. Keep the plant growing steadily with proper soil and light, and you will have fewer pest problems.
Frequently Asked Questions
Can I save a succulent with root rot and pests at the same time?
Yes, I have done it. It is a project. I unpot the plant. I wash the roots. I cut off all the black and mushy roots. I dip the healthy roots in a fungicide. Then I spray with a pesticide. I pot it in fresh, dry, gritty soil. I wait a week before watering. It looks grim initially, but succulents are survivors. I once saved a rare Haworthia this way. It took months to recover fully, but it is now thriving.
How long should I quarantine my trimmed plants?
I quarantine for a minimum of three weeks. Two weeks is the minimum to break the lifecycle of many sap-sucking insects. But waiting an extra week ensures that any eggs you missed have truly hatched and died off. It also gives the plant time to grow strong enough to resist future attacks.
Should I use chemical pesticides or stick to natural ones?
I start with natural methods. Physical removal and neem oil cut it for most infestations. If it is a severe scale infestation, I will use a systemic insecticide drench. But I hate doing this because it harms beneficial insects. If you have a collection indoors, chemical sprays can be toxic to you and your pets. I always air on the side of caution. Try the natural route first. Your plants will thank you.
Final Thoughts
Trimming succulents to remove pests is a skill. It involves courage and patience. I have killed my fair share of plants through hesitation and overwatering. But once you learn the balance, it becomes second nature. You realise that the act of cutting away the bad parts is an act of love. It allows the plant to start fresh.
I find that after a good trim and recovery, my plants look better than before. The new growth is dense and vibrant. The plant often looks more sculptural without the lanky, stressed parts. So do not fear the prune. Embrace it. Sterilize your tools. Make your cuts clean. Let the wounds heal. Watch closely. You will save your plant. And maybe, just maybe, you will become a better gardener for it.
Start with your most infested plant today. Look at it closely. Determine where the damage starts and ends. Then, take a deep breath, snip, and trust the process. You have got this. Your garden needs you to be decisive. Get out there and do it.