bluename
How to Identify Thrips on succulents (Before They Destroy Your Collection)
I have a confession to make. I almost lost my entire collection of rare succulents to thrips last summer. Those tiny, winged nightmares are barely visible to the naked eye. Yet they nearly wiped out three years of careful propagation work. If you're here because your succulents look a little off, stop what you're doing and check them right now. Because the truth is, thrips are the single most underdiagnosed pest problem in indoor succulent keeping.
So, how to identify thrips on succulents? Look for silvery or bronze streaking on leaf surfaces, tiny black specks that look like ground pepper, and distorted new growth. That's the short answer. But spotting the actual insects themselves is another challenge entirely. They hide in the leaf axils and the soil line. So, let me walk you through exactly what I did, what I missed, and how I finally beat these tiny devils.
Why Thrips Are So Hard to Spot on Succulents
I spent weeks staring at my Echeverias and Haworthias, wondering why they looked dusty and tired. The leaves had this weird, silvery sheen to them. It was almost like the waxy farina that succulents naturally produce had been rubbed off. But I didn't see any bugs. In fact, I never saw an adult thrip until I knew exactly where to look.
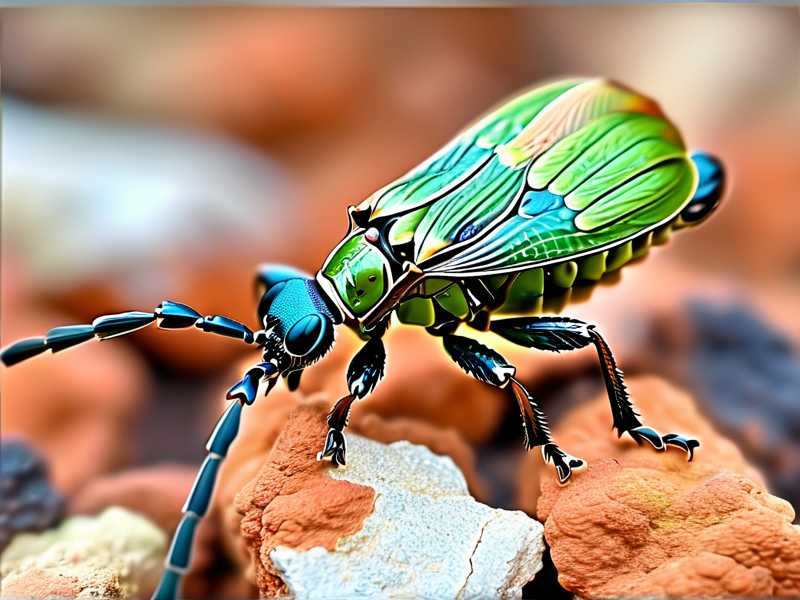
The biggest issue is their size. Adult thrips are about 1.5mm long. That is roughly the width of a staple wire. Their larvae are even smaller and almost completely translucent. Moreover, succulents have thick cuticles and compact rosettes. This offers thrips plenty of crevices to slip into. Honestly, if you are looking for black spots moving across the soil, you are looking too late. That is fungus gnat territory. Thrips are way more subtle.
Another thing that confused me was the lack of typical "holes". I expected chewing damage like caterpillar holes. Thrips don't eat like that. They puncture individual plant cells with their mouthparts and suck out the contents. This kills the cell, which then fills with air. Under the light, that dead cell reflects light back at you. This is what creates that streaky, silver, reflective look.
The Telltale Signs I Noticed on My Own Plants
Here is a breakdown of what I observed during my two weeks of intense observation. I isolated the affected plants in early June. I kept a daily journal with my phone camera and a jeweler's loupe. That magnifier was the single best purchase I have ever made for my plants.
Sign #1: The Silvery Streak and Bruise Look
If you turn a leaf slightly toward a light source, you might see tiny, irregular, silvered pathways or patches on the top surface. It really does look like scar tissue. At first, I thought it was sunburn. But sunburn usually affects the entire exposed area evenly. Thrip damage follows a more chaotic, zigzag path where the young larvae have been feeding.
The older lower leaves showed the most damage. The tips specifically looked dry and slightly desiccated. I remember picking up one of my Graptopetalum leaves and holding it up to the kitchen light. I could see the distinctive silvered dashes. Sometimes, you will see tiny brown dots within those silver patches. Those are the actual holes where the insect inserted its stylet.
Sign #2: Tiny Black Specks (And It's Not Dirt)
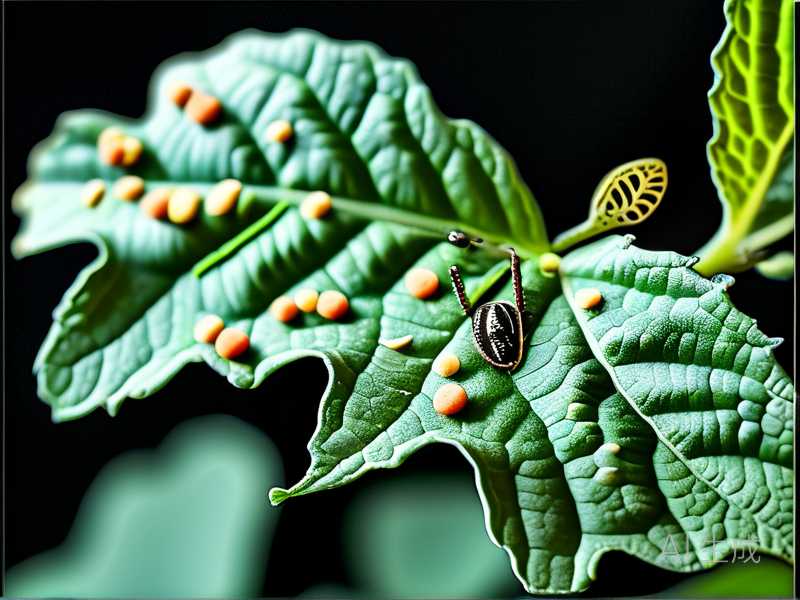
So, this is where the "personal experience" part gets a little gross. I noticed my white clay pots had tiny black spots on them. These looked like dust or soil splatters. But when I tried to wipe them off, they were stubborn. I grabbed my loupe and took a closer look. They weren't ground coffee or dirt. They were thrip frass. Basically, insect poop.
If you see these tiny, pinprick black dots on the plant stem, or on the lower leaves, or on the pot rim, you have a problem. This is a definitive indicator. It is actually easier to spot the frass than it is to spot the insects themselves. Look near the center of the rosette and along the leaf edges.
Sign #3: Distorted and Deformed New Growth
This is the feeling that made my heart sink. I had a Pachyphytum that was growing beautifully. Then, suddenly, the new leaves in the center started coming out twisted. They were wrinkled, but not in the shriveled way of underwatering. The newest leaves were also staying smaller than they should be. This is a classic sign of thrips because they love to feed on the tender, meristematic tissue in the center of the plant. That tissue is soft and easy to puncture.
The plant reacts by trying to heal the wounds, which causes the cell structure to warp as the leaf expands. If you have a succulent that is throwing out "ugly" leaves despite proper light and water, thrips are the likely culprit. Personally, I thought my plant was just having a bad growth phase. I was wrong.
The Actual Insects (And Where I Found Them)
After I saw the frass, I knew I had thrips. But I still hadn't seen an adult. I finally found them at dusk. That is the key. These pests are most active in the evening. I took a flashlight and a piece of white printer paper. I gently tapped the rosette of the succulent over the white paper. This is a method often recommended by growers, and I can confirm it works.
A few tiny, thin slivers of insects fell out. They were elongated and amber-brown. When they land on white paper, they try to scurry away quickly. If they were darker and stood still on the soil, that would be a different pest. The adults have wings, but they are useless for flying in strong wind. They prefer to crawl. Also, I noticed they would often latch onto my skin after I handled the plant, searching for a new meal.
The 3 Fatal Mistakes I Made As a Beginner That Attract Thrips
I want to be honest. The thrips didn't just show up out of nowhere. My poor care habits created a buffet for them. Here are the three biggest errors that new succulent keepers make. These are the exact same things I did wrong when I first started.
1. Watering Overload (The Root of All Rot and Thrips)
You have heard the statistic before, but let me repeat it: 90% of indoor plants die from overwatering. This creates stagnant, humid conditions at the soil surface. Although thrips themselves pupate in the soil, they thrive in environments that are slightly damp and overly warm. I used to water my succulents on a strict weekly schedule. That is a terrible idea.
Stressed plants produce a chemical signal called jasmonate when overwatered. This stress response actually makes the sap sweeter, making the plant more attractive to sucking pests like thrips. I observe that my overwatered plants were the first ones to get attacked. The healthy, semi-dry plants were largely untouched. I lost the first few plants to root rot and fungus gnats before I realized the thrips were just the next layer of the cake. Once I let my soil dry out completely and drastically reduced watering frequency, the pest population seemed to decline naturally as the environment became less hospitable.
2. Wrong Light Placement (Weak Cells)
I had a lovely shelf near a north-facing window. I thought it was perfect because the room was bright. However, succulents need direct sun, not just bright shade. Without adequate light, succulents etiolate (stretch). They become leggy. The cell walls become thin and flimsy. They are soft and mushy. This is like candy for thrips to pierce through.
I kept my Haworthia in a dim corner because I heard they liked shade. But I gave it too much shade. It grew weak, elongated leaves. The cuticle layer was thin. The thrips punctured it easily. I have learned that a stressed succulent with poor light is a sitting duck. You need to provide strong, direct morning sun or a grow light. Strong plants resist infestation. I run my grow lights for at least 12 hours a day now. It is non-negotiable.
3. The Wrong Pot (No Airflow)
This one was the hardest for me to learn. I loved those cute glass terrariums and pots without drainage holes. Succulents absolutely hate these. I discovered this after killing my third plant in a beautiful glass jar. Without drainage, moisture pools at the bottom level. This creates a high-humidity microclimate.
Thrips like to pupate in the top layer of the soil. If that soil is constantly wet and lacking airflow because it is enclosed in glass, you are creating a thrip nursery. Terracotta pots are the best. They are porous and allow the soil to dry out quickly. Use a gritty, well-draining mix with perlite or pumice. Avoid plastic pots if you are prone to overwatering. They retain water. I switched all my pots to terracotta after the active contamination. The airflow is so much better now.
My Step-by-Step Action Plan (That Finally Worked in 2 Weeks)
I didn't just read articles. I tested a mixture of organic and chemical controls. I used a methodical approach. Here is exactly what I did, day by day.
Step 1: Immediate Isolation and Physical Removal
I immediately separated the affected succulents. I moved them to a separate quarantine room that had no other plants.
- The Shower Test: I took the infected plants and gave them a strong blast of water in the sink/shower. I aimed the spray at the underside of the leaves and the centers of the rosettes. I literally washed off the adult thrips and some of the larvae.
- The Sticky Trap: I placed yellow sticky traps horizontally on the soil surface of the pots. The adults are attracted to the color yellow. Within two days, I saw tiny little black specs stuck to the traps. This confirmed my suspicion and also helped reduce the adult population.
Step 2: The Systemic Insecticide Route
For weeks, I tried neem oil. I know it is a favorite in the organic community. However, for succulents, this is not enough. Thrips hide in the leaf axils and larvae live inside the growing tips. A contact spray isn't enough to get them. So, I switched to a systemic insecticide.
I used a granular systemic containing Imidacloprid. I mixed it into the top inch of the soil. This is the most effective way to kill the larvae that feed on the plant tissue. I watered the plant immediately to activate the granules. The plant absorbed the chemical into its vascular system. When the thrips bit the plant, they ingested the poison and died, no matter where they were hiding.
A quick warning with systemic insecticides: Do not use Imidacloprid on plants that you intend to keep outdoors in flowering stages. It is toxic to bees and pollinators. I only used this indoors on my houseplants.
Step 3: The Daily Spray Routine (Week 1)
While the systemic poison was taking effect, I sprayed the aerial parts of the plant daily with a mixture of insecticidal soap and a few drops of pure neem oil. I did this in the evening to avoid the harsh sun burning the leaves (wet leaves + sun = burn). The insecticidal soap disrupts the lifecycle of the pests on contact. I also added a drop of a mild dish soap to help the mixture stick to the waxy surface of the succulent leaves.
I noticed that the leaves were so hydrophobic that the spray just beaded off. I added a wetting agent (a drop of dish soap) to the sprayer. This was essential! It allowed the liquid to spread evenly across the leaf surface.
Step 4: Patience and Repotting
After about four days, I repotted the worst-hit plants. I removed all the old soil from the roots. I noticed that the old potting mix was teeming with small, pale worm-like creatures. Those are likely thrip larvae or pupae that had dropped off the plant. I washed the roots carefully, then dipped them in a diluted hydrogen peroxide solution to kill those larvae.
My observation: The larvae had fallen off the plant into the soil. I repotted every single infected plant with a fresh, dry, gritty succulent mix. I discarded the old potting soil in a sealed bag in the trash can outside. You can’t use that old soil in your compost. You will just introduce thrips back into your garden.
How to Use the Rubbing Alcohol Technique
One of my favorite quick fixes for adult thrips is a cotton swab dipped in 70% isopropyl alcohol. This method is tedious but effective. I found that gently dabbing the visible silver spots and crevices with the rubbing alcohol dissolves the waxy layer of the thrips and kills them instantly. However, this does not kill the eggs. I used this as a supplemental manual clean-up method. I used it while I was waiting for the systemic granules to kick in. It is physically difficult to catch them all, so I relied more on the granules.
The Role of Healthy Soil and the "Biological" Solution
Since I wanted to reduce my reliance on synthetic chemicals, I introduced beneficial nematodes (Steinernema feltiae) into my soil after I noticed the problem was at the pupal stage. You can buy these online. They are microscopic worms that you mix with water and pour into the soil. They specifically attack soil-dwelling larvae and pupae. I did this three days after the topical spray treatment. It gave me peace of mind, because the systemic pesticide can harm some of the beneficial soil microbes, but the nematodes are unaffected.
What About the Damage Already Done?
The leaves that have been damaged will never heal. I had to accept that. Those silvery streaks have dead cells. They will not turn green again. You have two options here.
- Leave them: If the plant has healthy new growth and the pests are gone, you can leave the damaged leaves as a reminder. The plant will absorb them over time.
- Remove them: If the damage is severe and the leaves are dying, remove them. I removed the bottom leaves that were severely distorted. This encouraged the plant to focus energy on producing new, healthy roots.
New leaves will emerge, but they will look rough for a while. Give it time. Providing consistent, indirect bright light will help the plant recover its color.
How to Prevent Future Infestations
Prevention is easier than treatment, and I want to save you from the frustration I went through. I maintain a strict protocol now.
Quarantine New Arrivals
Never, ever bring a new succulent into your main collection without a quarantine period. I have a special shelf in my bathroom. New plants live there for at least 4 weeks. I inspect them every few days with a magnifying glass. I check undersides of leaves and the new growth points. I learned this after I bought a beautiful Agave from a nursery that was carrying thrips. It inevitably spread to my prized collection.
Inspect New Potting Soil
I also check my new potting soil bags before I use them. I once bought a sealed bag of "moisture-control" soil that was infested with tiny bugs. I opt for dry, mineral-heavy composts. Store your opened soil bags in a closed tote. This prevents insects from flying into the soil in your garage or shed.
Visual Checks Are Non-Negotiable
I still check for the signs weekly. I look specifically for the silver sheen. I also use sticky traps even in my healthy plants as a monitoring tool. If I see one thrip on a trap, I know I need to act fast.
Frequently Asked Questions
I get asked a lot about this, so allow me to preempt those queries.
How do I tell the difference between thrips damage and sunburn?
This is a huge confusion point. Sunburn happens suddenly and turns a leaf pale brown or white with distinct margins. The damage is often on the top side of the plant that faces the window. Thrip damage is distributed erratically, causes silvering and streaking, and is often accompanied by black fecal spots. Plant expert Sheena Adams, an RHS horticultural advisor from the RHS (opens in a new tab), points out that sunburn creates soft, pale necrotic patches, while thrip damage is more silvery and pitted.
Where do thrips lay their eggs?
Thrips lay eggs inside the soft tissue of the plant itself. They use their ovipositor to make a slit in the leaf, usually on the undersurface or along the central groove of the leaf. You will not see the eggs with your naked eye. Because the eggs are inside the plant tissue, spraying surfaces with insecticidal soap does little to stop them. A systemic insecticide is needed to reach the internal eggs.
Can thrips fly and infect my entire house?
Yes, they can fly! They are weak fliers, but they can travel distances. They often get carried in via the wind or on your clothes. They travel easily to adjacent plants if the pots are touching. I have found them on my plants two rooms away from the original source. You must treat the entire collection if you care about them all.
Should I throw away my plants?
If the plant has extremely thick, woody stems or is heavily infested, it might be beyond saving. Young, soft plants suffer significantly more. I did discard one of my smaller Echeverias because the crown had rotted due to tissue damage. If the crown is dead, it isn't coming back. But generally, if you act fast, you can save them.
Conclusion
Thrips are a massive headache. Think of them as the ninjas of the pest world. They are silent, quick, and deadly to your collection. The hardest part was identifying them early. I hope this breakdown helps you spot the signs faster. Remember, those silvery streaks and black speckles are a "cry for help" from your succulent.
Look at the new growth first. Is it deformed? Look at the old leaves. Are they dusty looking? Get yourself a magnifying glass and inspect the soil line for those tiny worms or pupae. Take action quickly. Do not wait a week to see if it improves. It won’t. It will only get worse.
I now preach the gospel of systematic treatment. Do not simply rely on a single neem oil spray. You need a plan that kills the adults, the larvae in the soil, and the eggs inside the leaf. My method took about two weeks to see a fully clean population and about a month for the new leaves to start looking "normal" again. Take a breath and tackle it step by step. Your plants are tough. They will bounce back. And again, consult your local horticultural society like the AHS (opens in a new tab) for specific regional advice on pest control and plant resistance. Good luck.