 bluename
 Brown Spots on Succulent Leaves: Causes and My 2-Week Rescue Mission
There's a special kind of panic that sets in when you notice the first brown spots on succulent leaves. One day, your plump, vibrant Echeveria is a picture of health; the next, it's sporting unsightly, crusty blemishes that seem to spread by the hour. I've been there, staring at a once-perfect plant, feeling a mix of concern and guilt. Was it too much water? Not enough sun? A silent, creeping disease? Over years of nurturing (and occasionally mis-nurturing) my succulent collection, I've learned that these brown spots are not a death sentence, but a urgent message from your plant. The key is to decode it correctly and act fast.
In this guide, I'll walk you through exactly how I diagnose and treat brown spots on my succulents, based on a recent two-week intervention I performed on a troubled Graptopetalum. I'll share the real, step-by-step process, the mistakes I made along the way, and how the plant responded day by day.
Decoding the Message: What Your Succulent's Brown Spots Are Trying to Say
Brown spots on succulent leaves are a symptom, not a disease itself. Their appearance, texture, and location are vital clues. Before you do anything, you need to play plant detective. The Royal Horticultural Society (RHS) emphasizes that accurate diagnosis is the first and most critical step in plant care, as treating for the wrong cause can do more harm than good.
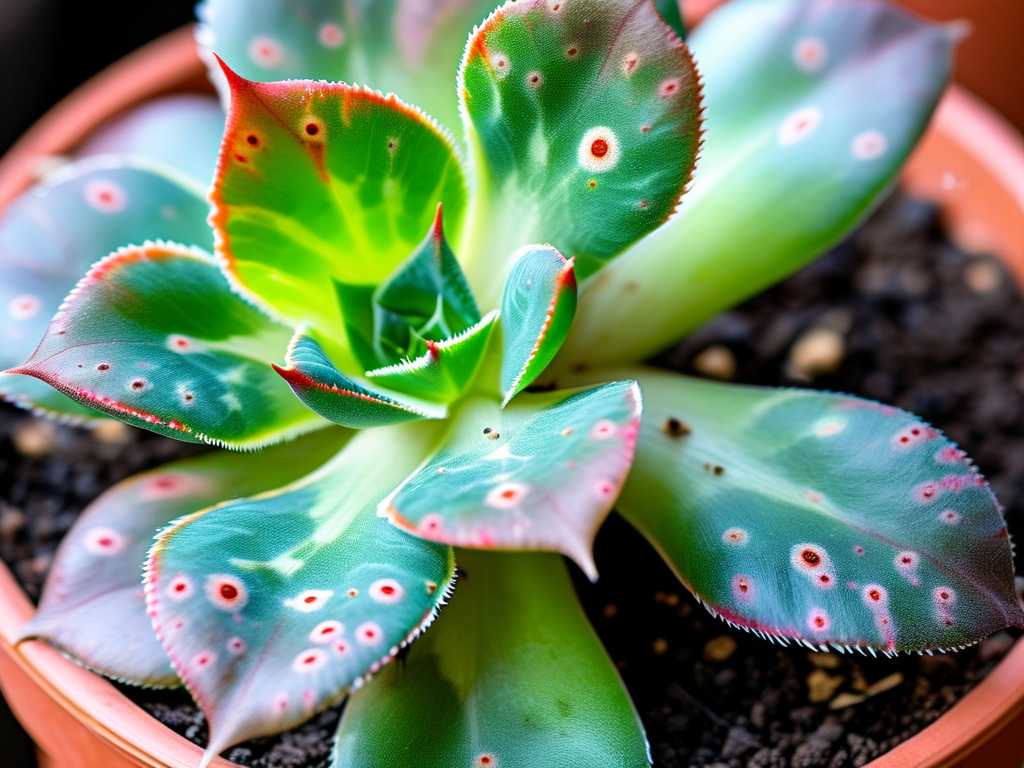
Through my experience, I categorize the primary culprits into three main groups: water issues, sun-related stress, and fungal or bacterial infections. Each leaves a distinct signature.
1. The Overwatering Crisis: Soft, Mushy, and Spreading
This is the most common offender in my collection, especially for beginners. The spots caused by overwatering are typically soft, dark brown, or even blackish. They often start on the lower, older leaves and feel mushy to the touch. If left unchecked, the rot can spread upward, causing the stem to blacken and collapse—a condition known as root rot.
- The Root of the Problem: Succulents store water in their leaves and stems. When soil stays wet for too long, the roots suffocate and die, creating an entry point for rot-causing pathogens like Pythium or Phytophthora. The American Horticultural Society (AHS) notes that "soggy soil is the single greatest enemy of most succulents and cacti."
2. Sunburn Scars: Dry, Scabby, and Localized
Unlike overwatering spots, sunburn marks are dry, crispy, and tan to light brown. They appear on the areas most exposed to intense, direct sunlight, often with a distinct pattern. You might see them on the top surfaces of leaves that were suddenly moved into harsh sun without acclimation.
- The Trigger: It's not just about heat, but about light intensity. A succulent accustomed to indirect light will scorch if placed abruptly on a south-facing windowsill or outdoors in mid-summer sun. The plant's tissues literally get "cooked."
3. Fungal and Bacterial Invaders: Spotty, Rusty, or Powdery
These spots can be trickier to identify. Fungal issues, like leaf spot diseases, often present as raised, rusty brown or black spots that may have a yellow halo. They can spread from leaf to leaf, especially in humid, stagnant conditions. Powdery mildew, while usually white, can cause underlying tissue to brown. Bacterial soft rot, often following physical damage, leads to wet, slimy brown areas.
My 2-Week Plant ICU: A Step-by-Step Recovery Journal
Two weeks ago, my Graptopetalum 'Purple Delight' sent up a red flag. Several lower leaves developed soft, dark brown patches. The soil, though not sopping, felt cooler and damper than it should. I suspected early-stage overwatering rot.
Week 1: Diagnosis and Immediate Action
- Day 1: The Unpotting. I gently removed the plant from its pot. The evidence was clear: the roots were dark, slimy, and had a faint musty smell—classic root rot. No healthy, white roots were visible.
- Day 1: The Surgery. Using sterilized pruning shears (I wiped them with isopropyl alcohol), I cut away every soft, brown leaf at its base. Next, I beheaded the plant, cutting the stem about an inch above the last sign of rot. I let both the stem cutting and the remaining healthy leaves (for propagation) sit on a dry paper towel in a shaded, airy spot. This callousing process is non-negotiable; planting a wet cut end invites immediate reinfection.
- Day 2-4: The Waiting Game. The cuttings and leaves rested. I resisted the urge to water or pot them. The cut end of the stem formed a dry, hard callous.
- Day 5: Fresh Start. I prepared a new, terracotta pot (porous for breathability) with a perfectly dry, gritty succulent mix (I use a 50/50 blend of potting soil and perlite). I planted the calloused stem cutting just deep enough to stand upright.
- The Mistake I Made: In my haste on Day 1, I initially used a decorative ceramic pot without a drainage hole for a different plant. I quickly remembered this was a recipe for disaster and repotted it into a proper container. Always, always use a pot with a drainage hole.
Week 2: Observation and Adjustment
- Day 6-10: No Water. I placed the repotted cutting in bright, indirect light. I did not water it. The plant needed to focus on pushing out new roots, not dealing with moisture.
- Day 11: The First Sip. After a full week in dry soil, I gave it a thorough but careful bottom-watering. I placed the pot in a shallow dish of water for 10 minutes, allowing the soil to wick moisture upward, then let it drain completely.
- Day 12-14: Vigilance. I monitored daily. The original brown spots on the sacrificed leaves had dried and not progressed. The main stem cutting remained firm. Most importantly, by Day 14, I noticed the slightest resistance when I gave the plant a very gentle wiggle—a promising sign of new root growth.
Key Lessons and Proactive Prevention
My two-week rescue was successful because I acted quickly and addressed the root cause (literally). Here’s how to prevent brown leaf spots on your succulents in the first place:
- Master the "Soak and Dry" Method: Water only when the soil is completely dry, then drench it until water flows freely from the drainage hole. Then, ignore it until it's dry again. This mimics the natural desert downpours succulents love.
- Invest in Fast-Draining Soil: A bagged "cactus mix" is a start, but I always amend it with extra perlite or pumice (up to 50%) for maximum drainage.
- Acclimate to Sunlight Gradually: When increasing light exposure, do it over 1-2 weeks, adding an hour of direct sun every few days to prevent sunburn on succulent leaves.
- Ensure Fantastic Airflow: Stagnant, humid air is a fungus's best friend. Use a small fan or open a window to keep air moving around your plants.
- Water the Soil, Not the Plant: Avoid letting water pool in the rosettes of succulents like Echeverias, as this can lead to rot in the crown.
Frequently Asked Questions
Can a succulent recover from brown spots? Yes, absolutely. The leaves with existing spots will not heal and will eventually be reabsorbed or can be carefully removed. However, the plant itself can fully recover if the cause is corrected and new, healthy growth is supported. The plant in my two-week journal is now growing a new root system and will eventually produce spot-free leaves.
Should I cut off the brown-spotted leaves? If the spots are caused by overwatering and the leaf is mushy, yes, remove it immediately with a sterile tool to prevent the rot from spreading. If the spots are dry, cosmetic sunburn scars, you can leave them or remove them for aesthetics. The plant will eventually shed these old leaves naturally.
Are brown spots contagious to my other plants? If the cause is fungal or bacterial, yes, it can spread through water splashing or contact. Isolate the affected plant immediately. If the cause is environmental (overwatering, sunburn), it is not contagious, but it indicates that your care routine needs adjusting, which could affect other plants under the same conditions.
Seeing brown spots on your succulent plants is a call to action, not a reason for despair. By observing carefully, diagnosing accurately, and having the patience to follow through with the right treatment—even if it means a major surgery and a two-week wait—you can often save your plant. More than that, you'll gain a deeper understanding of its needs. The journey from spotting those first alarming blemishes to seeing the first signs of firm, new growth is one of the most rewarding experiences in plant parenthood. It transforms you from a passive owner into an attentive caregiver, ready to keep the rest of your collection thriving and spot-free.





