bluename
How to Trim succulents to Remove Damaged Leaf Sections: My Hands-On Guide to Saving Your Plants
There’s nothing more disheartening for a succulent lover than seeing a prized plant develop unsightly, damaged leaves. Whether it’s from overwatering, physical knocks, or pesky pests, those brown, mushy, or scarred sections can feel like a personal failure. I’ve been there, staring at a once-perfect Echeveria, wondering if I should just leave it be or risk making things worse. The good news? Learning how to trim succulents to remove damaged leaf sections is a game-changer. It’s not just about aesthetics; it’s a vital act of plant healthcare that redirects energy to healthy growth and prevents potential rot from spreading. After years of trial, error, and meticulous observation, I’ve refined a process that works. In this guide, I’ll walk you through my exact steps, share the crucial two-week recovery timeline I monitor, and frankly discuss the mistakes I’ve made so you can avoid them.
Why Trimming Damaged Leaves is Non-Negotiable
Many beginners hesitate to cut their plants, fearing they’ll cause harm. I was the same. But succulents are resilient. A damaged leaf is a drain on the plant’s resources and an open door for pathogens. The Royal Horticultural Society (RHS) advises removing diseased or damaged plant material promptly to maintain plant vigor and prevent issues from compounding. Leaving a partially rotten leaf attached can allow the decay to travel into the stem—a death sentence for many succulents. Trimming is a proactive step, not a reactive one.
My Toolkit: Sterilization is Everything
My first major mistake involved using whatever scissors were on hand. Big error. A dirty tool can introduce bacteria straight into a fresh cut. Here’s what I use now:
- Sharp Precision Snips or Micro-Tip Pruners: Clean, sharp cuts heal faster. Blunt tools crush the tissue.
- Isopropyl Alcohol (70% or higher): I keep a small bottle and cotton pads nearby.
- Cinnamon Powder (optional but effective): A natural antifungal desiccant.
- A Clean Tray and Paper Towels: For organizing the operation.
Before and after each cut—and especially between plants—I meticulously wipe the blades with alcohol. This single habit has saved countless plants in my collection from cross-contamination.
The Step-by-Step Process I Follow Every Time
Let’s get into the practical steps for trimming succulent leaves. I’ll use a recent case with a Sedum burrito (Burro’s Tail) that had several leaves with bruised, translucent sections from accidental overwatering.
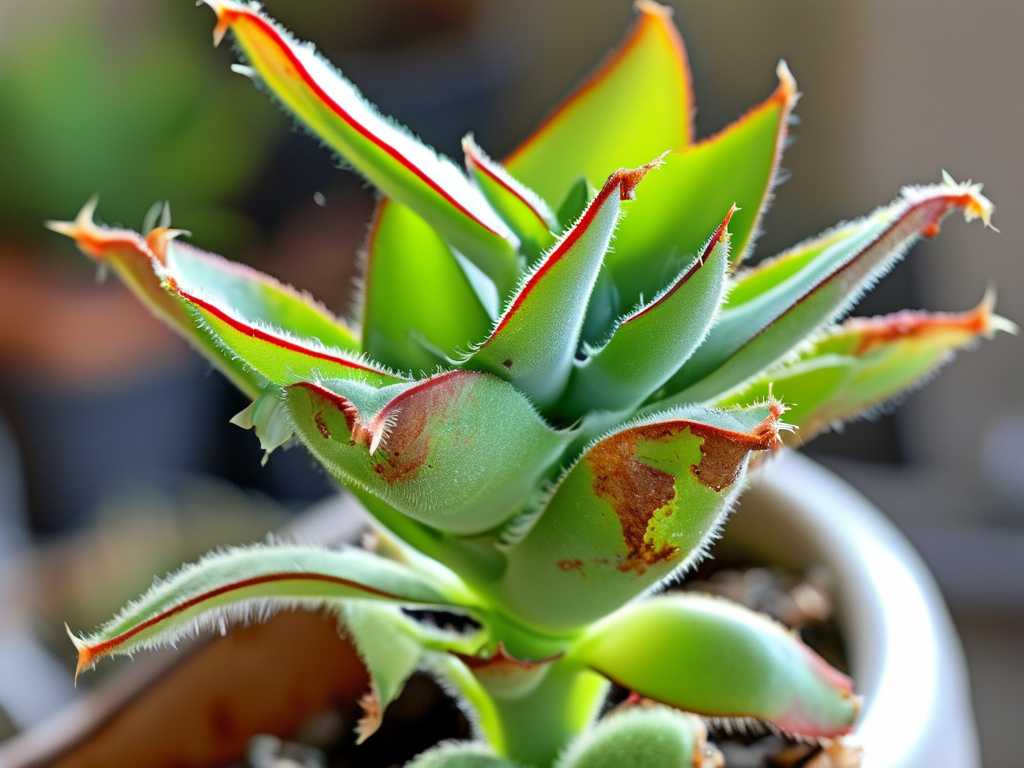
1. Assessment and Planning: I don’t just start snipping. I gently examine the plant under good light. I identify every leaf with damage, tracing where the healthy green tissue ends and the damaged part begins. For my Sedum, the goal was removing rotten leaf parts without harming the stem. I mentally note which leaves need partial removal and which are so far gone they must be fully plucked.
2. The Correct Cutting Technique:
- For Partial Leaf Removal: If only the tip or a side section is damaged, I sterilize my snips. I then cut straight across, about ¼ inch into the healthy, firm green tissue. This ensures no compromised tissue is left behind. Cutting into healthy tissue sounds harsh, but a clean cut in good tissue will callus cleanly. Leaving any damaged margin often leads to continued die-back.
- For Full Leaf Removal: If the damage is at the base or the entire leaf is affected, partial trimming won’t work. I gently wiggle the leaf from side to side until it snaps cleanly off at the stem. The goal is a clean break without tearing the stem’s skin.
3. Immediate Aftercare: Right after cutting, I leave the plant absolutely alone. No water on the wounds! I place it in a spot with bright, indirect light and excellent airflow. For the partial cuts on the Sedum leaves, I lightly dusted the wet cut ends with cinnamon. This helps dry the sap and form a protective callus, a trick supported by many horticulturalists for its mild antifungal properties.
4. The Drying Period: This is the most critical phase. The plant must form a firm, dry callus over every cut surface before any moisture is introduced. For stem cuts, this can take 2-5 days. For the fleshy leaves of my Sedum, the partial cuts took about 3 days to callus over properly.
The Crucial Two-Week Observation Window
What happens after the trim is just as important as the trim itself. Here was my timeline for the Sedum:
- Days 1-3 (Callusing): I resisted the urge to move or water it. The cut ends slowly changed from wet and shiny to dry and dull. The remaining healthy portions of the partially trimmed leaves remained plump and green—a great sign.
- Days 4-7 (Stabilization): With calluses formed, I returned the plant to its normal sunny spot. I continued to withhold water, allowing the plant to use its internal resources. No new damage appeared, and the plant showed no signs of stress or further shrinkage around the cuts.
- Days 8-14 (Recovery & New Growth): Around day 10, I gave it a thorough bottom-watering, ensuring no water sat on the callused areas. The response was positive. The healthy leaves firmed up, and by the end of the second week, I noticed tiny, bright green growth points emerging from the stem near where I had done full leaf removals. The trimmed leaf tips remained sealed and stable. This two-week succulent care observation confirmed the procedure was a success; the plant had redirected its energy to new growth instead of fighting decay.
Pitfalls I’ve Encountered (And How to Fix Them)
My journey hasn’t been all success. Here are the key mistakes that taught me the most:
- The Pitfall of Impatience with Watering: My biggest early error was watering too soon after trimming. I saw a slightly wrinkled leaf and panicked. The result? The un-callused cut absorbed water, turned mushy, and rot began creeping into the leaf. The Fix: Always, always wait for a perfect callus. Wrinkling for a few extra days is far safer than rot.
- The “Just the Bad Bit” Trap: I used to try to sculpt out only the brown part, leaving a jagged edge or a thin layer of damaged tissue. This tissue always died back further, necessitating a second cut. The Fix: Cut decisively into healthy tissue for a clean, straight line that can heal properly from the start.
- Ignoring the Root Cause: I once trimmed sunburned leaves but left the plant in the same scorching afternoon sun. New damage quickly appeared. The Fix: Trimming is treatment, not prevention. Diagnose why the damage occurred (too much sun, overwatering, poor airflow) and correct the environment simultaneously.
Expert Insights on Plant Wound Healing
The American Horticultural Society (AHS) emphasizes that proper plant wound care minimizes stress and resource expenditure. A clean, sterilized cut creates a smaller injury zone than a ragged tear, allowing the plant to seal itself off efficiently. My method of cutting into healthy tissue aligns with this principle, creating a clear boundary for the plant to defend.
Will trimming hurt my succulent? Not if done correctly. Succulents are adapted to lose leaves. A sterile, precise trim mimics natural leaf abscission and is far less stressful than letting rot spread or pests fester on damaged tissue.
Can I propagate the parts I cut off? It depends. For a fully removed healthy leaf, yes—let it callus and try to propagate. For a partially removed section that contained damage, I do not recommend it. The risk of the cutting rotting is very high, and it often lacks the resources to sustain new growth.
How often should I check for damaged leaves? Make it part of your regular watering routine. A quick visual inspection every time you care for your plants allows for early intervention. Catching a problem leaf early makes the trimming process simpler and the recovery faster.
Seeing a succulent thrive after a careful trim is incredibly rewarding. It transforms plant care from passive observation to active stewardship. The process of trimming damaged succulent leaves requires a steady hand, patience during the callusing period, and a willingness to learn from the plant’s response. By following these steps, respecting the two-week recovery window, and avoiding the common pitfalls, you’re not just removing damage—you’re actively promoting a healthier, more resilient plant. Your succulent will thank you with vibrant, new growth.