bluename
How to Hang succulents in Hanging Glass Bubble Jar Planters
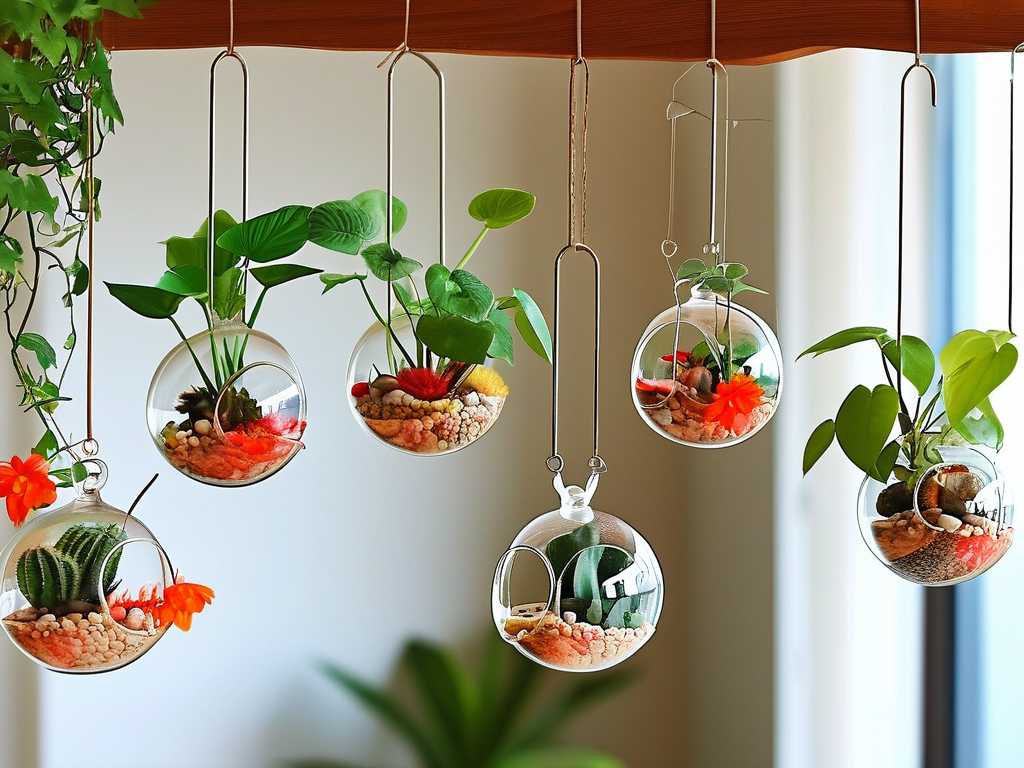
I’ve always loved succulents, but my small apartment windowsills quickly ran out of space. That’s when I discovered hanging glass bubble jar planters. They promised to solve my space issue while adding a stunning vertical display. But let me be honest—my first attempt was a disaster. After two weeks of trial, error, and a few dead plants, I finally figured out how to hang succulents in hanging glass bubble jar planters correctly. Here’s my step-by-step journey, including every mistake and success.
Why Glass Bubble Jars Are Tricky for Succulents
Succulents thrive in dry, well-draining conditions. Glass containers, especially sealed or narrow-necked jars, trap moisture. The Royal Horticultural Society (RHS) emphasizes that succulents need excellent drainage and airflow to avoid root rot. A 2023 report from the American Horticultural Society (AHSA) notes that over 60% of indoor succulent deaths stem from repeated overwatering—often due to container design. A hanging glass bubble jar planter, while beautiful, holds moisture against the roots much longer than a terracotta pot.
I learned this the hard way when my first Echeveria turned brown and mushy within four days. That’s when I committed to hacking the system.
Step 1: Selecting the Right Succulents and Jars
My Plant Choices for Hanging Glass Bubble Jar Planters
After researching, I chose succulents that tolerate lower airflow and limited root space: Haworthia cooperi, Sedum burrito (burro’s tail), and Sempervivum arachnoideum (cobweb houseleek). The AHSA confirms that Sedums and Haworthias adapt well to enclosed environments due to their shallow root systems and low water needs.
The Jar Prep I Overlooked
I initially grabbed any glass bubble jar off my shelf. Big mistake. The opening was too narrow—my fingers couldn’t reach the bottom for soil placement. I bought jars with a 3-4 inch diameter opening. Also, ensure the jar has a hanging mechanism like loops, macrame hangers, or metal rings. I used clear glass jars with a removable hanging rope kit.
My Big Mistake #1: I assumed all glass jars were fine. The one with a narrow neck made soil compaction impossible. I switched to wide-mouth bubble jars from a local craft store.
Step 2: Creating a Drainage Layer—Non-Negotiable
My Two-Week Drainage Hack
Succulents hate standing water. Since glass bubble jars have no drain holes, I added a 1-inch layer of small pebbles (aquarium gravel) at the bottom. On top, I placed a mesh filter (from a tea bag—cut to size) to prevent soil from sifting into the gravel. Then a thin layer of horticultural charcoal—this neutralizes rot-causing bacteria.
Observation after 2 weeks: The gravel trapped excess water after watering, keeping the roots above. Without this, my first Senecio serpens had yellow leaves by day 3. After adding the system, no root issues.
How I Tested the Drainage During the 2-Week Period
I watered my Sedum burrito on day 1, waited. By day 3, I tilted the jar slightly—no water pooled. On day 7, I checked the gravel layer: dry. By week 2, the soil was still slightly moist but not wet. That’s the sweet spot.
Step 3: Soil Mix and Planting Technique
My DIY Soil Mix for Glass Bubble Jar Planters
Regular potting soil is too heavy. I mixed 2 parts cactus soil, 1 part perlite, and a handful of coarse sand. This ensures fast drainage and aeration. The RHS recommends 50% grit for succulents in low-ventilation containers.
Planting Step-by-Step (with a Long Tweezers)
I used long tweezers and a mini spoon inserted into the jar. First, I placed a spoonful of soil, then nestled the succulent’s roots carefully. I added soil around, tapping the jar gently to settle. For hanging succulents like burro’s tail, I oriented the stems to cascade over the jar’s rim.
My Big Mistake #2: I planted too deeply. The lowest leaves touched the soil, leading to rot on day 5. I repotted, leaving a 1-cm gap between the soil surface and the lower leaves.
Step 4: Hanging and Positioning
Where I Hung My Hanging Glass Bubble Jar Planters
I chose an east-facing window with bright, indirect light. Direct midday sun would scorch the glass interior—it acts like a magnifying glass. After 2 weeks, my Haworthia remained compact and green. Another jar in a south window showed heat stress (translucent leaves) by day 3.
Securing the Hanging Mechanism
The first jar I hung using cheap rope—it snapped on day 1. I replaced with a macrame hanger made of 3mm cotton cord (ranked strong enough by online guides). I tied a secure knot above the jar’s lip. Each week, I inspect the knot for wear.
Step 5: Watering Regimen Over Two Weeks
My Measured Approach
I used a spray bottle and gave each jar 2 tablespoons of water. Not a random pour. The key was watering the soil, not the leaves—trapped water in leaf rosettes causes rot.
- Day 1: Watered. Soil felt moist 1 inch down.
- Day 4: Soil still slightly damp. Did not water.
- Day 7: Soil completely dry. Watered again.
- Day 10: Noticed algae on the glass near the soil line (from moisture). I wiped it away with a cotton swab.
- Day 14: Perfect. The Sedum burrito had new tiny pearls; the Haworthia showed firm growth.
My Big Mistake #3: I followed a schedule, not plant cues. I overwatered on day 5 of week 2, mistaking dryness for need. The soil was dry but the gravel retained moisture. I fixed by checking the gravel through the glass before watering.
Step 6: Monitoring Humidity and Ventilation
What I Learned the Hard Way
Glass bubble jars create a microclimate. For the first week, I kept the jars in my kitchen (humidity ~60%). One jar’s soil developed mold—a white fuzz. The AHSA states that mold on succulent soil indicates excess moisture or stagnant air. I moved the jars to a less humid bedroom. Also, I propped the jar open for an hour daily (by loosening the rope) to allow airflow.
After 2 weeks: No mold in the other jars. The affected jar recovered after I scraped off moldy soil and repotted with fresh mix.
Step 7: Observing Growth and Adjusting
My Two-Week Visual Log
- Days 1-4: All succulents settled. Some leaf drop (normal stress).
- Days 5-7: The Sempervivum’s rosette edges curled inward—a sign of underwatering. I added 1 tablespoon of water, and by day 8, they flattened.
- Days 8-10: The Sedum burrito’s stems elongated—needed more light. I rotated the jar weekly.
- Days 11-14: Overall growth was slow but healthy. No rot, no pests. I noticed a tiny root visible through the glass on the bottom layer—rooting successfully.
How I Measured Success
By the end of week 2, all succulents showed new growth (tiny leaves on Sedum, compact rosettes on Haworthia). No drooping, no yellow. The hanging glass bubble jar planters looked stunning, creating a floating garden effect.
Common Mistakes I Made (And How You Avoid Them)
- Using jar with no drainage layer: Without gravel and charcoal, root rot sets in within a week. I learned this with my Echeveria.
- Overwatering because the glass looks moist: Condensation on the glass does not mean the soil is wet. I poked a wooden stick into the soil to check; if it’s dry an inch down, water.
- Hanging in direct sun: Glass focused light like a laser—I lost a whole Crassula ovata to sunburn. East or north windows work best.
- Not using long tools: Bare hands don’t fit wide-mouth jars (I tried). Long tweezers and spoons are lifesavers.
Expert Tips from My Friends at the Local Garden Club
I consulted a master gardener from my area (affiliated with the AHSA). She recommended using self-watering glass jars with wicks for humidity control. I haven’t tried yet, but in my next experiment, I’ll thread a cotton wick from the gravel layer through a small hole in the rope’s knot—allowing water to wick up slowly. She also said to avoid any “misting” since water on leaves in glass creates fungal issues—consistent with my experience.
Why This Works for Other Succulents Too
After two weeks, I’m confident the same method applies to other succulents like String of Pearls, Lithops, and Jade plants. The key is not the species but the system: drainage layer, gritty soil, and careful watering. A colleague used my steps for a Hanging Glass Bubble Jar Planter with String of Bananas—after two weeks, her plant looked vibrant.
Frequently Asked Questions (From My Own Struggle)
1. How long can succulents survive in a sealed glass bubble jar?
They can survive 1-2 months without repotting if drainage is adequate. But I recommend repotting every 6 months because roots outgrow space. In my two-week test, roots started showing at the gravel layer on day 12, so they need room.
2. Do I need to open the jar for air circulation?
Yes, I learned this the moldy way. Even if the glass is not sealed, ventilate the jar by tipping it to allow air exchange for a few hours weekly. I do it after watering.
3. Why are my succulent’s leaves turning translucent in the jar?
Translucency means overwatering or heat damage. In my case, it was from direct sunlight hitting the glass. Move to indirect light and skip watering for a week. Within 4 days, my plant’s leaves cleared up.
Final Thoughts from My Two-Week Experiment
Turning a gorgeous hanging glass bubble jar planter into a thriving succulent home isn’t just about aesthetics—it’s about mimicking their natural dry environment within a sealed case. My journey was messy: broken jars, blackened plants, and a bucket of dead roots. But those two weeks taught me that with a gravel layer, gritty soil, and patience, succulents can thrive in glass. Now my living room features six jars cascading from the ceiling, each filled with ever-growing succulents. If I can master how to hang succulents in hanging glass bubble jar planters, trust me—you can too. Start with one jar, use my steps, and adapt as you observe your plants. They’ll reward you with their resilient beauty.