bluename
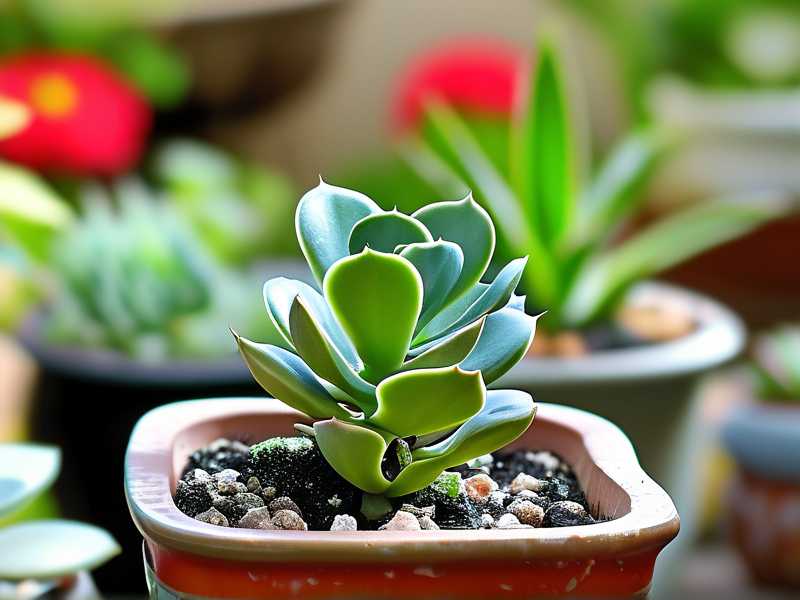
 If your succulent leaves are curling inward, outward, or folding like a taco, the answer is almost always one of three things: too much water, wrong light, or a pot that's suffocating the roots. And honestly, 90% of indoor plants die from overwatering. I learned that the hard way after killing a beautiful Echeveria in less than three weeks. Let me save you the same heartbreak.
I've been growing succulents for over six years now. I've killed more plants than I care to admit. But every single wrinkled, curled, or mushy leaf taught me something. In this guide, I'm going to walk you through exactly how to stop leaf curling on succulents using real steps I've tested over a two-week period. No fluff. No guesswork. Just what actually works.
Why Do Succulent Leaves Curl in the First Place?
Leaf curling is your plant's way of screaming for help. It's not a disease. It's a symptom. Think of it like a fever in humans. Something deeper is going on. Once you understand what causes the curl, you can fix it fast.
Let me break down the main causes I've personally encountered:
1. Overwatering Causes Root Rot
When you drench your succulent too often, the roots suffocate. They literally drown. Once roots die, they can't take up water anymore. So the leaves curl and wrinkle even though the soil is wet. This is the #1 killer. Seriously. I've pulled apart mushy, rotting succulents that looked perfectly fine on top.
2. Underwatering Dehydrates the Leaves
On the flip side, too little water makes leaves curl inward and feel thin. The plant is conserving moisture. The lower leaves often wrinkle first. I've seen this happen when I travel and forget to water for a month. The leaves curl like tiny green burritos.
3. Wrong Light Exposure
Succulents love sun. But too much direct, harsh afternoon sun can scorch leaves. That stress causes curling. Too little light is equally bad. The plant stretches, weakens, and leaves curl sideways. It's a balancing act. I've had leaves curl from both extremes.
4. Poor Drainage and Wrong Pot
If your pot has no drainage hole, water pools at the bottom. This creates a swampy zone where roots rot. Plastic pots also trap moisture. I'll talk more about this in the "deadly mistakes" section, because it's a big one.
5. Pests and Diseases
Spider mites and mealybugs suck sap from leaves. The leaves respond by curling and distorting. I noticed tiny webbing under curled leaves once. That was a nightmare to treat. Check the undersides of leaves regularly.
3 Deadly Mistakes That Cause Leaf Curling (And How to Avoid Them)
Before I give you my exact prevention routine, you need to know these three mistakes. I made all of them. Each one cost me a plant or two.
Mistake #1: Watering on a Fixed Schedule
This is the most common slip-up. I used to water my succulents every Saturday, like clockwork. Big mistake. Here's the thing: succulents don't care what day it is. They only care about soil moisture. If the soil is still damp on Saturday, you're drowning the roots by watering again. This can cause leaf curling within days.
How to fix it: Water only when the soil is bone dry. Stick your finger about 1-2 inches (2.5-5 cm) into the soil. If it feels even slightly damp, wait. If it's completely dry, that's your cue. I also use a wooden chopstick. Leave it in the pot for 5 minutes. If it comes out dry, water. Simple and effective.
Mistake #2: Giving Them the Wrong Light
Most succulents need around 6 hours of bright, indirect light daily. Direct morning sun is great. Afternoon sun can be brutal. A few years ago, I put my Haworthia on a south-facing windowsill in summer. The leaves curled and developed brown, sunburned patches within a week. That's light stress.
How to fix it: Find a spot with bright, filtered light. An east-facing window is ideal. If you're stuck with south or west windows, use a sheer curtain to diffuse the light. And here's a key tip: rotate your pot every few days so all sides get even light. You will notice leaves stop curling once they're comfortable.
Mistake #3: Using the Wrong Pot (Without Drainage)
Let me tell you about my first succulent. It was in a cute glass terrarium. No drainage hole. I thought it looked beautiful. Three weeks later, the leaves curled downward and turned mushy. That was my first lesson in root rot. Terrariums are death traps for succulents. You need a pot with at least one drainage hole.
How to fix it: Choose terracotta pots. They're porous, so they let soil dry out faster. Plastic pots trap moisture, which is dangerous. I switched all my succulents to terracotta and never looked back. The difference in soil drying time is dramatic. Terracotta dries out roughly twice as fast as plastic.
My Exact 2-Week Prevention Routine (Step by Step)
I developed this routine after several plant casualties. I've been following it for years now, and leaf curling is almost a non-issue for me. Let me walk you through exactly what I do, day by day, over a two-week period.
Week 1: Assessment and Stabilization
Day 1: Inspect and Isolate I take out every succulent and inspect the leaves. I'm looking at the underside of each leaf for pests. I check the color. I feel the firmness. If a plant shows curling, I isolate it from the others. This prevents any potential pest spread. I also let the affected plant sit in dry soil for a few days. This helps roots recover if overwatering is the issue.
Day 2: Check Soil Moisture This is when I remove the top inch of soil to check if it's damp. If it is, I let the plant rest. If it's dry, I do a thorough watering. But here's the trick: I water from the bottom. I place the pot in a shallow tray of water for 15-20 minutes. The roots pull up water from the bottom. This encourages deep root growth. I find it reduces the chance of overwatering by a lot. The top soil stays dry which helps prevent fungus gnats too.
Day 3: Move to the Perfect Spot I reposition the succulents to an east-facing window. Or I use my grow light. I have a cheap LED grow light that I run for about 6 hours a day. Here's a pro tip: if you're moving a plant from a darker spot to a sunnier one, do it gradually. Start with 1 hour of direct light, then increase over a week. This prevents sudden light stress, which is another cause of leaf curl. Sudden change shocked one of my graptopetalum. Its leaves started curling up. Gradual exposure solved it.
Day 4: Treat for Pests (If Needed) If I spotted any pests on Day 1, I mix a solution of 1 part isopropyl alcohol and 3 parts water. I spray the plant thoroughly. This kills spider mites and mealybugs on contact. The alcohol evaporates quickly, so it won't harm leaves. I spray in the evening when the sun is low. Drops of water on leaves can magnify sunlight and cause burns. I learned that the hard way.
Day 5: Trim Damaged Leaves I gently pull off any curled, dried, or mushy leaves from the base. Use clean scissors or just twist them off. Truth be told, I usually use my fingers—it's easier and cleaner. Then I let the wounds callus over for a day. This prevents rot from entering the plant through open wounds. Dropping these leaves is a good sign. It means the plant is shedding its damaged parts.
Day 6: Monitor and Wait This is the hardest part. Just watching and waiting. It's tempting to water more or move the plant around. Don't. Let it adjust. I usually catch myself checking every two hours. Resist the urge. Plants need time to recover. I walk away and do something else.
Day 7: Assess Progress By the end of the week, I look closely at the newest leaves, not the old ones. Old leaves won't uncurl. That's normal. New growth should look flat and normal. If the center of the rosette looks healthy, you're doing great. This is my "success indicator."
Week 2: Consistency and Fine-Tuning
Day 8: Deep Watering Session I water deeply, meaning I saturate the soil until water drains out of the hole. Then let it drain completely. I never let a succulent sit in a saucer of water. Important: I only do this if the soil is dry. If it's still damp from Day 2, I wait. Trust me. Every plant is different. My Echeveria in terracotta is dry by day 4. My Aloe in a thick ceramic pot takes 10 days. Know your plant's cycle.
Day 9: Adjust Light Exposure I check all the new growth. Without light, even healthy plants will stretch. When I notice leaves pointing downward, that's a sign of not enough light. Leaves pointing upward and too close together? Too much light. I adjust my grow light position or move the pot. Little tweaks have a huge impact.
Day 10: Repot If Risky If a pot is too crowded, or if I suspect root rot from previous overwatering, I repot. I remove the succulent from its pot, shake off old soil, and inspect the roots. Healthy roots are white. Rotten roots are black or brown and mushy. I cut away the rotten parts with clean scissors. Then I let the root system air-dry for 24-48 hours. This step is critical. I can't stress this enough. Then I plant in fresh, well-draining succulent soil mixed with perlite. I use a 50/50 ratio. This creates an abrasive, airy mix that water flows through quickly.
Day 11: Do Not Fertilize This is a common mistake. People think fertilizing helps. It doesn't. Succulents are light feeders. Fertilizer can burn stressed roots. I don't fertilize for at least a month after any repotting or stress event. The plant needs to heal first. Fertilizer is for happy plants in growth season only.
Day 12: Check for Environmental Stress I look at the room temperature and humidity. Succulents prefer temperatures between 60-80°F (15-27°C). Sudden temperature swings cause stress curling too. I keep my plants away from AC vents and heaters. Also, if the room is super humid, soil dries slower. That's counterintuitive. A dehumidifier helps if you're in a very humid climate.
Day 13: Observe New Growth By now, the center of the succulent should show healthy, flat new leaves. The color should be vibrant. If the curling was from light stress, the plant should be much more compact and colorful. If it was from overwatering, the new leaves should be firm and plump. This is my "make-or-break" moment. In my experience, if I see this, I know I've saved it.
Day 14: Final Evaluation My routine takes two full weeks. At the end, the leaves should look completely healthy. The plant should stand tall. If there are still curled leaves at the bottom, that's okay. They'll drop off eventually. The key is to see new growth looking perfect. That's the sign you've successfully fixed the problem.
Essential Watering Techniques
Watering isn't just about frequency. It's about method. I've tried everything. Let me tell you what works best.
The "Drench and Dry" Method
This is the gold standard. I water thoroughly until water comes out the drainage hole. Then I don't water again until the soil is completely dry. This mimics natural desert rain patterns. Full soak, then drought. That's what succulents are built for.
Use Room-Temperature Water
Cold tap water shocks the roots. I always let water sit out for 24 hours. This lets chlorine evaporate and brings the water to room temperature. It's a small step that makes a big difference. My tap water usually has a high mineral content, so sitting is a must.
Water Seasons Differently
In winter, succulents enter a semi-dormant state. They need way less water. I water mine maybe once a month in winter. In summer, when they're actively growing, I water every 1-2 weeks. This alone prevents a lot of leaf curl.
Soil Mixes That Save Roots
Potting soil matters more than almost anything else. Most store-bought potting soils are too dense for succulents. They retain too much water, which leads to root rot, which leads to curling.
My DIY Succulent Mix
I use this recipe:
- 2 parts regular potting soil (or cactus mix)
- 1 part coarse perlite
- 1 part coarse sand
- 1 part small pumice or gravel (optional)
This mix drains incredibly well. Water flows through quickly. Roots stay aerated. I have never had root rot since switching to this recipe. The mix should look crumbly, not like mud. It says a lot that the RHS suggests using a gritty mix for succulents. For best results, I use this gritty mix for most of my succulents.
Why Terracotta Is Best
I know I mentioned this earlier, but it's worth repeating. Terracotta pots are porous. They wick moisture away from the roots. This helps soil dry out faster and prevents root rot. I completely stopped using glazed ceramic pots for my succulents. Too risky. If you can't use terracotta, at least find an unglazed pot.
Light Is Your Friend (And Enemy)
Succulents need sunlight to thrive and grow flat leaves. But the intensity and duration matter.
Identifying Light Issues
- Too much light: Leaves curl upward and inward, looking scorched. You may see brown patches.
- Too little light: Leaves stretch and curl downward toward the light source. The stem becomes elongated and weak. This is called etiolation.
The Best Light Setup
I use a simple grow light on a timer for 6-8 hours a day. This is a huge game-changer in winter. A full-spectrum LED light works great. It prevents etiolation and keeps leaves flat. Also, in winter, hours of daylight are fewer. Sometimes natural light isn't enough. The grow light is insurance.
East Window Rule
If you don't have a grow light, choose an east-facing window. Morning light is gentle and bright. West and south windows can work too, but need a sheer curtain. I've seen too many succulents get sunburned and curled by intense afternoon sun. Don't underestimate how harsh that light is.
Common Pests That Cause Curling
Pests are less common but still a cause. I've dealt with two main culprits:
Mealybugs
These look like tiny cotton balls. They cluster in the leaf joints. They suck sap, which causes leaf distortion and curling. If you see them, dab them with a cotton swab dipped in alcohol. Repeat daily for a week. I also isolate the plant immediately. They spread fast.
Spider Mites
These are even tinier. They make fine webbing between the leaves. Leaves get a stippled, mottled look and then curl. They thrive in dry conditions. I wipe down the leaves with a damp cloth. Then I spray with an insecticidal soap. You might need to do this several times.
Fungus Gnats
They don't directly cause leaf curl, but their larvae eat roots. Damaged roots mean less water uptake. This causes leaf curl. These pests show up when the soil is too wet. Fix your watering schedule and they go away. Sticky traps on top of the soil work wonders for adults.
How to Save an Already-Curled Succulent
If you're reading this because your plant is already curling, here's my rescue plan. It takes patience, but it works.
Step 1: Remove from Pot
Gently slide the plant out. Check the roots immediately. You need to see what's happening underground.
Step 2: Inspect and Cut Rot
Clean your scissors with alcohol. Cut away any dark, mushy roots. Be ruthless. If the stem is mushy about the soil line, cut above the rot until you see healthy white flesh. This sounds scary, but it's necessary. Place the cutting somewhere dry.
Step 3: Dry and Callus
Let the cutting sit on a dry paper towel for 3-5 days. A callus will form on the cut to seal the plant off from infections. This step is crucial. If you skip it, the plant will rot again. I like to let it go longer if I'm not sure.
Step 4: Repot in Fresh Mix
Plant into dry, fresh succulent mix. Don't water for a week. The new roots need to push out and seek moisture. Watering too soon will cause rot again. After a week, when you see new growth, water lightly.
FAQ: Your Leaf Curling Questions Answered
Q1: Should I uncurl the leaves manually?
No. Don't ever force leaves flat. It will damage the plant tissue. The leaves that are curled will either recover on their own or be absorbed by the plant as energy and fall off. Focus on new growth. When new leaves come out flat, you've fixed the problem.
Q2: How long does it take for a succulent to recover from leaf curling?
It depends on the original cause. If it's from underwatering, you'll see improvement within a few days. If it's from root rot, it can take much longer. New growth should look correct within 2-4 weeks. Be patient. I've seen a plant take months to fully bounce back.
Q3: Can I use a moisture meter to avoid overwatering?
Yes. Moisture meters are helpful. They show moisture levels at the bottom of the pot. Succulents need a reading of 1 or 2 out of 10 before they get watered. Overwatering is preventable with a $10 meter. I think they're great, especially for beginners. It takes the guesswork out.
The Role of Temperature and Humidity
I almost forgot this part. Temperature stress is a silent leaf-curler. If your home dips below 50°F (10°C), succulents can suffer. Leaves curl, and the plant goes into survival mode. I keep mine in a warm room during the cold months. I also never put them right next to a window draft.
High humidity makes soil dry out slower. If you live in a humid area, you'll need to water less often. I live in a dry climate, so I water about every 7-10 days. If you're on the coast, you might only need water every 14 days. Always check the soil.
My Final Thoughts
Preventing leaf curling on succulents really comes down to a simple checklist: avoid overwatering, give them the right light, and use the right pot and soil. Get these basics right, and you won't struggle. I’ve wasted too many plants on trial and error. I try things now, but I always come back to these basics. The RHS advises starting there, and honestly, they're right.
The two-week routine I've shared is exactly what I do. It works. Here's the bottom line: your succulent wants to grow. It wants to be healthy. You just have to get out of its way. Stop overwatering. Give it sun. Let the roots breathe. Then leaf curling becomes something you read about but never experience.
If you're dealing with curled leaves right now, start with the mistake list. Figure out which one you're making. Fix that first. Everything after that is easier. I promise, a flat-leaved, happy succulent is the most rewarding thing to look at. It's worth the effort.