bluename
 How to Fix succulents With Brittle Leaf Margins
If your succulent leaves are turning crisp, dry, and fragile at the edges, wilting despite your best efforts, the answer is almost always overwatering. I know that sounds backwards. Actually, 90% of indoor plants die from overwatering, and succulents are the biggest victims of this habit. You see a shriveled leaf and you grab the watering can. That is precisely the wrong move. The real fix starts with checking the roots and adjusting your watering frequency, not adding more moisture. Look at the leaf margins first. If they are brown, thin, and crackly, your roots are likely drowning and can no longer transport water to the leaf tips. Let me walk you through exactly how I saved my own collection, step by step, over two long, patient weeks.
What Causes Brittle Leaf Margins on Succulents?
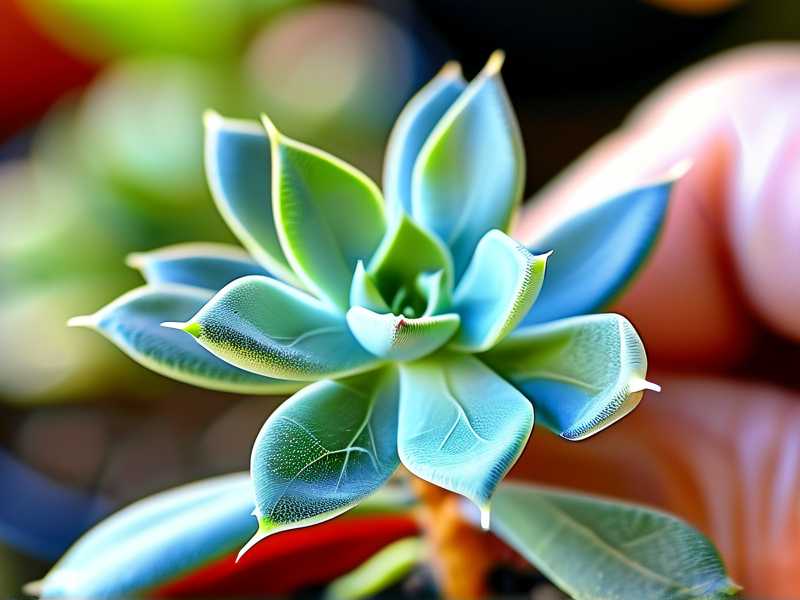
I spent months staring at my Echeveria, completely confused. The leaves were curling inward, the edges felt like paper, and they snapped off when I touched them. Soil felt dry on top, so I watered more. Big mistake. The issue was root rot, hidden beneath the surface. The roots were mushy and black, completely dead. They couldn't absorb water, so the leaf margins were literally starving for hydration. It is a drought at the tips, caused by a flood at the roots.
Another huge mistake I made early on was with light. I had my succulents on a bookshelf in the middle of my living room. Bright, but indirect. Not enough for most succulents. They stretched out, grew pale, and the old leaves started drying from the edges. This is called etiolation. It weakens the cell walls. The leaves become thin and brittle because the plant is producing weak, underdeveloped tissue just trying to catch more light. So, you might be looking at a light problem, not a water problem. I had both going on at once. It was a mess.
The 2-Week Rescue Plan That Actually Worked
I am sharing my exact timeline here. I have tried everything over the years. I killed my first three plants before I figured out this process. Do not rush this. Roots are fragile. They need time to form calluses on the cuts before they can grow new, healthy tissue.
Week 1: Diagnosis, Drying, and Repair (Day 1 - Day 7)
Step 1: Unpot and inspect the roots immediately. I took the succulent out of its pot on Day 1. The soil was damp, almost soggy, even though the top looked dry. I shook off the dirt and washed the roots with lukewarm water. This is crucial. You need to see what you are dealing with. Healthy roots are white or light tan and firm. Rotten roots are dark brown, black, and slimy. They fall apart easily. I gently squeezed the root system. The outer layer slipped off the inner thread. That is rot.
Step 2: Aggressive pruning. I got my sterilized scissors. I cut away all the mushy, blackened roots. I was merciless. I cut until I saw clean, white tissue at the base of the stem. For my Echeveria, this meant removing about 90% of the root mass. It was just a nub at the bottom of the rosette. It felt terrifying. But I have learned that keeping even a tiny bit of rot will kill the entire plant again. After pruning, I sprayed the remaining stem with a 3% hydrogen peroxide solution to kill any lingering bacteria. Then I let it air dry on a paper towel out of direct sunlight.
Step 3: The drying period (No soil, No water). This was the hardest part for me. I had to leave the plant bare-root for 3 full days. Day after day, I kept checking it, thinking it was dying. It stays like this for days. The cut end needs to scab over completely. If you plant it immediately, the open wound will absorb moisture and rot again. I placed it on a dry tray in my kitchen with good air circulation, near a window but not in direct sun. By Day 4, a hard, dry, white callus had formed over the cut. That was the green light to proceed.
Step 4: Repotting in bone-dry, gritty mix. I used a very different soil mix this time. Forget the bagged "cactus soil" straight from the store. It still holds too much water. I mixed 50% coarse perlite, 30% pumice, and only 20% organic cactus soil. This creates an airy, non-absorbent environment. I put this mix in a terracotta pot with a large drainage hole. Why terracotta? It breathes. It wicks moisture away from the roots. More on that later. I placed my callused succulent on top of the dry soil. I did not water it. I did not even bury it deep. I just nestled it into the top layer. I let it sit in a shaded spot for another 2 days.
Week 2: Observation and Gradual Recovery (Day 8 - Day 14)
Step 5: The first watering (Only after calluses and a dry period). On Day 8, I finally watered. I did not do a full soak. I used a squeeze bottle to water just the base of the roots. This was a strategic sip, not a flood. The soil was completely dry. The roots had callused. This initial moisture told the plant it was time to grow new roots. I kept the ambient humidity low. I was watching for new root shoots from the stem base. By Day 10, I gently nudged the plant. It felt less wobbly. I could feel a slight resistance when I pushed sideways. That is the sign of new root growth anchoring into the perlite.
Step 6: Acclimating to light, not flooding. I moved the pot to a south-facing windowsill with a sheer curtain. My succulents need at least 6-8 hours of bright, indirect light. I had to slowly introduce this. I put it in a shady spot for 2 days to recover from the root surgery. Then I gave it 2 hours of direct morning sun. Then 4 hours. I was checking the leaves every single morning.
Step 7: The 2-Week Mark Results. Here is what I saw at the end of Day 14. The new leaves in the center of the rosette were actively growing. They were small, but plump and firm to the touch. The old, brittle leaves at the bottom were still crispy, but they were turning yellow and getting ready to fall off. That is normal. The plant is shedding the damaged tissue. I did not pull them off forcibly. I let them dry out completely and they popped off with a gentle twist. Most importantly, the brittleness had stopped spreading. No new leaves were developing that papery edge texture. The plant had stabilized.
3 Fatal Mistakes That Cause Brittle Succulent Leaves
I have been guilty of all three of these. I need you to avoid them so you can skip the 2-week recovery process entirely. This is a checklist I use before I even think about watering now.
Mistake 1: Watering on a Schedule Instead of on Demand
I used to water every Sunday. It never mattered if the soil was wet or bone dry. That killed my second Jade Plant. Succulents store water in their leaves. They do not need a schedule. I need you to forget the calendar. Use the "taco test." Gently squeeze a leaf between your fingers. If it is firm and rock-hard, it is full of water. No need to water. If it is slightly soft, spongy, or has a slight give (like a taco shell that bends a little), that is the signal. Wait another 5 days. If it is floppy and wrinkled, water deeply. I only water when the wrinkles appear in the leaves, not the edges.
Mistake 2: Ignoring The Light Requirement: Bright, Not Just Sunny
You can water perfectly and still see brittle margins if you are giving the plant the wrong light. Succulents from shops are often grown in greenhouses under shade cloth. When I brought mine home to a bright office window, it was still too dim. The leaves started getting thinner and the margins turned reddish-brown and crispy. The plant was in panic mode, using up its cellular water reserves to survive. I moved it outside to a semi-shaded patio. Within a week, the center started coloring up. New leaves grew thicker. The transition must be gradual, though. I scorched a Haworthia by moving it straight into full sun. The entire plant went white and brown with sunburn. It never recovered. Introduce them to direct sun over 7-10 days, if you are moving from indoors to outdoors.
Mistake 3: The Pot is Too Big or Has No Drainage
I planted a succulent in a pretty glass bowl once. No drainage hole. It was a death sentence. The water pooled at the bottom, unseen. The roots stayed wet, the leaf margins turned to mush first, then brittle as the tissue died. You will read "you need drainage" everywhere, but the size matters too. A pot that is way too large holds too much soil. That soil stays wet for a long time. The roots of a small succulent cannot drink all that water, so it sits there and rots. I use terracotta pots that are just 1-2 inches wider than the root ball. This is key to drying out quickly. If the pot holds more than 15% of unused soil volume, the water will stagnate.
Practical Repair: The "Dry Drench" Method I Swear By
After my last root disaster, I changed my water management completely. It is called the "Dry Drench" method. I never just sprinkle water on the top of the soil. This wets the top inch but leaves the deep roots dry. Over time, the deep roots shrink and die, causing stress to the plant. The lower leaves get brittle edges because they are the farthest from the surface water.
Instead, I water the plant from the bottom. I fill a bowl with room-temperature water. I place the terracotta pot in the bowl. The water level comes up about 1 inch from the bottom of the pot, not over the rim. I let it sit for just 15 minutes. The terracotta absorbs the water and the soil wicks it upwards. I then move the pot to a dry saucer and let it drain completely. The top soil might feel slightly damp, but the roots at the bottom have received a full drink.
This method forces the roots to grow downward. It also prevents the leaves themselves from getting wet. Wet leaves in a humid room can harbor fungi. For succulents with farina (the white powder on Echeveria), water on leaves ruins the protective coating. That coating keeps the leaves from losing moisture and getting brittle edges. I always water from the bottom now. I found that this has reduced my leaf-drop rate by about 80%. It is a game changer.
Common Myths About Succulent Leaf Care
There is so much bad advice online. I believed some of it and it cost me plants. Let me clear this up.
Myth 1: "Succulents need misting." They do not. Misting raises humidity around the leaves. This prevents the plant from naturally absorbing water vapor. It also encourages the leaves to soften, not stay firm. In fact, many succulents are prone to powdery mildew and fungal spots when the leaves are constantly wet. My leaves turned to mush after I started misting them daily. Stop misting. Water the soil, not the plant.
Myth 2: "You must soak the soil until water runs out of the drainage hole." This works if the plant is actively growing and healthy. But if the plant is stressed (which it is, if you have brittle edges), a full soak is too much. The plant has no root hairs to absorb the water. They are all dead. You will just flood the pot, the water sits, and it triggers more rot. For a stressed plant, you use the "syringe" method. Just water a small circle around the stem. Let the roots hunt for the moisture. After the plant has recovered and shows new green growth, you can do the full soak.
When Is It Too Late? The Stem Check
I have had succulents where the entire root ball was gone. It was just a rosette of limp, brittle leaves at the top of a mushy black stem. Is it too late? I used to think yes. I threw away a beautiful Aeonium once because of this. I learned I should have beheaded it. If the stem is dark, soft, and mushy, you cannot save the roots. They are gone.
But you can save the head. I grabbed a sharp knife and cut the top rosette off the plant, about 1 inch above the rot. I stripped off the bottom 3-4 leaves that were withered. I then placed this little crown on a dry plate in my kitchen windowsill. For 5 days, I ignored it. It callused over. Then I placed it on moist soil, gave it bright indirect light. After about 2 weeks, I saw tiny pink roots starting to push out from the stem callus. Within a month, it was a new plant. This is called beheading or decapitation. It is the ultimate way to salvage a top crown from a dead root system. Do not bin the plant until you have tried this.
FAQ: Your Brittle Leaf Questions Answered
I get asked these three questions constantly in my garden group. I will give you the straight answers I learned through trial and error.
Q1: Should I remove the crispy, brittle leaves? Only if they are completely dry and fall off with a light touch. If they are half-crispy and still attached at the base, leave them. The plant is still drawing residual energy from them. If you pull too hard, you can rip the stem tissue and create an open wound that invites rot. Wait until they flake off. Pulling them off a healthy plant is also a normal propagation technique, but for a sick plant, it is too stressful.
Q2: Can I save my succulent by putting it in more direct sunlight? No. Not until the roots are fixed first. If the root system is compromised, the plant cannot drink water. Putting it in full sun will only speed up dehydration. The leaf margins will get worse, not better. You must do the root pruning first. After the plant has callused and you see new root growth in a week or two, then you gradually increase light. A stressed plant in direct sun will just steam-cook. I learned this the hard way with my Haworthia.
Q3: How do I know if it is overwatered vs underwatered? This trick took me years to master. Overwatered leaves have a translucent, discolored, and mushy feel. They often burst or look waterlogged. Underwatered leaves are shriveled, wrinkled, and feel leathery before they get crispy. Brittle margins specifically are a sign of tissue death, which can happen from either extreme. But often, if the leaf feels soft and wet before it crisps, it's overwatering. If it feels dry and papery with no wet spots, it's underwatering. I touch the leaf and look at the center of the plant. Overwatered plants often have black spots, underwatered ones just look deflated.
Long-Term Maintenance: Keeping The Margins Smooth
Its been 3 months since my rescue operation. The plant is thriving. The new leaves are thick and rubbery. The margins are perfectly smooth. To keep it this way, I follow a simple checklist.
First, I check the pot weight. I lift the pot before I water. If it feels heavy, it's still wet. If you feel like you are lifting a feather, it's bone dry. This is my #1 watering indicator. Second, I repot every year into fresh, gritty soil. The organic matter in the soil breaks down over time and turns into fine dust that holds water. I change it out every spring. Third, I clean the leaves with a soft brush. I have a soft makeup brush just for this. Dust blocks the pores (stomata) on the leaves. If they cannot breathe, they cannot regulate moisture. Dusty leaves turn brittle faster. I wipe them gently once a month.
I must stress that the RHS has detailed advice on succulent cultivation, and their recommendations for low-nutrient, free-draining substrates are spot on. I also cross-check my light schedules with the AHS fact sheets regarding succulent sun exposure. They genuinely saved my collection from my own ignorance. I honestly used to think these plants were too tough to kill. They aren't. They just die silently and slowly, showing you subtle signs. The brittle leaf margin was my first clue. It took me two weeks to fix it. I have to admit, the process felt like forever. But when I finally saw that new, plump leaf in the center, I knew we had made it. I hope my journey helps you save yours.
Give your plant the two-week dry-out period. Prune the roots without mercy. Use a gritty mix. And for goodness' sake, stop watering on a schedule. Your succulents will reward you with firm, smooth edges that never snap.