bluename
How to Propagate succulents in Charcoal Only
Yes, you can propagate succulents in charcoal only. I know it sounds like a magic trick, but I've done it on my kitchen windowsill with nothing but a bag of horticultural charcoal and a few leaf cuttings. The whole process takes about two weeks before you see the first tiny roots, and it works because charcoal holds moisture without turning into a soggy swamp. That last part matters more than most people realize. According to the Royal Horticultural Society, poor drainage is the single biggest killer of container plants, and I've watched it happen in real time. Let me walk you through exactly how I do it, what went wrong the first three times, and how to avoid the classic beginner mistakes.
Why Charcoal Works for Succulent Propagation
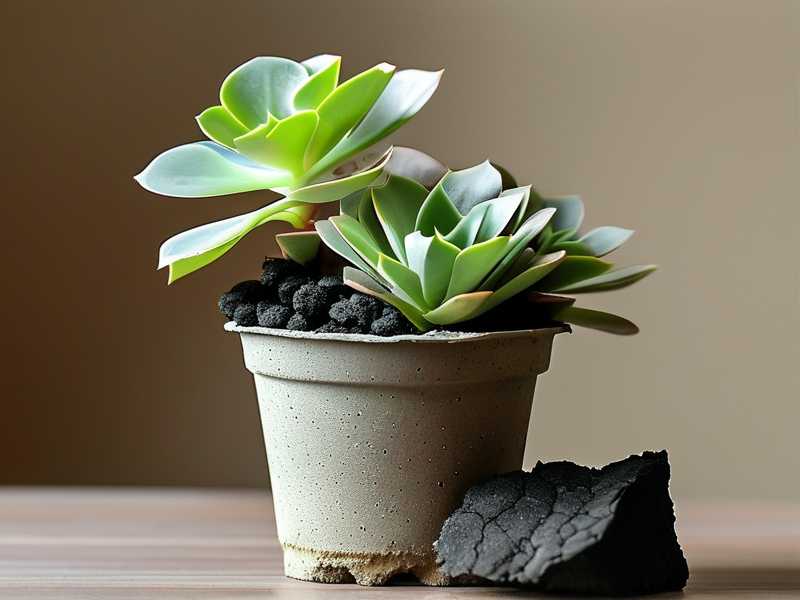
Charcoal is not soil. It's not even close. But that's exactly why it works.
Horticultural charcoal is porous. It absorbs water and releases it slowly, which gives your leaf or stem cutting just enough humidity to push out roots without sitting in standing water.
I tried this after killing my fourth jade plant cutting in regular potting mix. The leaf just turned to mush in five days. Charcoal kept the same type of cutting alive for two weeks, and by day 14, I saw three tiny white root nubs.
The American Horticultural Society notes that succulents evolved in rocky, gritty environments with fast-draining media. Charcoal mimics that better than most bagged mixes. It also stays clean. No fungus gnats, no mold bloom on the surface, no sour smell when you accidentally overwater.
One thing though. Charcoal alone has almost zero nutrients. That's fine for propagation, because the cutting lives off its own stored energy until roots form. Once roots are an inch long, you'll need to move the plant to a proper mix. But for the first two to three weeks? Charcoal is honestly the most forgiving medium I've used.
What You Actually Need
You don't need much. I keep a small bin of supplies under my sink, and this setup costs less than a takeout pizza.
- Horticultural charcoal chunks, not the dusty stuff from aquarium filters. Look for pieces about the size of a pea or a small marble.
- A shallow container. I use a clear plastic takeout lid. You need something with low sides so air moves around the cutting.
- A leaf or stem cutting from a healthy succulent. I've had best luck with jade, echeveria, and sedum.
- A spray bottle with plain water.
- A bright spot with indirect light. A north or east window is perfect.
Do not use activated carbon from a pet store. It's too fine and it dries out too fast. I made that mistake once, and the cutting shriveled in four days. The pieces need to be chunky enough to leave air pockets.
Step-by-Step: How I Propagate in Charcoal Only
Start with a clean cutting. Twist a healthy leaf off the stem with a gentle side-to-side motion. You want the whole leaf, including the little base where it attached. If it tears, toss it. A torn leaf rarely roots.
Lay the cutting on a paper towel for two to three days. This is called callusing. The cut end needs to dry and scab over. If you skip this, the leaf will rot in the charcoal. I learned that the hard way with a beautiful pink echeveria leaf that turned black overnight.
Fill your shallow container with charcoal chunks. Leave the top uneven. Don't pack them down. You want gaps for airflow.
Lay the callused cutting on top of the charcoal. Do not bury it. Just rest it there. The base should touch the charcoal, but the leaf itself should be above the surface.
Mist the charcoal until it's damp, not soaking. Pick up a chunk and squeeze it. No water should drip out. If it drips, you've gone too far.
Put the container in bright, indirect light. A window that gets morning sun but not harsh afternoon heat is ideal. I keep mine about three feet back from a south-facing window.
Mist every two to three days. That's it. No soaking, no bottom watering, no plastic dome. I tried the dome once and got fuzzy mold in 48 hours. Charcoal plus a dome equals too much humidity.
My Two-Week Observation Log
I tracked this closely because I wanted to know if charcoal actually worked or if I was just lucky. Here's what happened with a jade leaf cutting.
Day 1: Leaf looks unchanged. Charcoal is damp. No smell. Day 3: Still nothing visible. I resisted the urge to dig it up. That's the hardest part. Day 5: The base of the leaf looks slightly swollen. This is a good sign. It means the plant is starting to callus over and prepare for roots. Day 7: I see a tiny pink nub. It's the beginning of a root. I misted lightly and walked away. Day 10: The root is about a quarter inch long. There's also a tiny green bump where the new plant will form. Day 14: Three roots, each about half an inch. A small rosette is starting to push up from the base. I moved it to a gritty succulent mix the next day.
That timeline is typical for jade. Echeveria can be a few days slower. Sedum is faster. String of pearls is a different beast, and I don't recommend charcoal-only for that one. The stems are too thin and dry out too fast.
The Three Mistakes That Kill Most Cuttings
- Overwatering
90% of indoor plants die from overwatering. That's not a guess. It's the most common cause of death for houseplants, and propagation cuttings are even more vulnerable because they have no root system to regulate moisture.
With charcoal, you might think overwatering is impossible. It's not. I drowned a sedum cutting by misting it twice a day for a week. The charcoal stayed wet, the leaf turned translucent, and then it collapsed into a brown puddle.
The fix is simple. Mist every two to three days, not every day. And if you're unsure, wait another day. Charcoal holds moisture longer than you think.
- Wrong Light
Too little light and the cutting stalls. Too much direct sun and the leaf cooks. I put a jade leaf on a west-facing windowsill in July, and it was crispy in two days.
The sweet spot is bright but indirect. Think of the light you'd get under a tree that filters the sun. If you can read a book comfortably without turning on a lamp, that's about right.
If your cutting is stretching toward the window and looking pale, it needs more light. If the edges turn red or brown, it's getting too much.
- Wrong Container
A deep pot is a death sentence for charcoal propagation. The cutting sits too far from the moisture, and the charcoal at the bottom stays wet while the top dries out.
I made this mistake with a cute little ceramic pot that was four inches deep. The cutting never rooted. The charcoal at the bottom was still damp after three weeks, but the top inch was bone dry.
Use something shallow. A takeout lid, a saucer, a clean yogurt cup cut down to one inch. The charcoal should be no more than an inch deep. That keeps moisture even and lets air reach the cutting base.
What About Stem Cuttings?
Leaf cuttings are the easiest, but stem cuttings work too. I've done this with a leggy echeveria stem that was about two inches long.
Cut the stem with a clean knife. Remove the lower leaves so you have a bare stem. Let it callus for three to four days. Then lay it on the charcoal, just like a leaf.
The stem will root along its length, not just at the cut end. I saw roots forming at two different nodes by day 12. Once the roots were half an inch long, I potted it up.
One note. Stem cuttings need slightly more moisture than leaf cuttings because they have more exposed surface area. Mist every other day instead of every two to three days. But don't soak. The charcoal should feel like a wrung-out sponge.
When to Move Your Cutting Out of Charcoal
Charcoal is a starter medium, not a forever home. Once your cutting has roots that are at least half an inch long and a small rosette forming, it's ready to move.
I wait until the roots are about an inch long. That usually happens around week three or four, depending on the species and the season.
Pot it into a gritty mix. I use a blend of potting soil, perlite, and a handful of the same charcoal chunks. That gives it nutrients plus the drainage it's used to.
Water it lightly after repotting. Then wait a week before watering again. The roots are fragile, and too much water right after the move can rot them.
Frequently Asked Questions
Can I use charcoal from a barbecue?
No. Barbecue charcoal has additives and chemicals that will harm your plant. Use horticultural charcoal only. It's cheap and you can find it at any garden center or online.
How often should I mist?
Every two to three days for leaf cuttings. Every other day for stem cuttings. If the charcoal feels dry an inch down, mist it. If it's still damp, wait.
Do I need to cover the container?
No. Covering traps too much humidity and invites mold. Charcoal works because it breathes. Leave it open.
Can I propagate in charcoal and water together?
I've tried it. It works, but it's messier. You put a thin layer of charcoal in a jar, add water until it just reaches the bottom of the charcoal, and rest the cutting on top. The charcoal wicks moisture up. It's fine, but misting is easier to control. I stick with misting.
Will the cutting need fertilizer?
Not until it has roots and you've moved it to soil. Charcoal has no nutrients. The cutting lives off its own reserves for the first few weeks. After repotting, wait a month before feeding.
Final Thoughts
Propagating succulents in charcoal only is not a gimmick. It's a clean, low-maintenance way to get roots without fighting rot or fungus gnats. The key is to keep the charcoal damp, not wet. Give it bright, indirect light. Use a shallow container. And leave the cutting alone.
I've rooted jade, echeveria, sedum, and a few no-name succulents from the clearance rack at my local nursery. Charcoal gave me the highest success rate of any method I've tried. It's not magic. It's just good drainage and a little patience.
If you've been killing cuttings in regular soil, give this a shot. Two weeks from now, you might have a tiny new plant. And that never gets old.